Configuration | Operation |
|---|
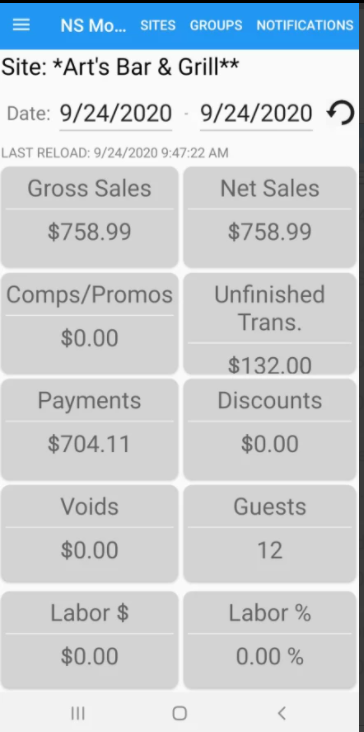
NorthStar Mobile ManagerNS Mobile Manager is NorthStar's real-time mobile reporting tool. With NS Mobile Manager, a user can receive and review information on their Android or iOS mobile device wherever they are. Documentation: NS Mobile Manager |
| |
Guest Identifier Speed Screen User can select guest identifiers from a pre-defined list To improve ordering speed and ease of use, the order taker can select from an account-defined list of guest identifiers to make quick guest identifier selections during the order-taking workflow. The availability of guest identifiers is controlled by area. Documentation: Guest Identifier Speed Screen ECM Setup: Guest Identifier Categories, Guest Identifiers (ECM) |
Configuration | Operation |
|---|
Pre-conditions Configuration - Create guest identifier categories (example: Vehicle Type)
- Add guest identifiers to each guest identifier category (example: sedan, convertible, SUV)
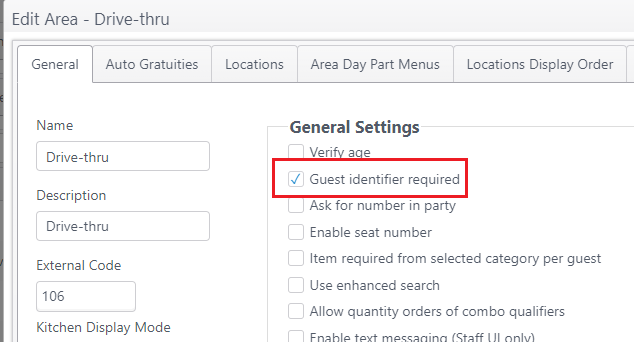
Optional: If the Area setting Guest identifier is required is selected, the guest identifier screen will automatically display in a pop-up when items are sent to the kitchen or when Payment is tapped. If this Area setting is not selected, the staff member will tap the guest identifier icon on the NorthStar Order Entry app to open the guest identifier screen.
 GUEST IDENTIFIER CATEGORIES Path: Categories > Guest Identifier Categories Guest identifier categories can be added, edited, searched and moved to change the display order. 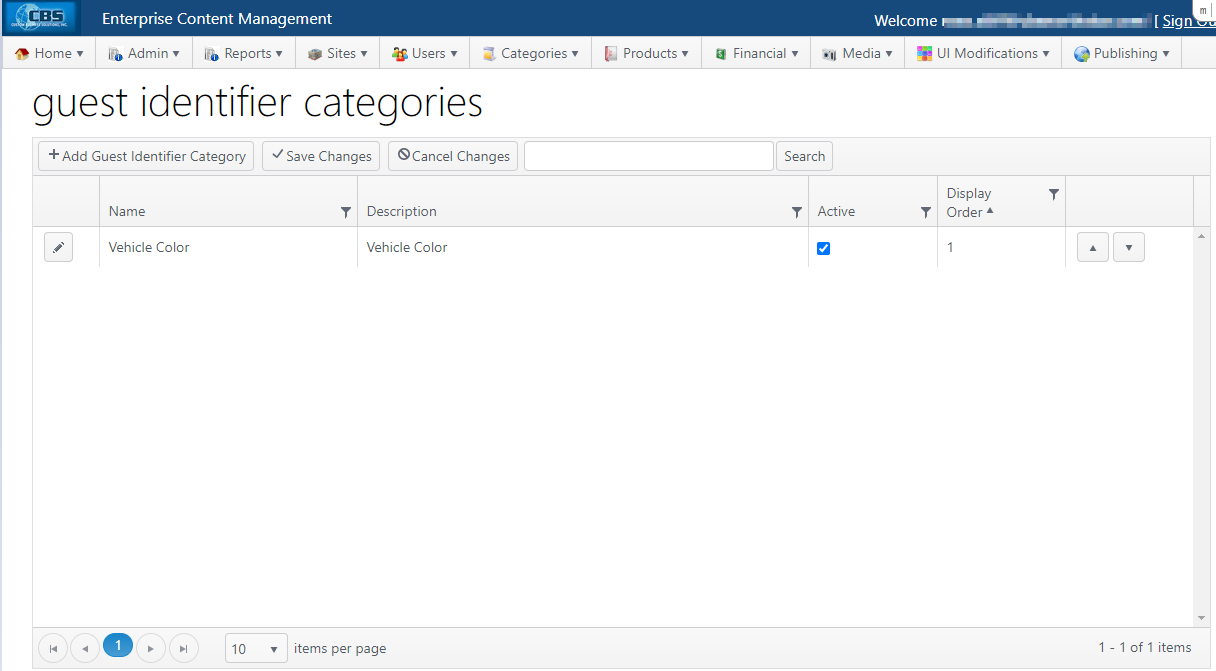
ADD GUEST IDENTIFIER CATEGORY - Click Add Guest Identifier Category
- Enter Name and Description and select Active to make this an active Guest Identifier Category.
- Click Save and Edit to edit the category and add guest identifiers to the category.
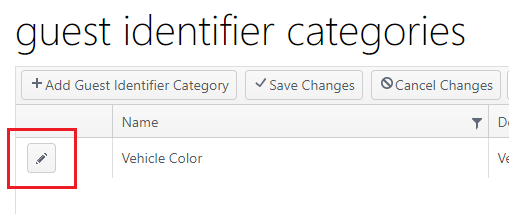
- Click the edit (pencil) icon to edit an existing guest identifier category
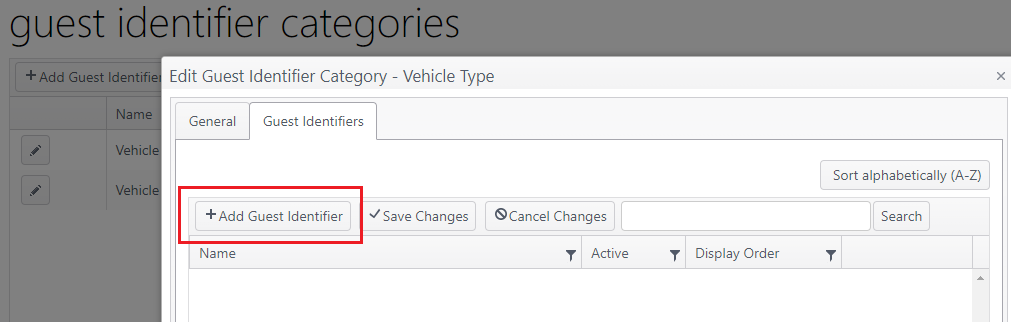
EDIT GUEST IDENTIFIER CATEGORY/ADD GUEST IDENTIFIERS - General tab: Edit name, description and Active setting
- Guest Identifiers tab:
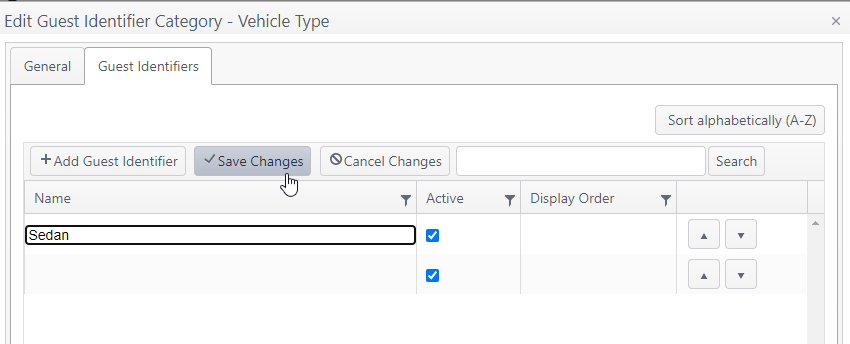
- Use up/down arrows to move selections up or down in list
- Click Sort alphabetically (A-Z) to sort the list in alphabetical order
- To add, click Add Guest Identifier
- Form field opens to add guest identifier; add text, select Active
- Click Save Changes at top and continue adding guest identifiers
- Click Save at bottom to return to Guest Identifier Categories
GUEST IDENTIFIERS Path: Categories > Guest Identifiers Guest identifiers can be added, edited, searched and moved to change the display order. 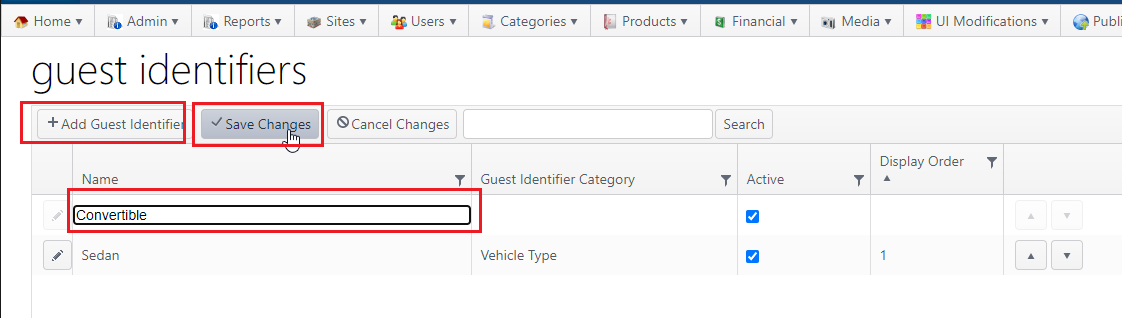
- Click Add Guest Identifier
- Form field opens to add guest identifier; add text, select Active
- Click Save Changes at top and continue adding guest identifiers
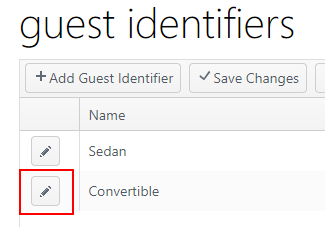
Edit Guest Identifier - Click the edit (pencil) icon to edit name, description and Active setting
Select Areas allowed to use guest identifier speed screens Path: Sites and Groups > edit a site > Areas - Add or edit an area and select Use guest identifier speed screens
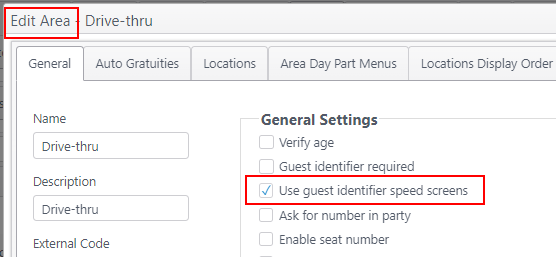
| Prompt guest identifier screen to open - The guest identifier screen is prompted to pop up when the guest identifier icon is tapped
 . .

- Optional: If the area setting Guest identifier is required is selected, the guest identifier screen will automatically pop up under the following conditions:
- Tap Send Now (either at bottom of check panel or on the flyout menu that appears when the icon is tapped next to the order item.
- Tap Payment.
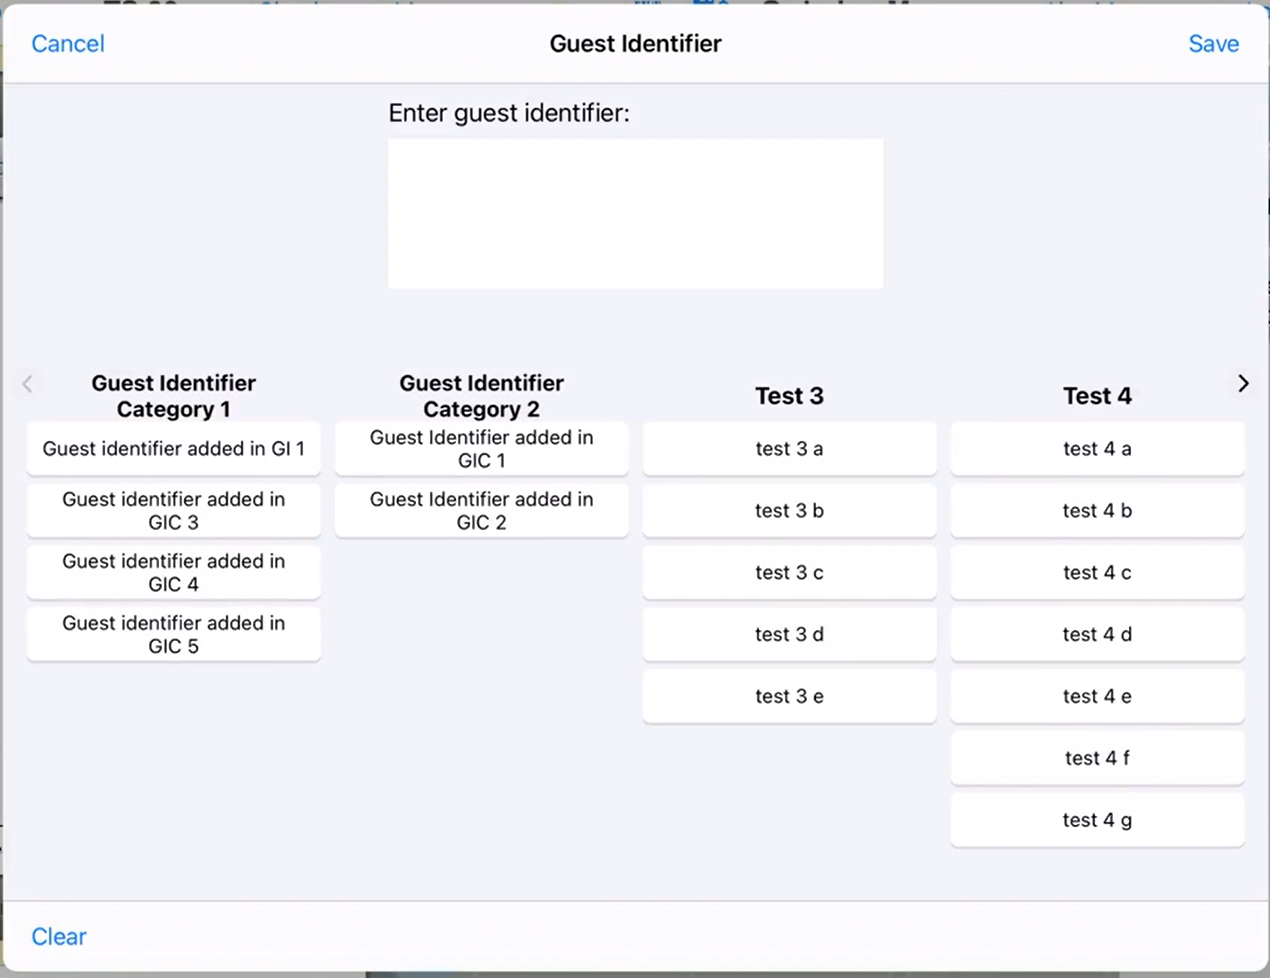
Select guest identifiers - The Guest Identifier page shows:
- Text field to enter information by typing
- Columns of pre-defined guest identifiers; tap to select. Selections will be shown in the guest identifier field above
- One item can be selected from each guest identifier category column
- Pagination arrows to page left or right when there are more than four guest identifier categories
- Cancel - cancel entries and close page
- Save - save entries and close page
- Clear - clear entries and remain on page
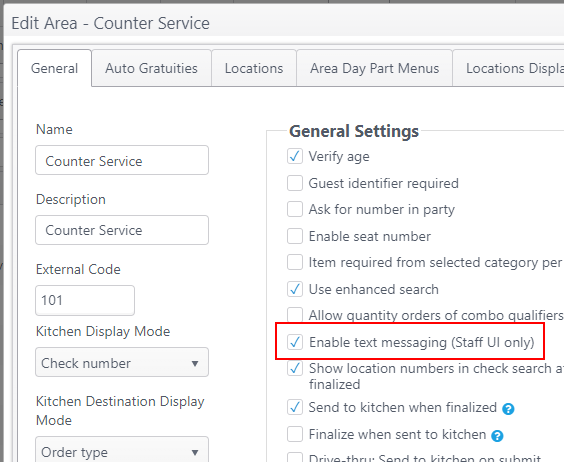
- Optional: If the Area setting Enable text messaging is selected in ECM, a mobile number can be entered on the guest identifier screen (existing functionality).
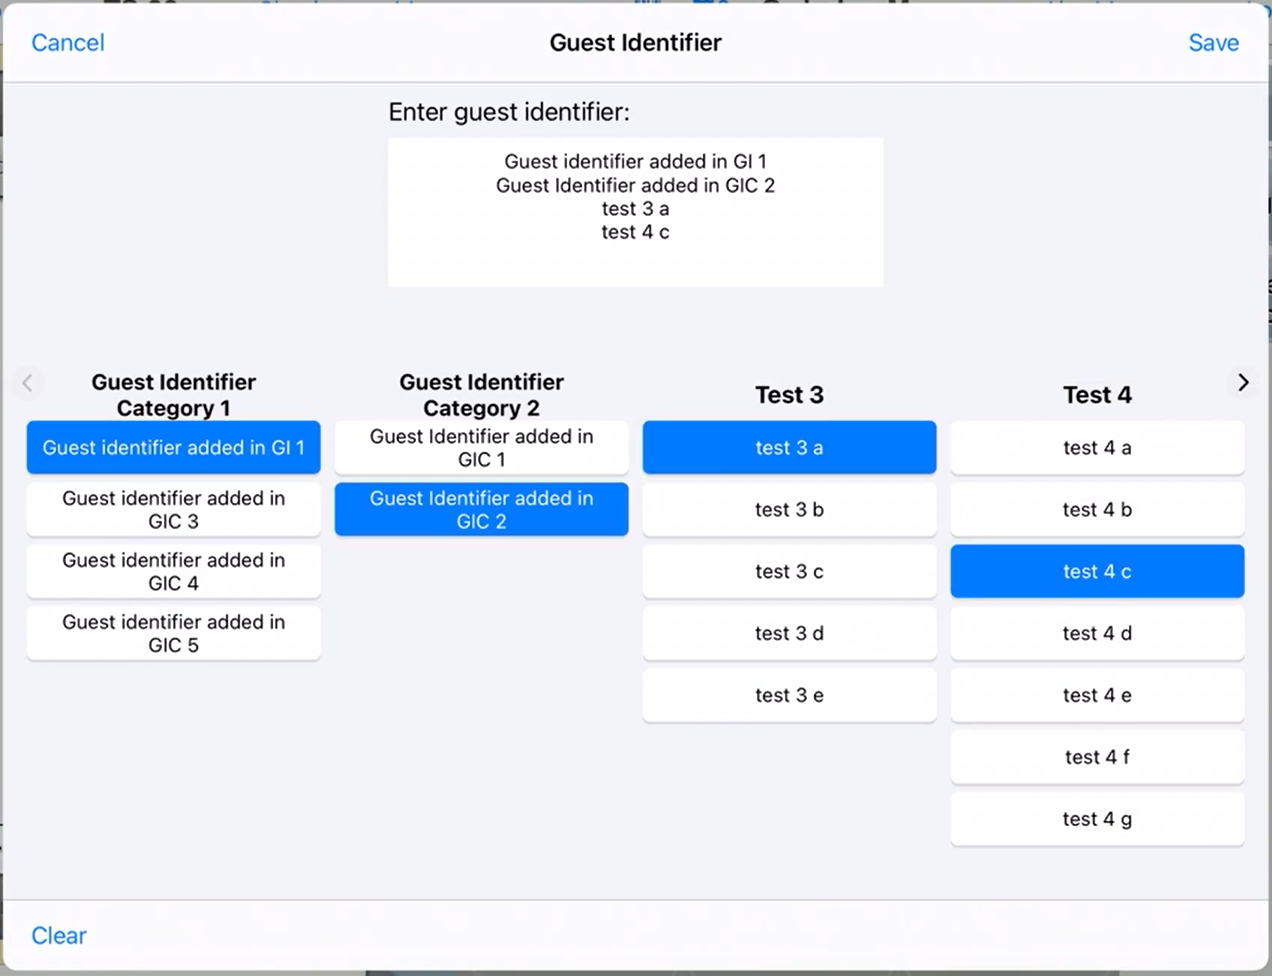
- Tap a guest identifier from each relevant category; selections will appear in the guest identifier text field above and will be highlighted as they are selected.
- Tap selected guest identifier to unselect.
- Tap another guest identifier in the guest identifier category to change the guest identifier before saving.
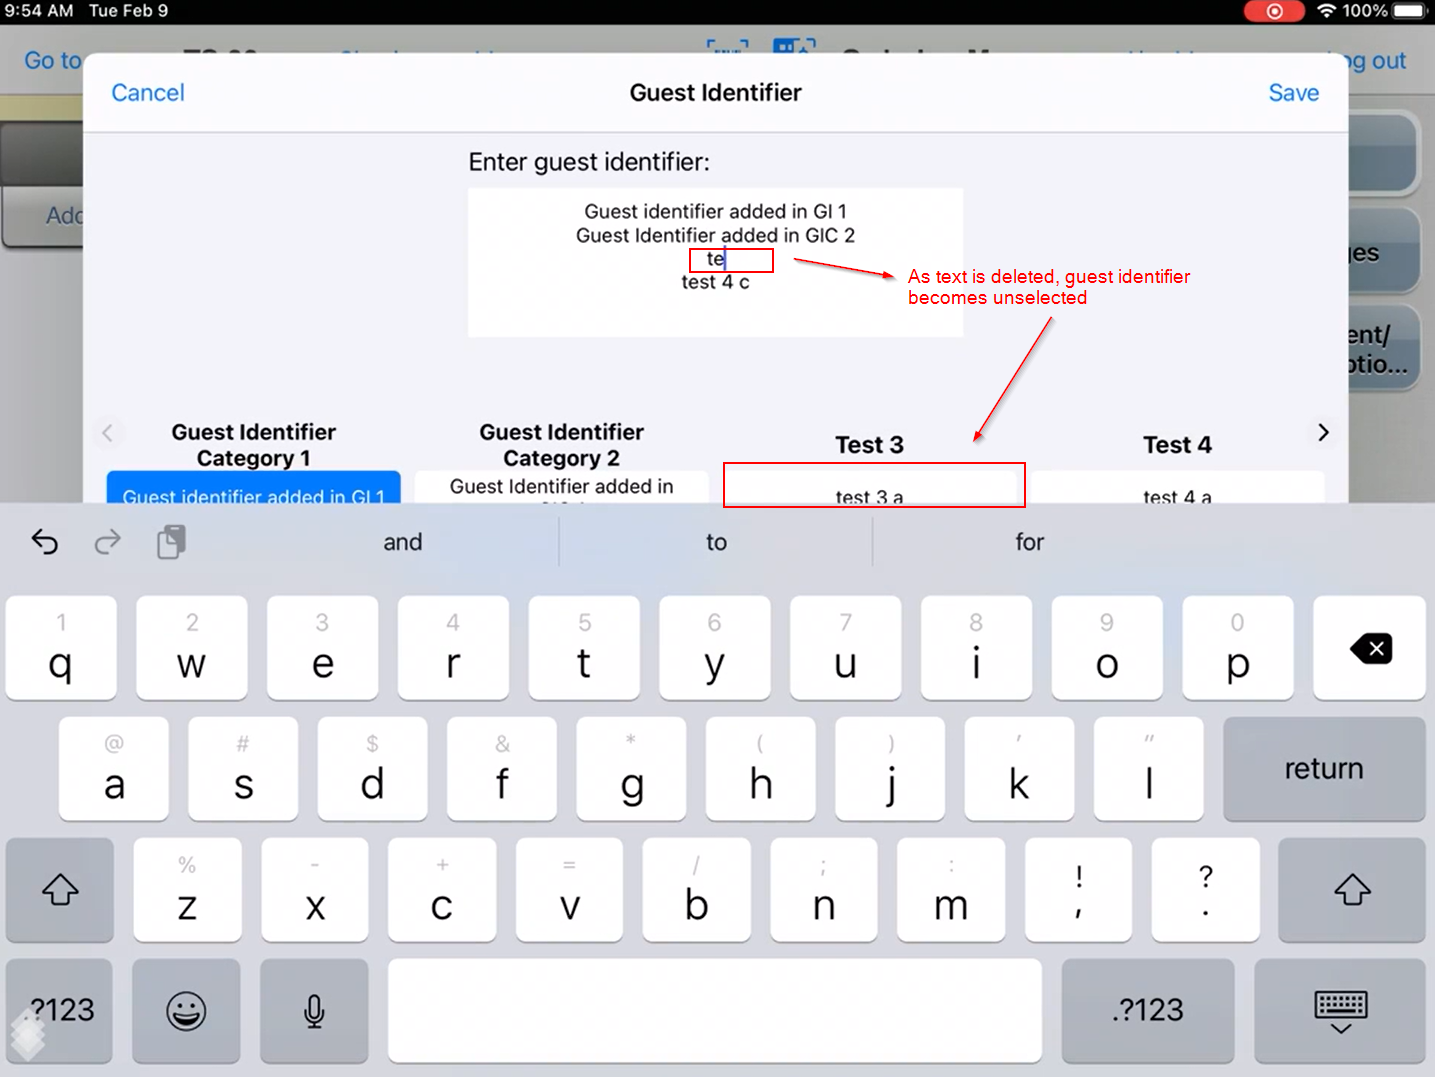
- Delete guest identifier - Use the keyboard to delete a guest identifier from the list. The selection in the category will no longer be selected.
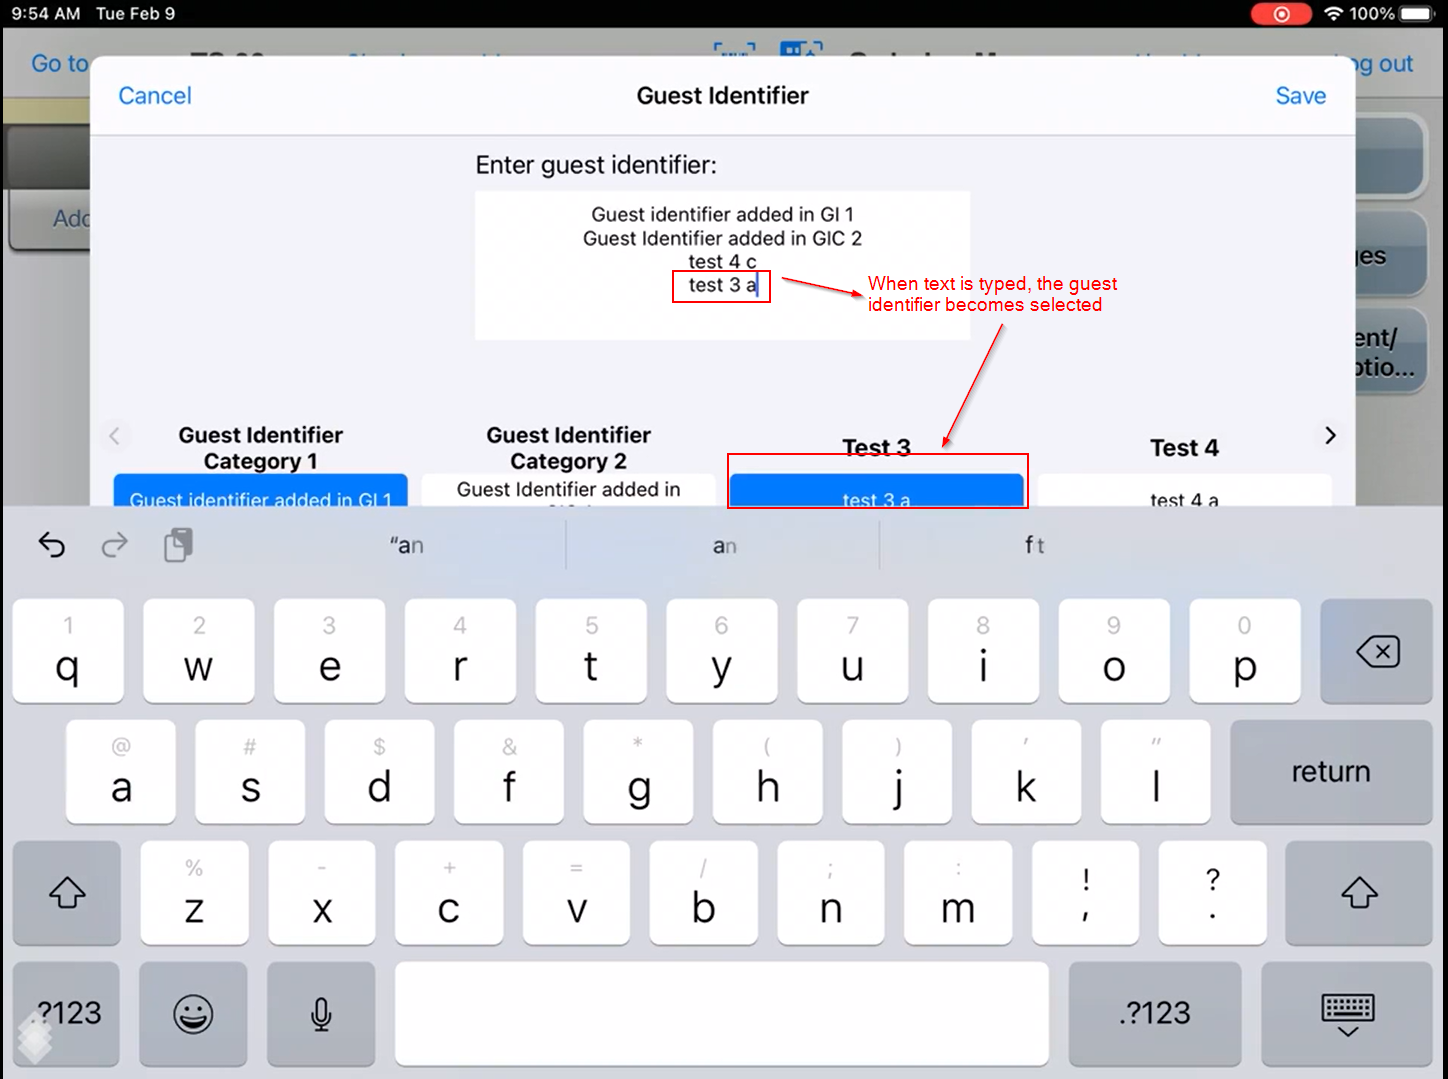
- A guest identifier can be typed into the field using the keyboard. The guest identifier will be highlighted if a matching item is found.
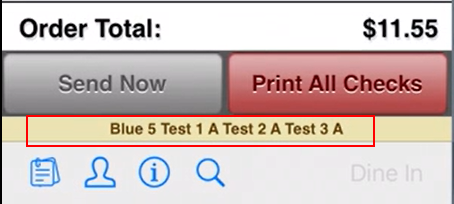
- The guest identifier(s) will be shown below the check panel.
|
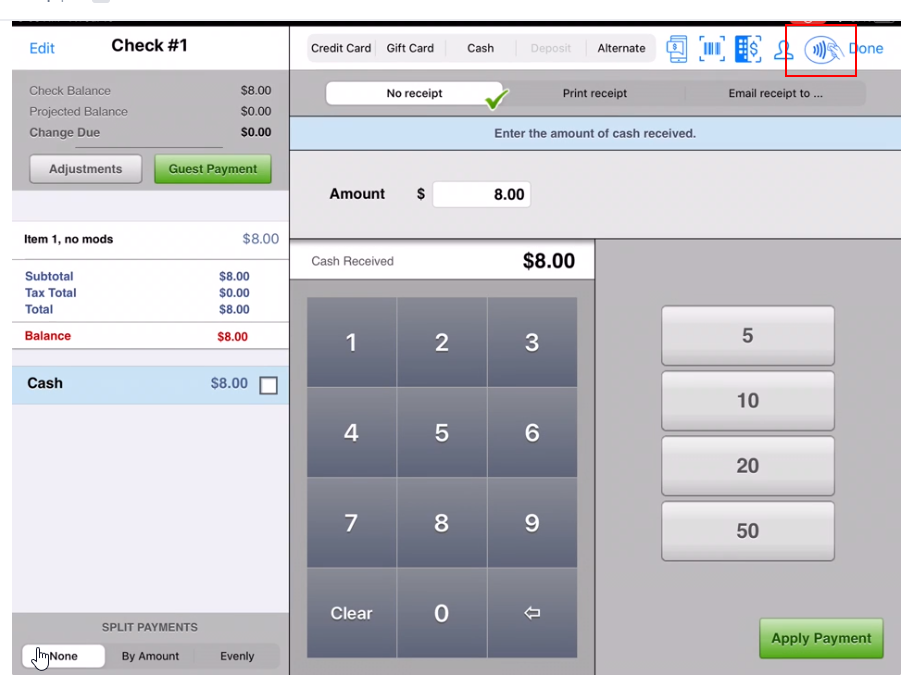
Counter Service: Guest Payment ImprovementsImprove access to guest payment view; allow CC/GC payment on specified devices - Two ways to access guest payment view from the staff payment screen and then return to staff payment:
- Flip the iPad over; screen switches to guest payment. Flip back over to return to staff payment.
- Tap Guest Payment; screen switches to guest payment.
Use 5-finger tap on screen to return to staff payment.
- Allows guests to pay using gift card or credit card using: eDynamo, iDynamo, iDynamo 6, or PAX S300. (PAX allows credit card only; no gift card.)
Documentation: Guest Payment - Counter Service |
The following payment devices can be configured and allowed for use in guest payment:
- eDynamo
- iDynamo
- iDynamo 6
- PAX S300
(Add payment devices by going to Peripherals tab on Sites configuration.) | Switch between staff payment view and guest payment viewStaff payment view 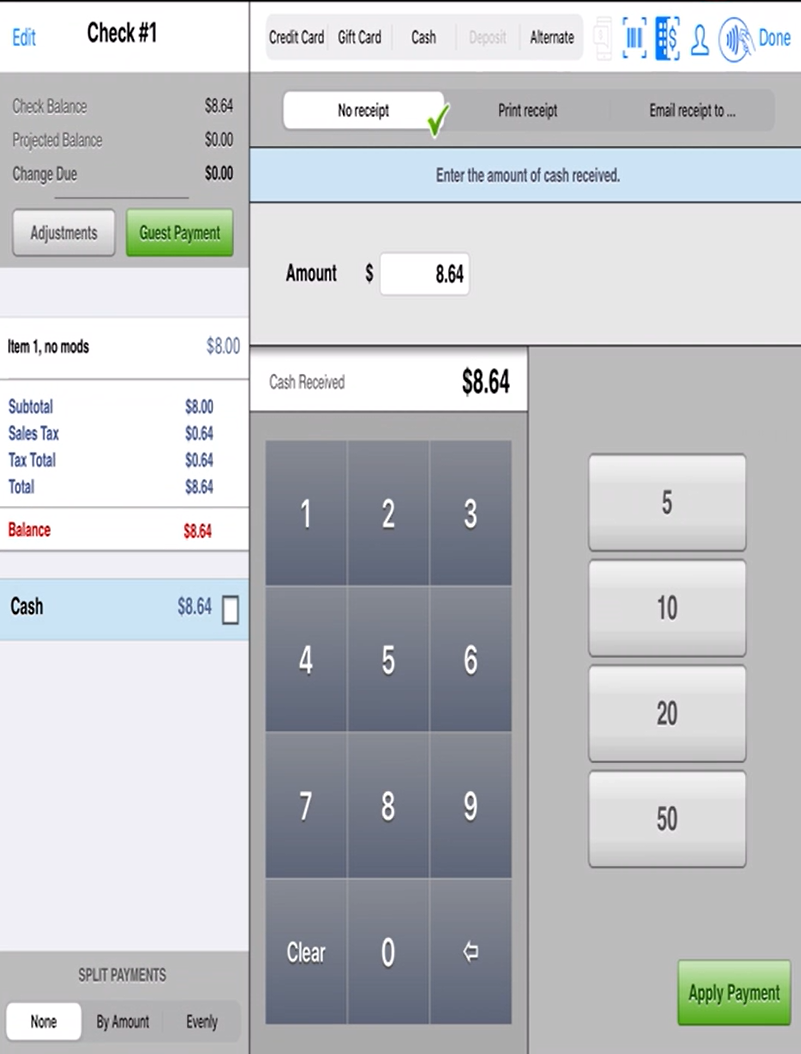
Flip iPadFlip iPad to over to face guest; iPad switches to guest payment view to allow guest to pay. (Images intentionally upside down.) 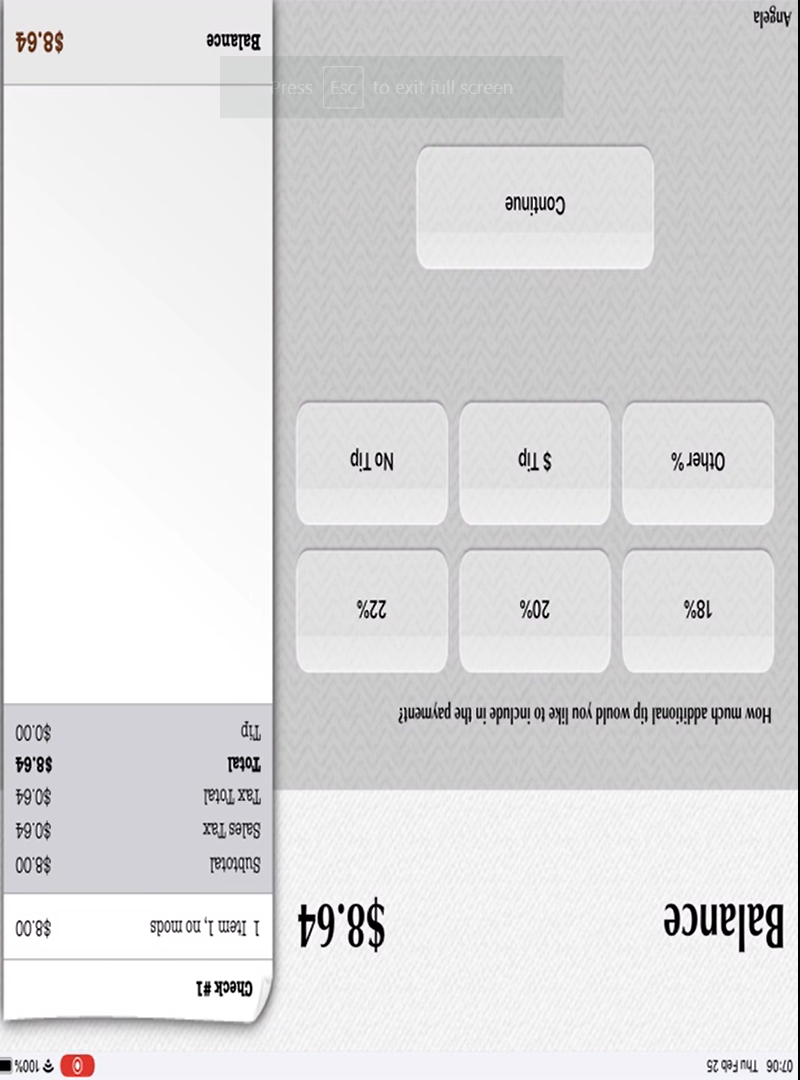
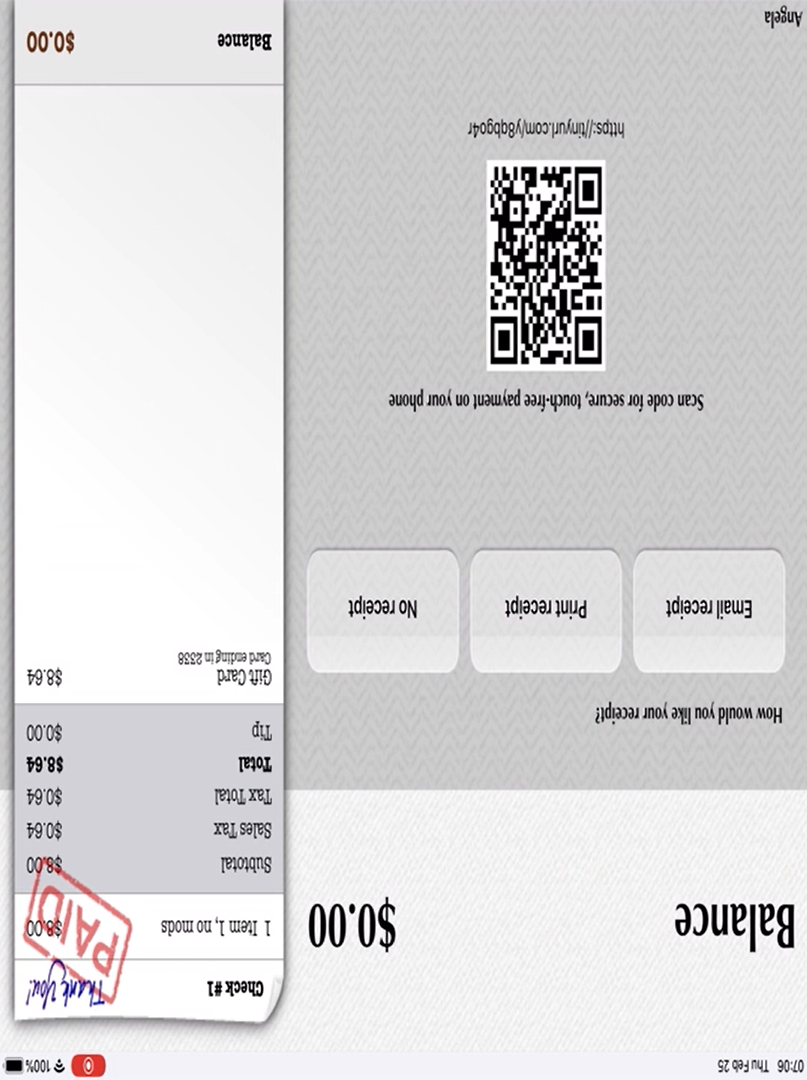
Message will notify guest after payment and allow guest to select receipt option. 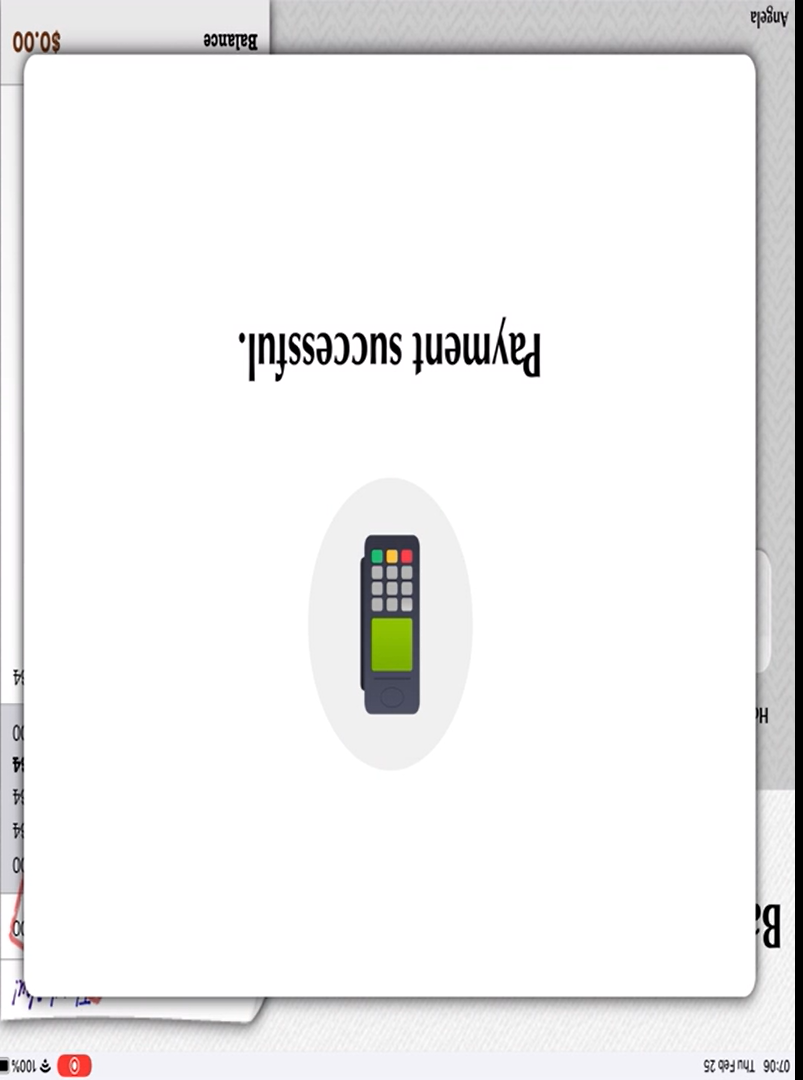
To return to staff payment, flip iPad back over. 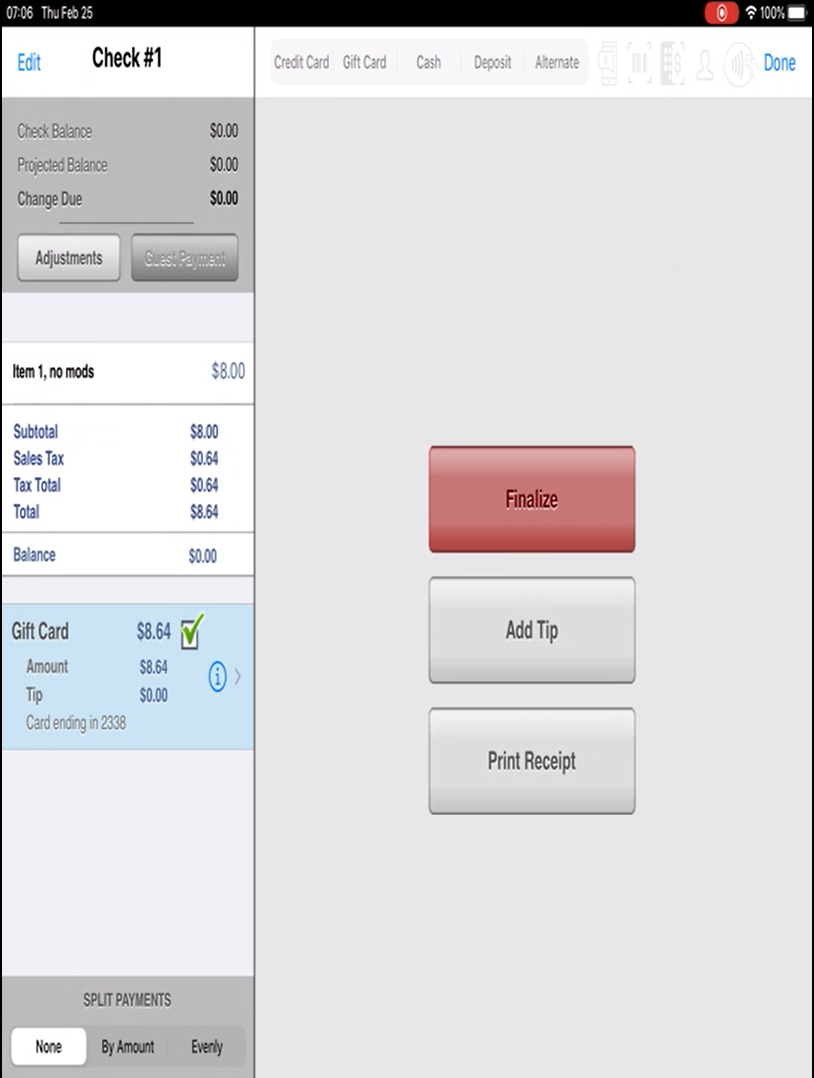
Tap Guest PaymentStaff payment view: tap green Guest Payment button. 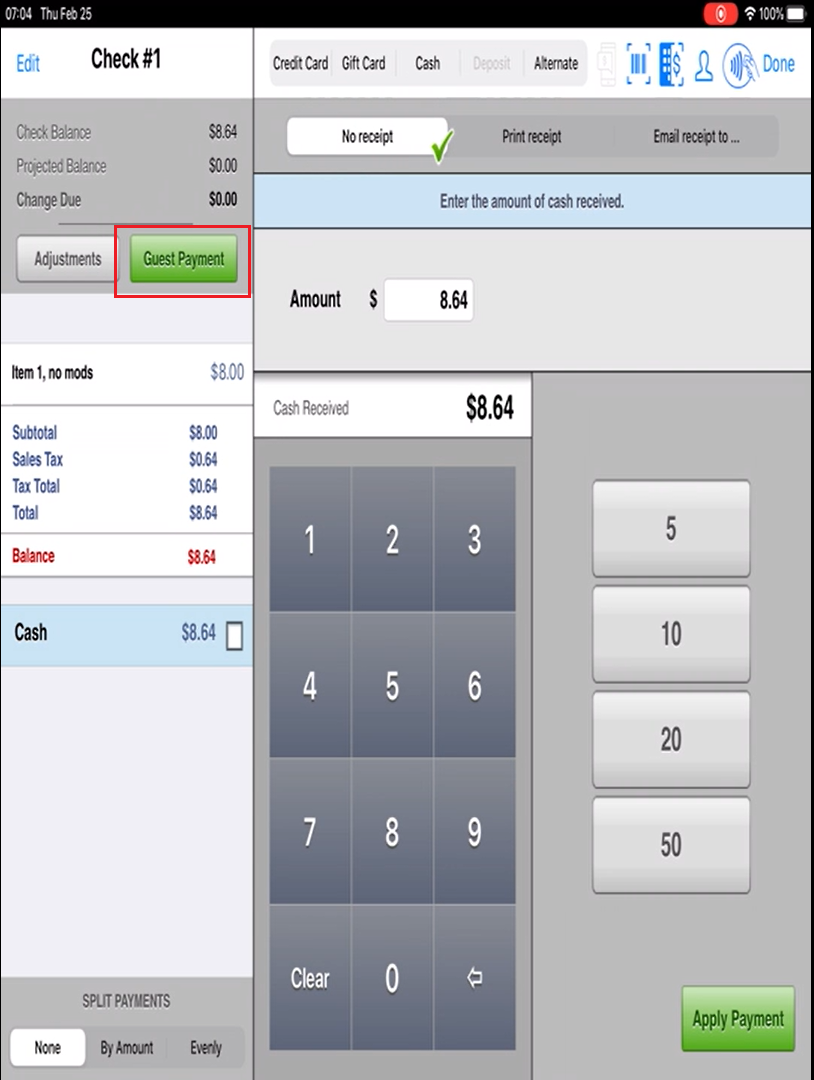
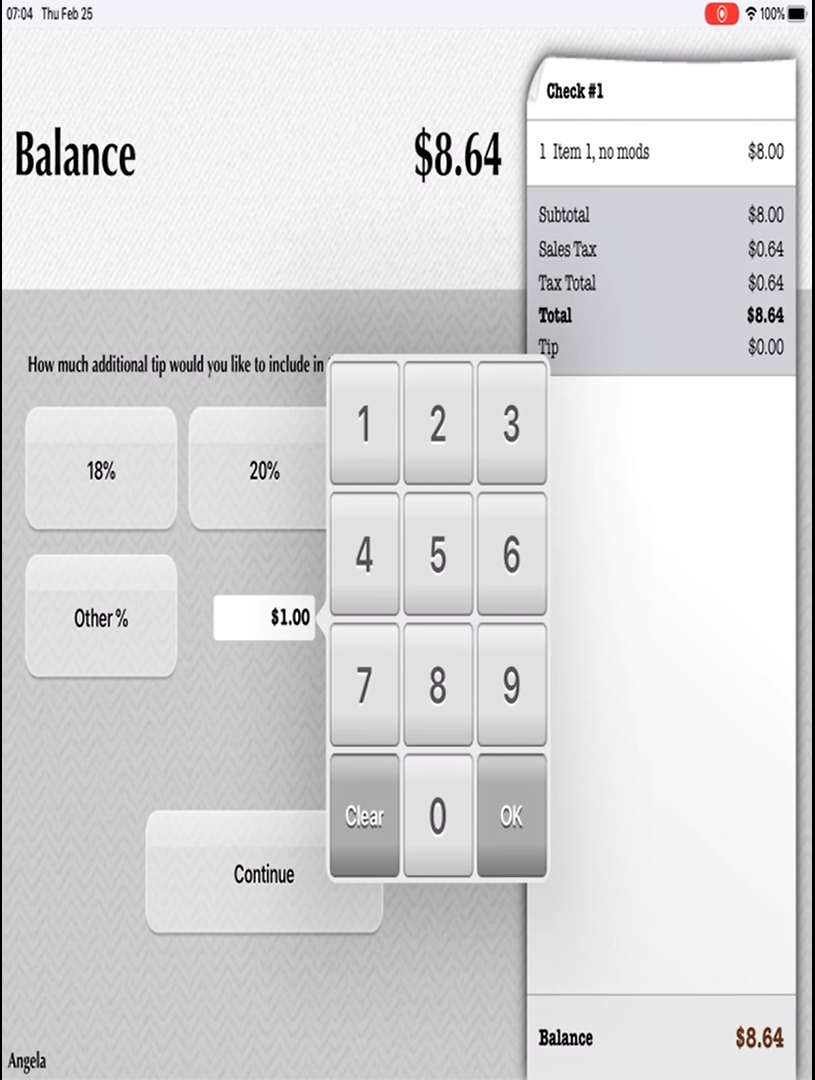
Screen switches to guest payment view; guest can enter tip. 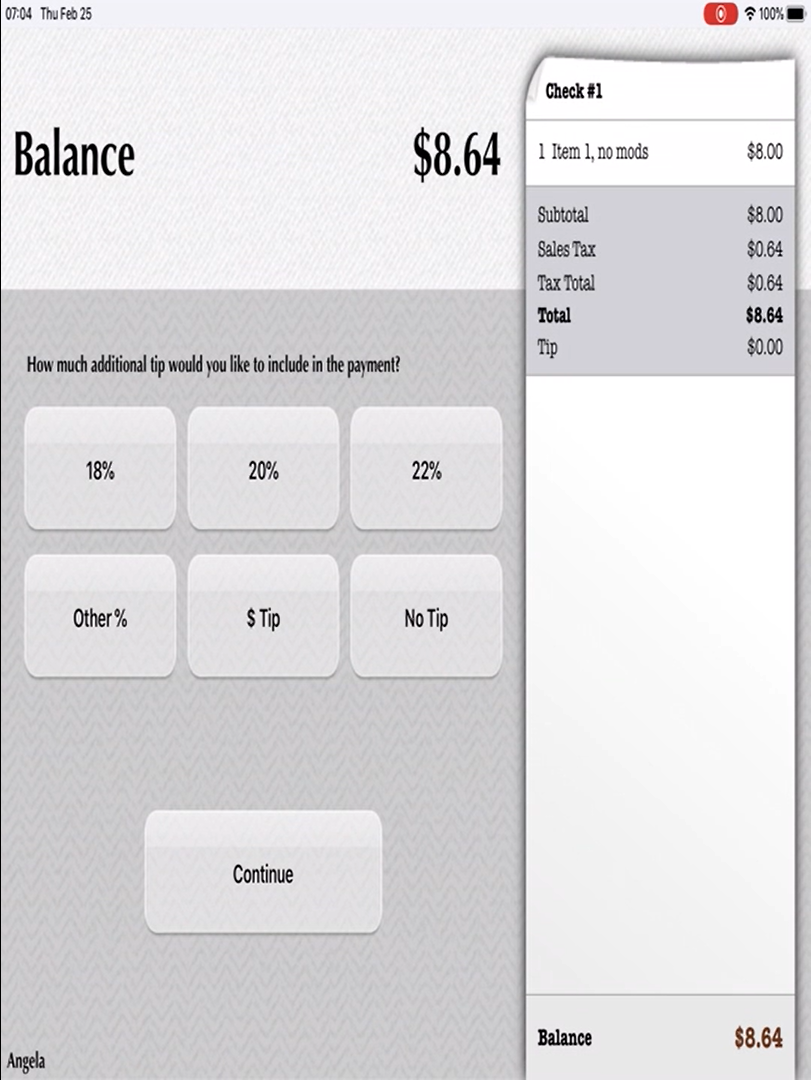
Message will notify guest after payment and allow guest to select receipt option. 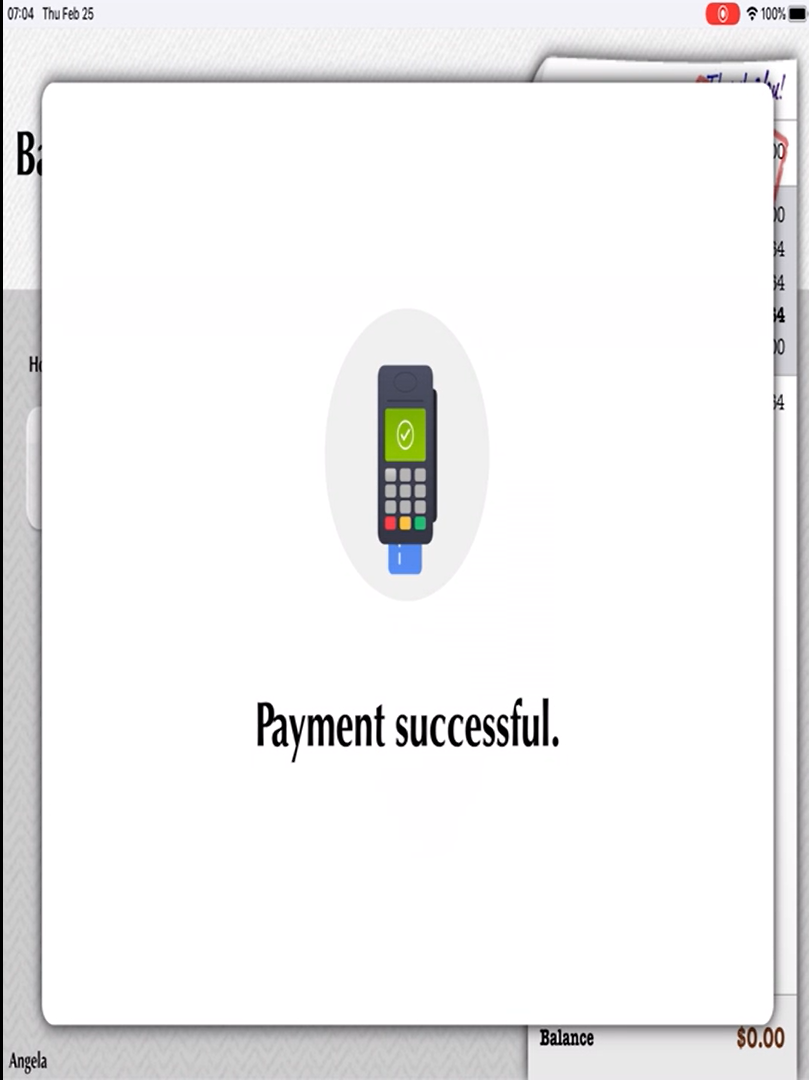
Use a 5-finger tap (tap on screen with tips of fingers) to return to staff payment. 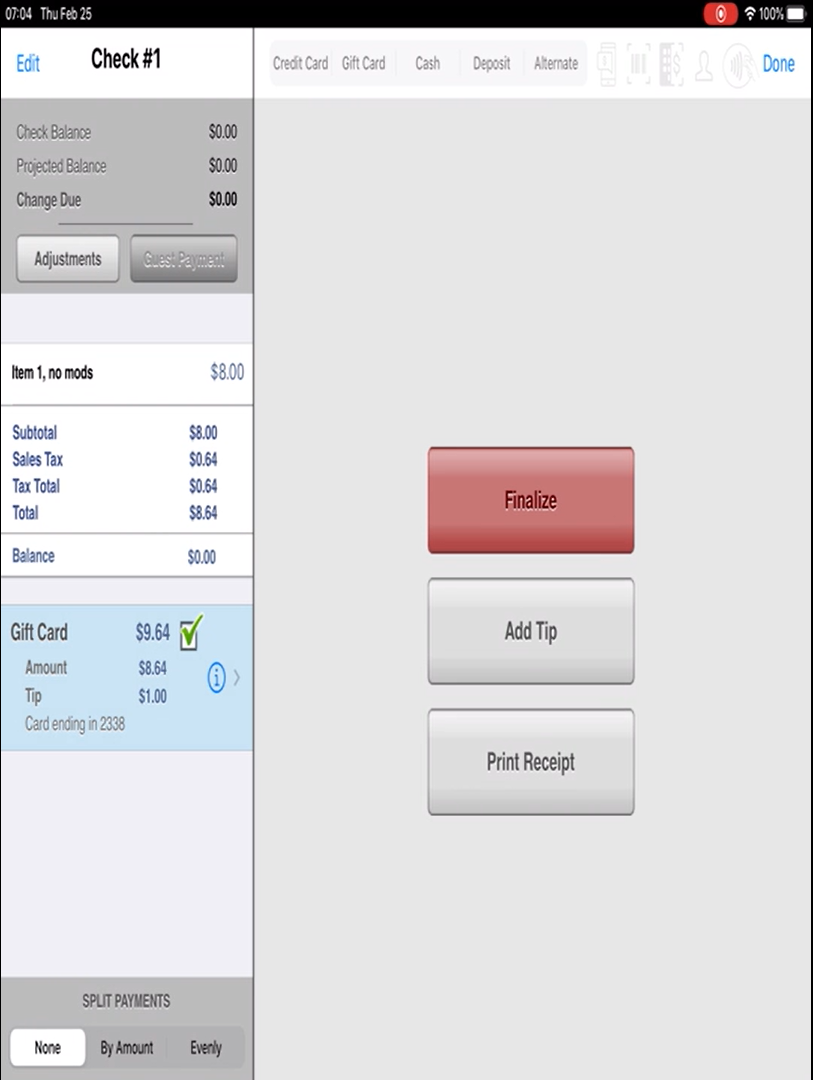
|
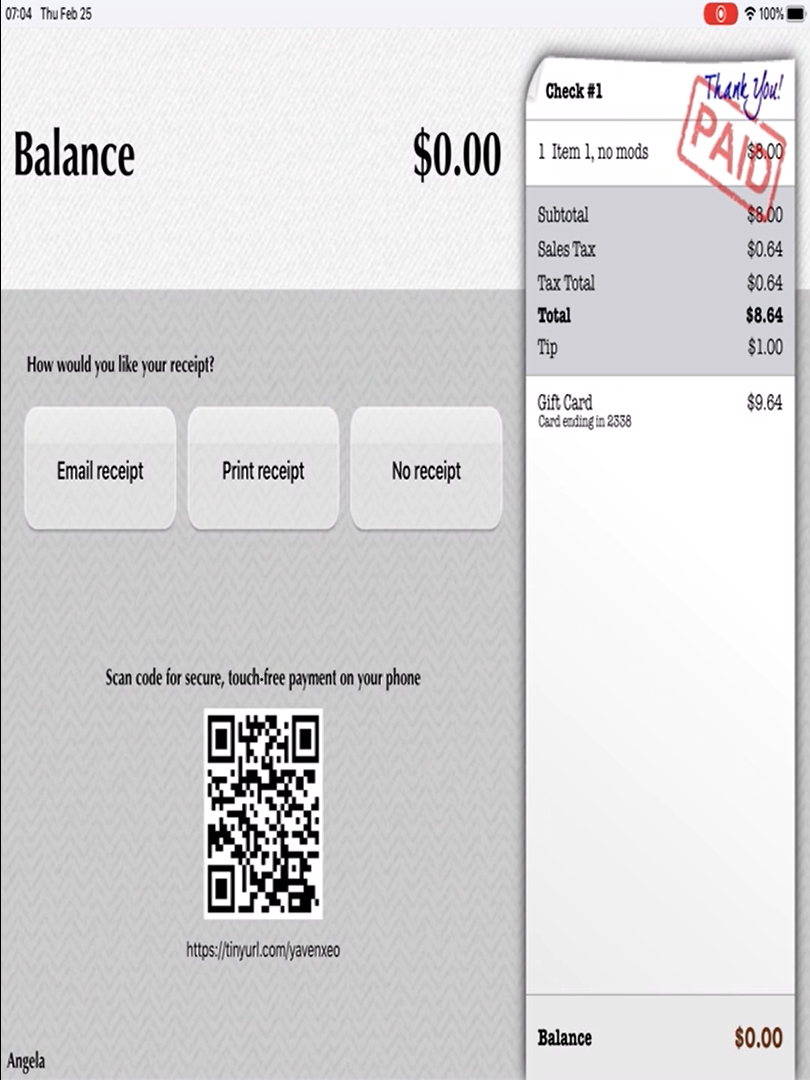
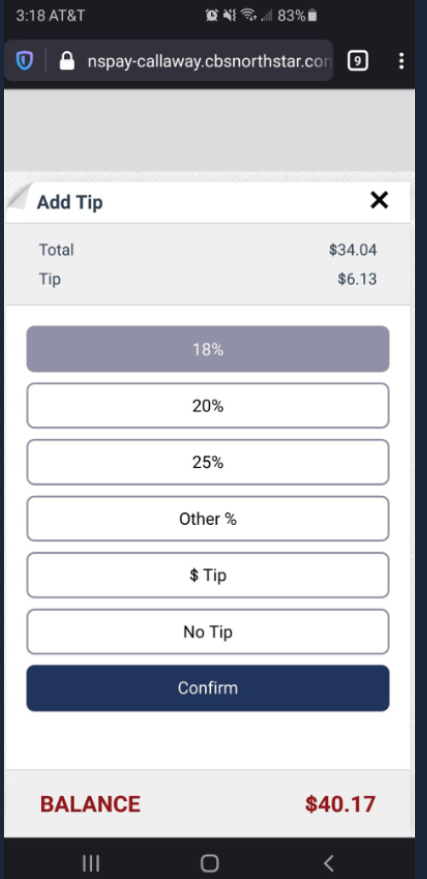
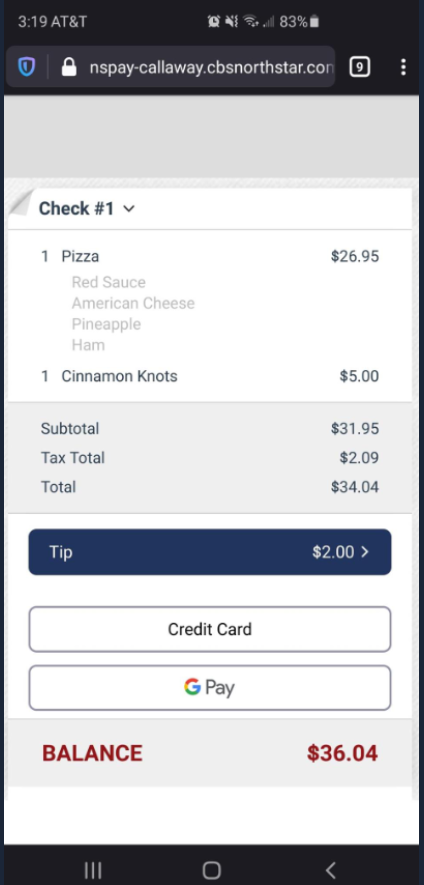
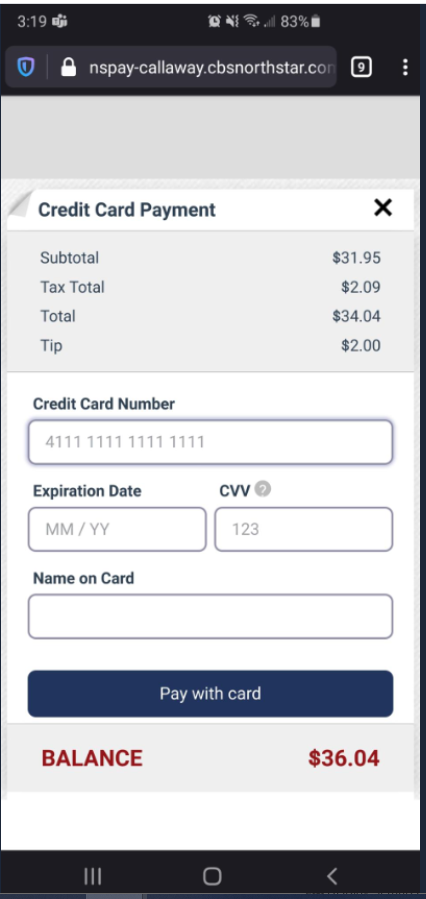
NorthStar Pay Online PaymentThe NorthStar Pay payment app provides secure, contactless check payment on a mobile device. A NorthStar Pay QR code and URL are printed on the receipt. Guests scan the code or enter the URL manually on their mobile device to access NorthStar Pay and complete the payment on the app. Guests can also add tip and select receipt option. Documentation: NorthStar Pay (QR Pay?)
Setup: Receipts - Codes |
Configuration | Operation |
|---|
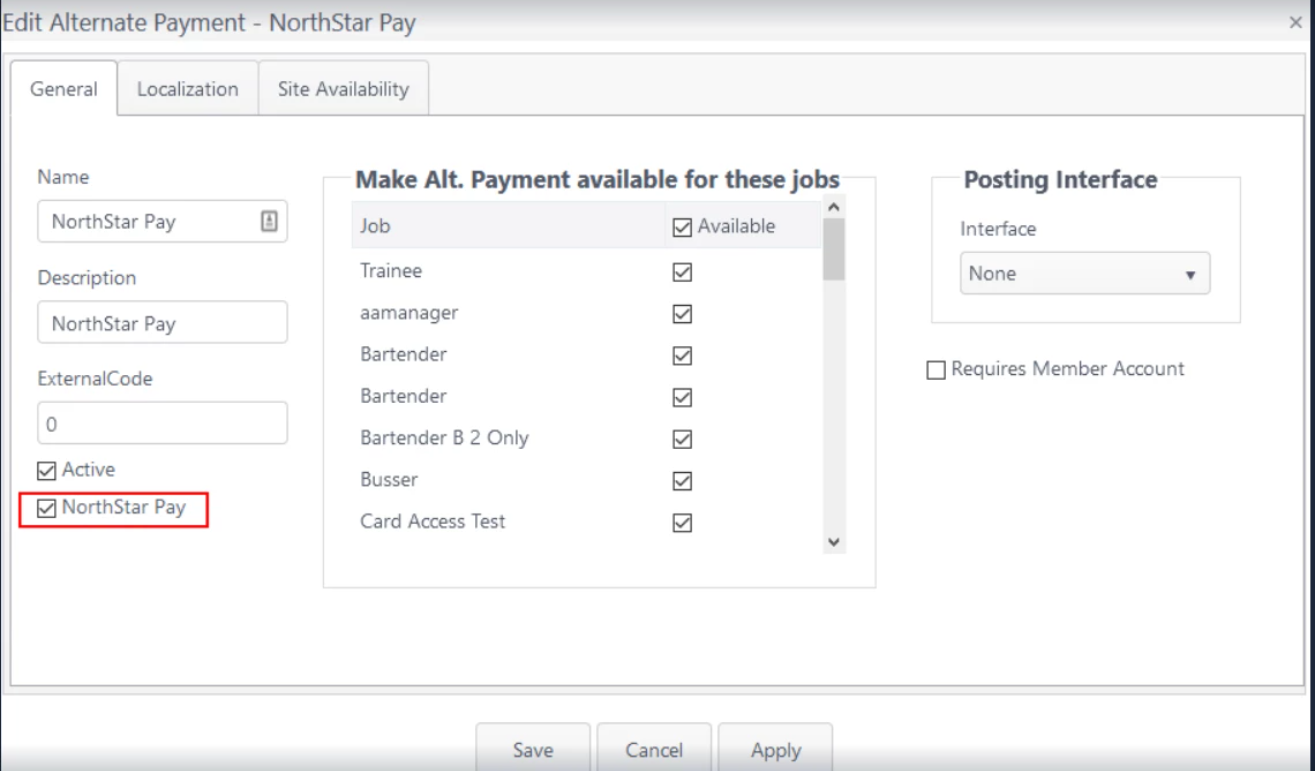
Set NorthStar Pay as Alternate Payment - Go to: Financial > Alternate Payments
- Add or edit an alternate payment.
- Select NorthStar Pay for the alternate payment to be used for NorthStar Pay.
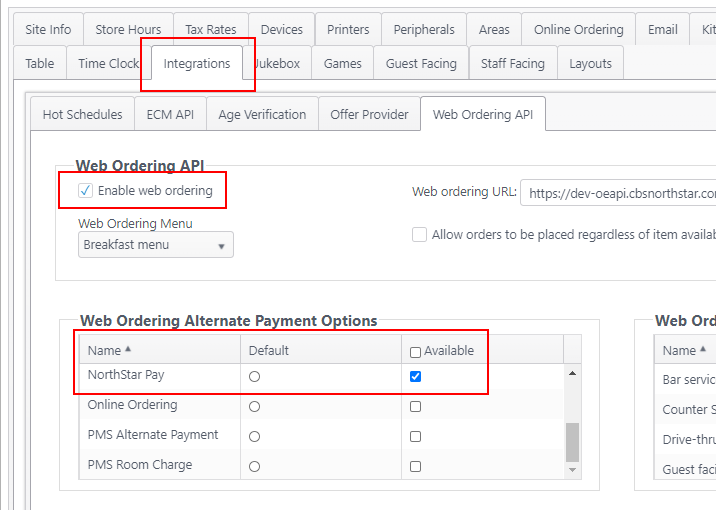
Web Ordering API - Set NorthStar Pay as payment option - Go to Sites > Integrations > Web Ordering API
- Select: Enable web ordering
- Select the alternate payment you configured above as an available payment method.
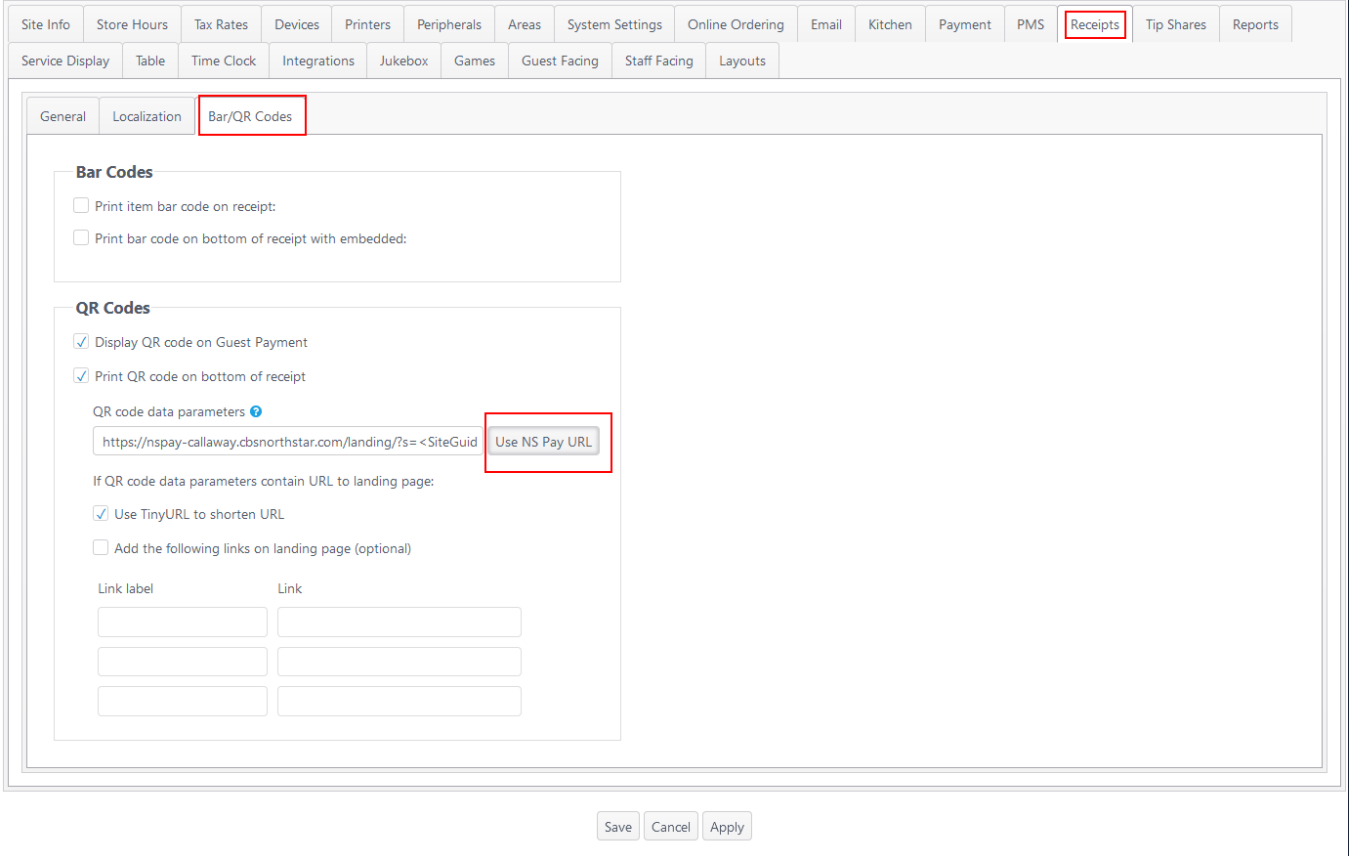
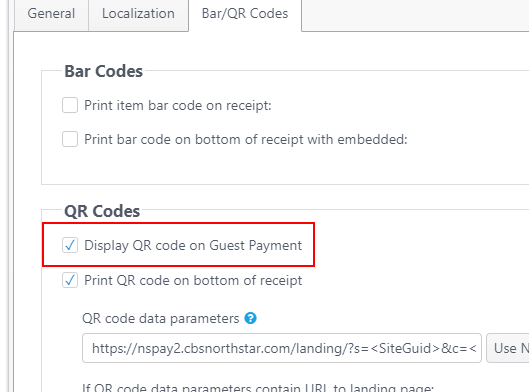
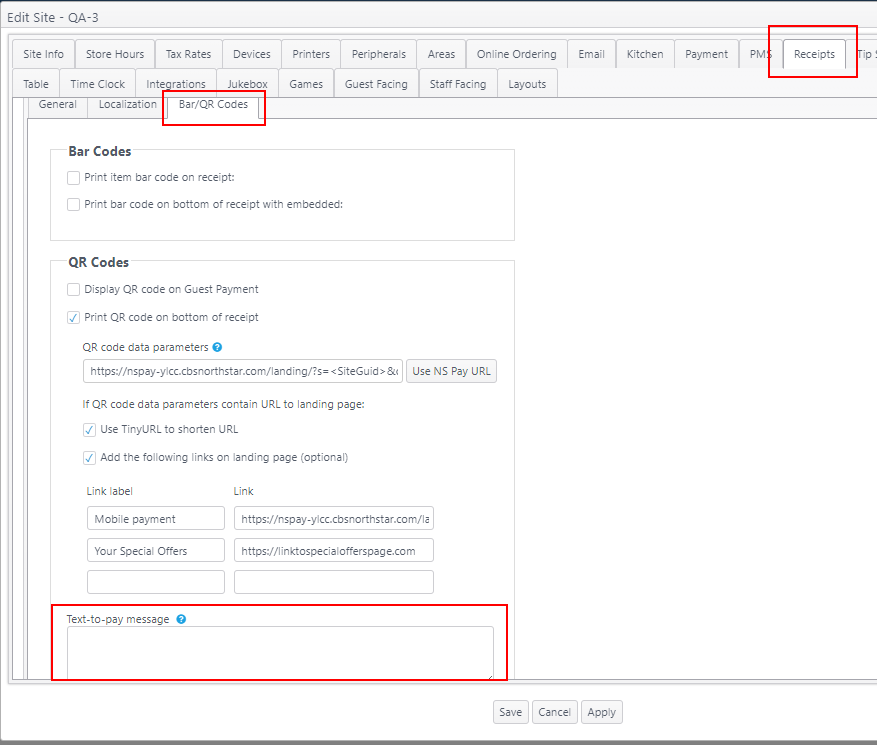
Bar/QR Codes- Go to Sites > Receipts > Bar/QR Codes
- Bar Codes
- Select the first or both print settings to print the bar code.
- QR Codes
- Select: Print QR code on bottom of receipt
- QR code data parameters
- Click Use NS Pay URL to auto-fill the NS Pay URL textbox.
- Note: The QR code data parameters can be used to direct a user to a page other than NS Pay. Add URL and data parameters to QR code data parameters - Include /landing/ in URL
- Other settings are optional
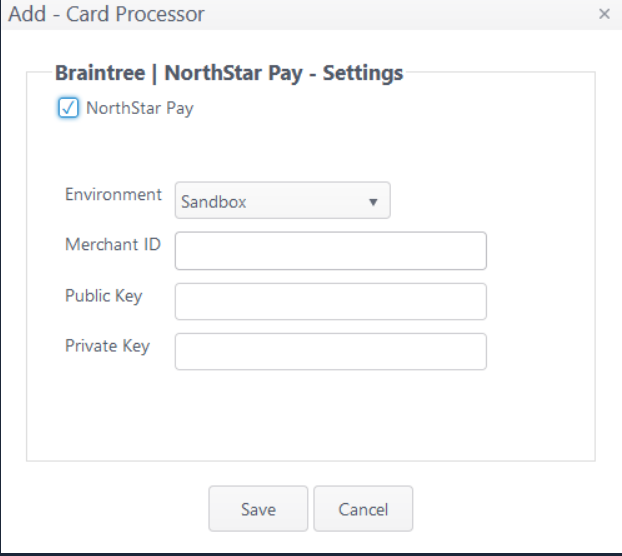
Payment- Go to Sites > Payment
- Click: Add Processor
- Select “Braintree | NorthStar Pay”
- Enter your Braintree credentials for the production environment (if you are not using test credentials.)
Display site logo on NorthStar Pay appThe logo configured for the site concept will display at the top of the NS Pay app on the mobile device. Path: Sites > Concepts > Concept tab - Logo Settings
- Name - Add/modify name
- To add a logo:
- Image file must meet the image requirements specified.
- Click Select file to find and upload a file.
- When the file has been uploaded, the status bar will show Done with a checkmark.
- Click Save to save changes or Cancel to cancel changes.
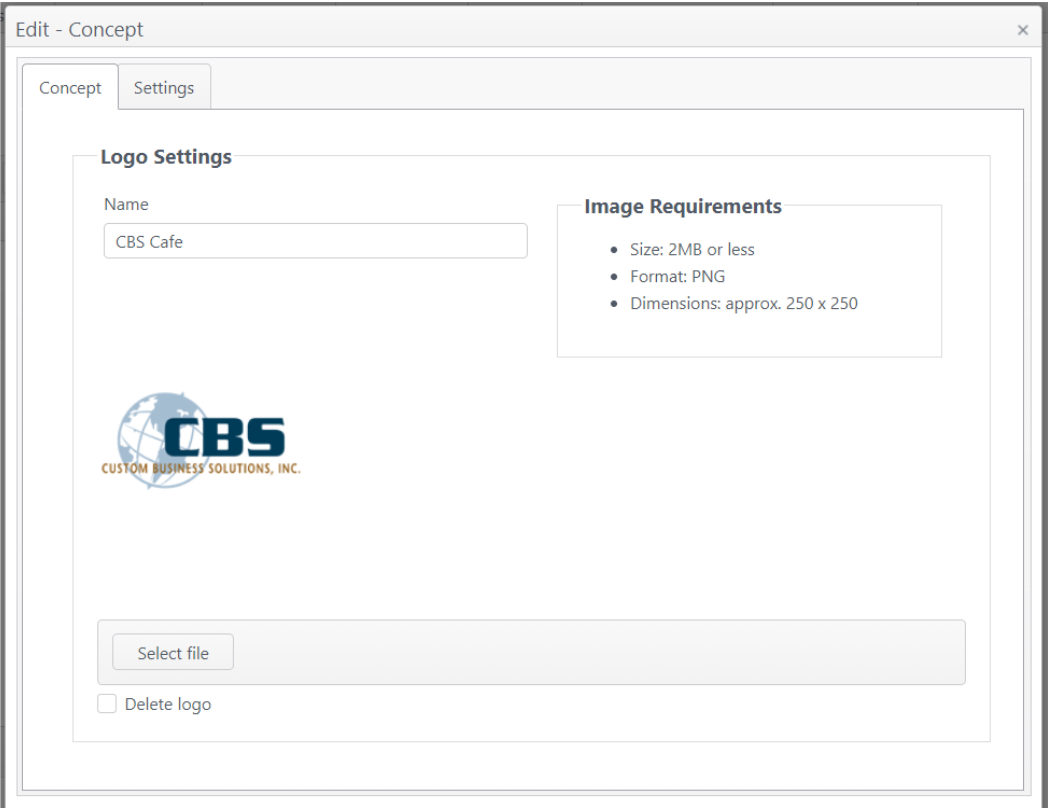
- The logo will display at the top of the NS Pay app.
- Note: If logo is changed, change will be reflected on NS Pay one hour later.
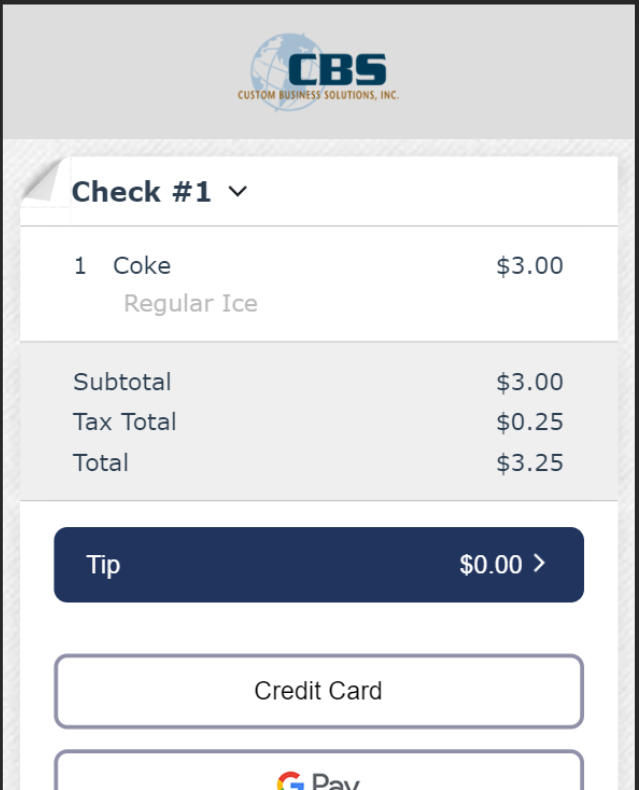
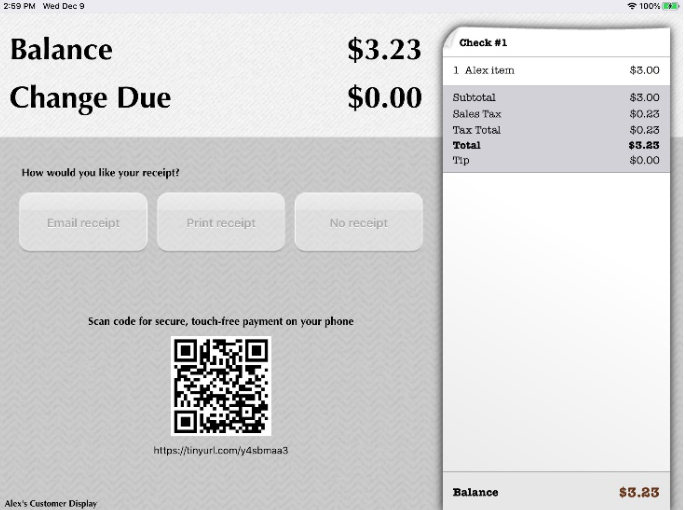
| Print receipt with QR Code and URL- The QR code and URL will print on the receipt.
- Guest can scan the code or enter the URL on their browser to access NS Pay and complete payment.
- Note: QR Code expires after 30 minutes.
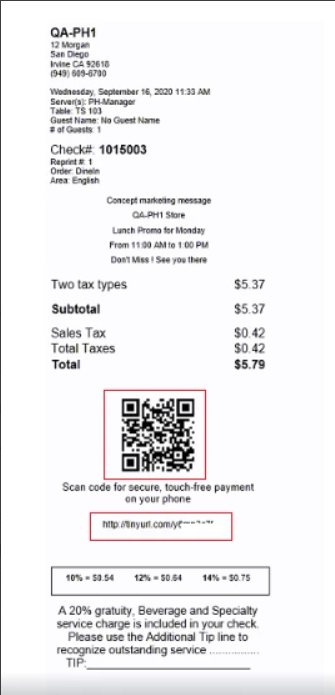
- When configured, a QR code linked to NS pay will appear on the receipt before payment.
- Guest scans the code (or enters the URL manually) to access NS Pay and pays their check in full.
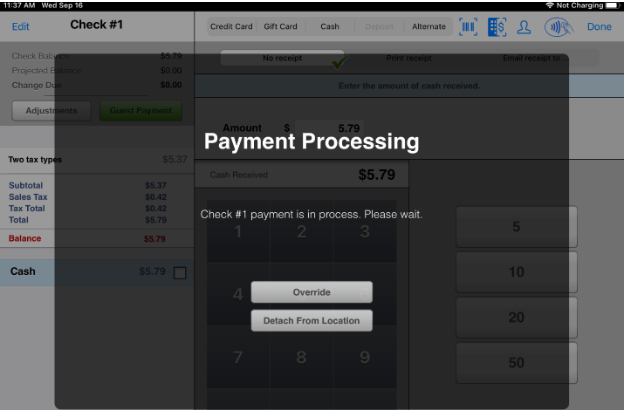
Lock location- On the OE app, the payment page is masked during the payment process to prevent another user from accessing the check while the guest is completing payment in NS Pay.
- A manager can override the lock by tapping Override and scanning their manager card.

- After check is paid, the table location lock is released.
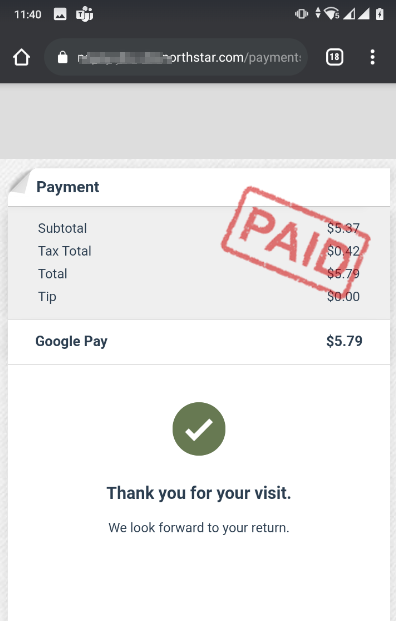
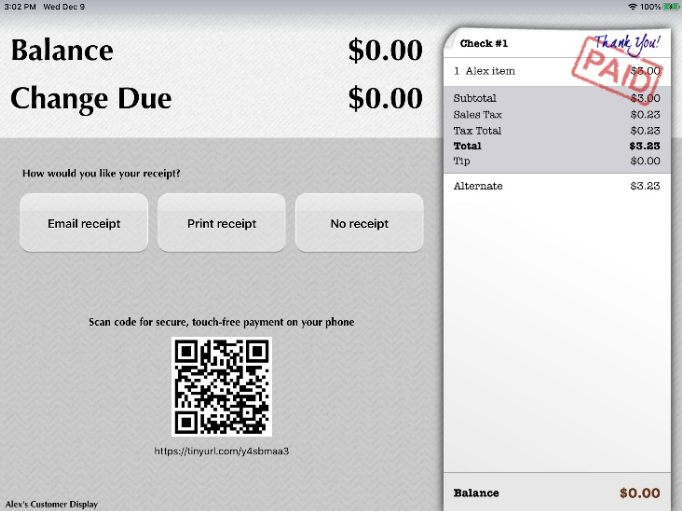
QR code not active after payment- If the QR code is scanned again (or URL revisited) within 30 minutes, the guest will see the Paid view of the check on NS Pay with a note "Check already paid in full. Thank you!"
Check reprint- If the receipt is reprinted after the check is paid in full, the QR code does not print again on the receipt.
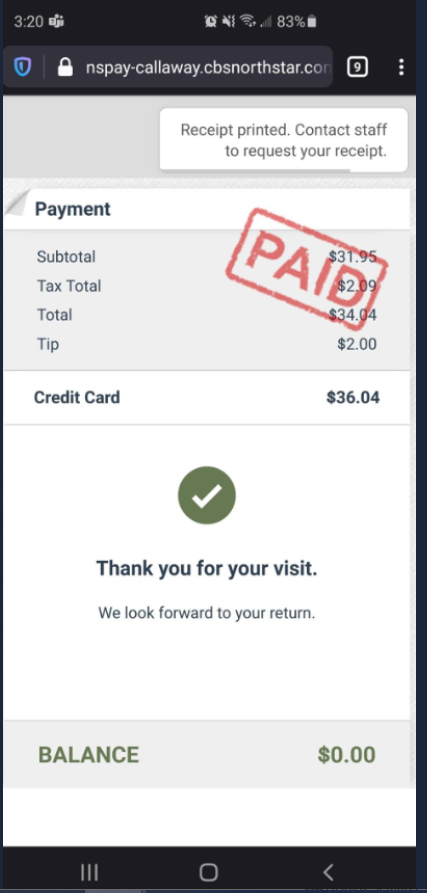
NorthStar Pay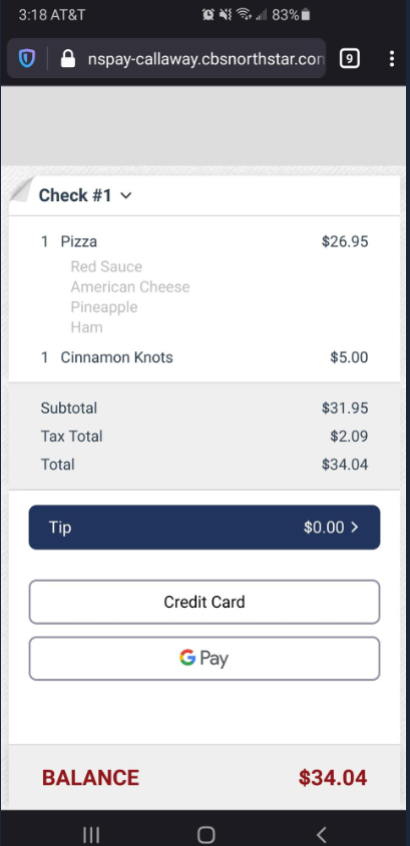
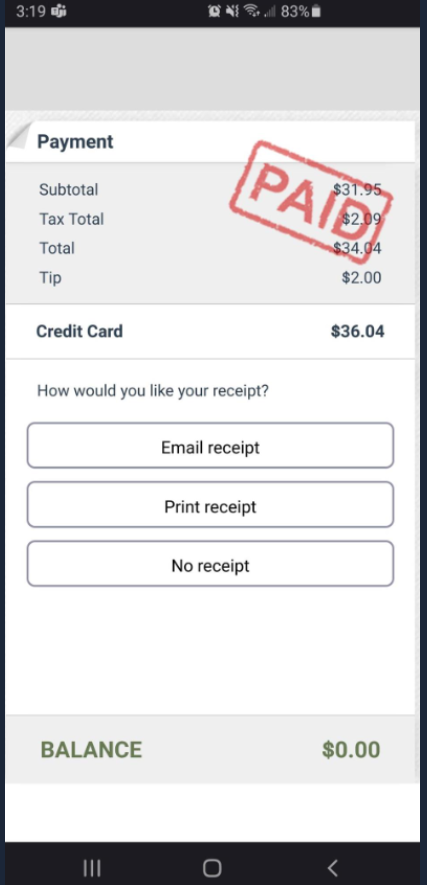
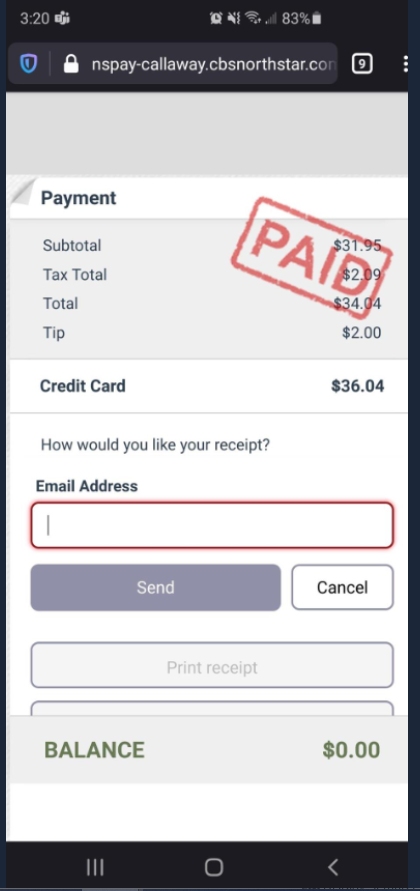
On the email confirmation message, tap OK to email receipt to email address shown. If guest taps Print receipt, the receipt is printed and the guest is notified to request the receipt from staff.
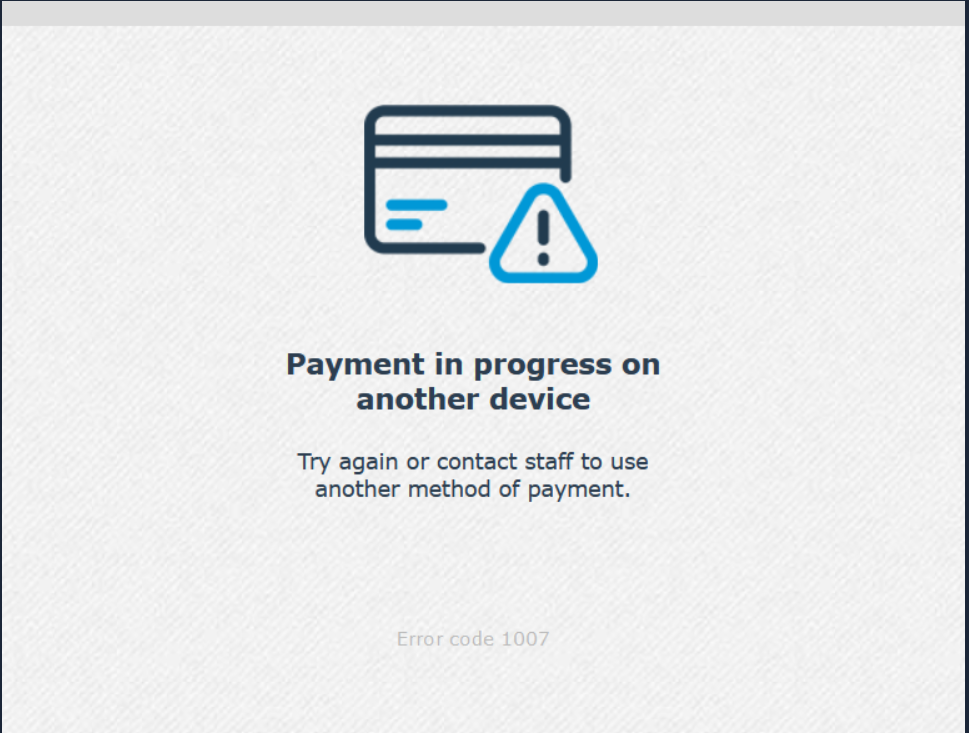
Error message: While the check is in progress on the guest's device, if the QR code is scanned from the receipt on a second device, an error message will be shown to prevent access on the second device.
Apple Pay When paying with Apple Pay, the site name will be shown on the payment screen as "PAY site name." 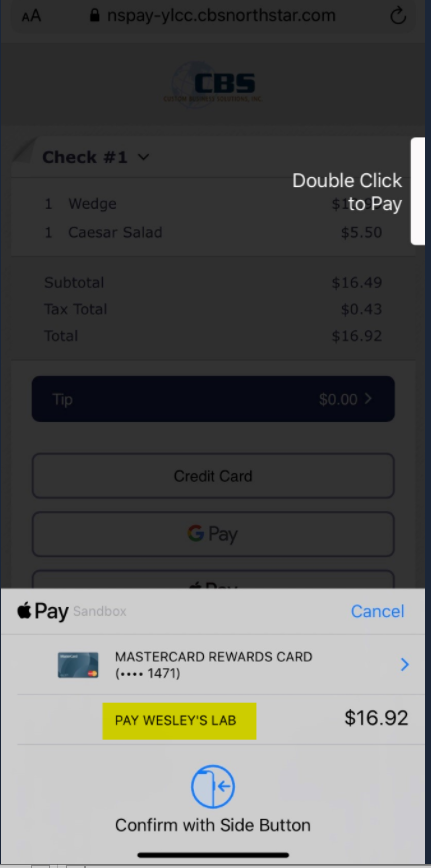
Order Entry app- On the OE app, the payment page is masked during the payment process.
- A manager can override the lock by tapping Override and scanning their manager card.
- After the check is paid, the table location lock is released and the check session is closed.
|
NorthStar Pay on Advanced Customer DisplayIf a staff-facing iPad and a guest-facing Advanced Customer Display (ACD) are both used, the QR code and URL can be displayed on the ACD for the guest to scan and pay from their phone. Documentation: NorthStar Pay on Advanced Customer Display |
Configuration | Operation |
|---|
ECM settings - Set the Alternate Payment, Integrations, Receipts and Payment settings as noted for NorthStar Pay.
- Go to Sites > Receipts > Bar/QR Codes - Select Display QR Code on Guest Payment
| Order Entry app - Staff orders items for guest, which guest views on the ACD.
- Staff taps Payment.
- The ACD displays the Payment page with a QR code.
- Guest scans the QR code or enters URL on their mobile device and goes to the NorthStar Pay interface.
- Guest proceeds to pay via NS Pay on their mobile device.
- Finalize payment
- If the guest selects a receipt option on their phone, the order is finalized and the ACD is cleared for the next order.
- If the guest does not select a receipt option on their phone, they can select a receipt option on the ACD and staff can finalize the check manually.
|
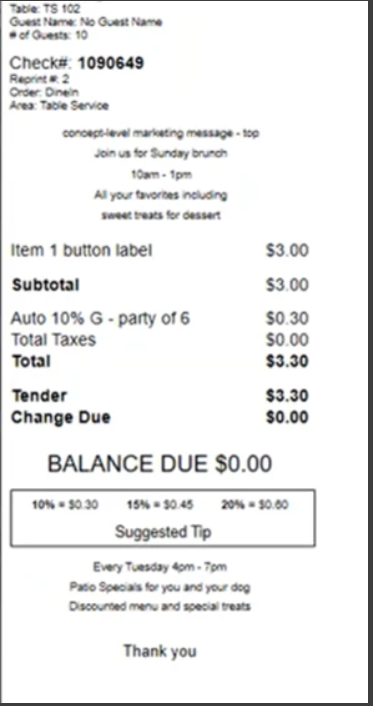
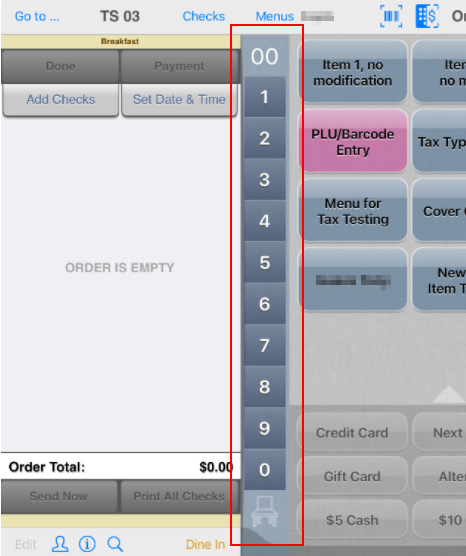
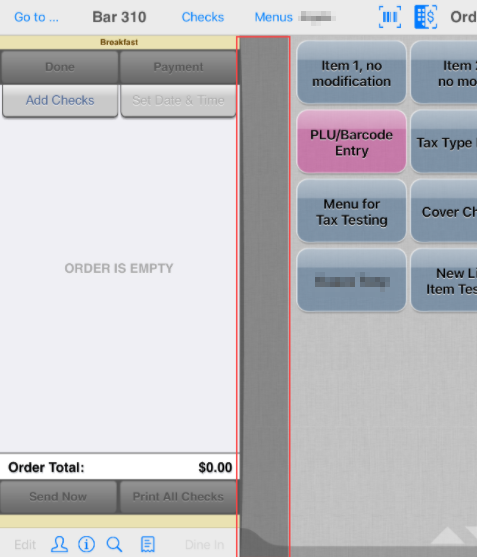
Display check number on onscreen checks (all modes except guest facing) To improve user experience, when a check has been created the check number is shown on the onscreen check for all ordering modes (excluding guest facing). |
| N/A | Check number shown on onscreen check: Counter service
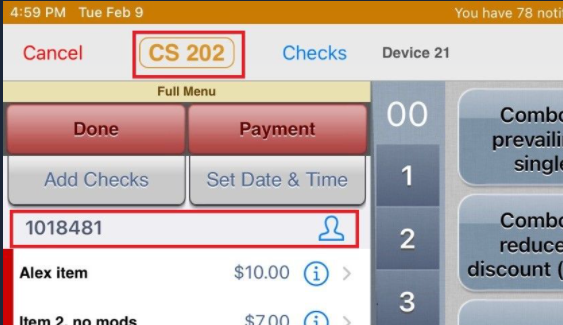 Kiosk 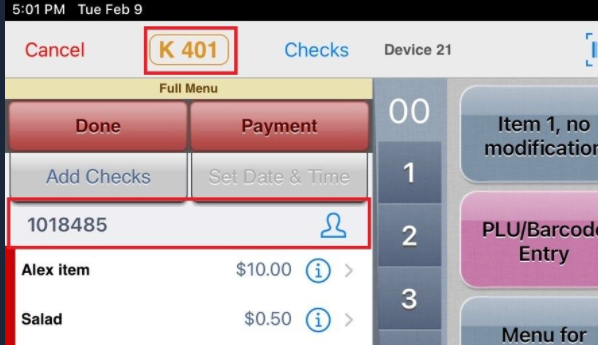
Bar 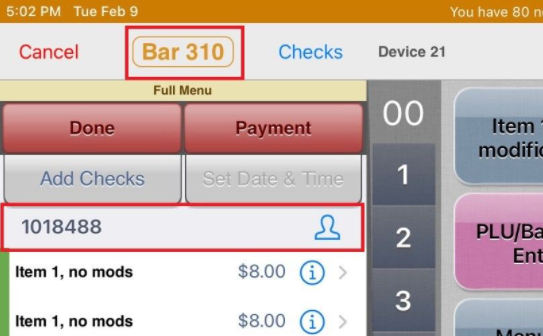
Table service 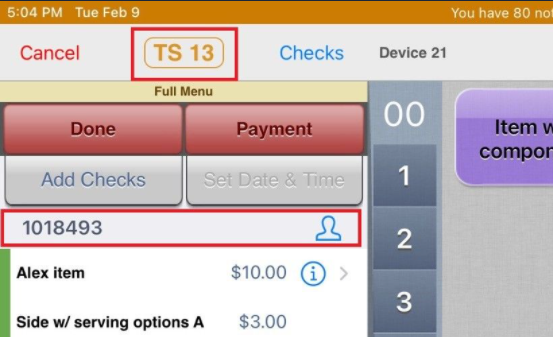
Drive thru 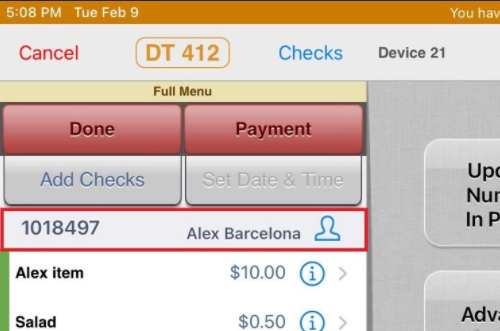
|
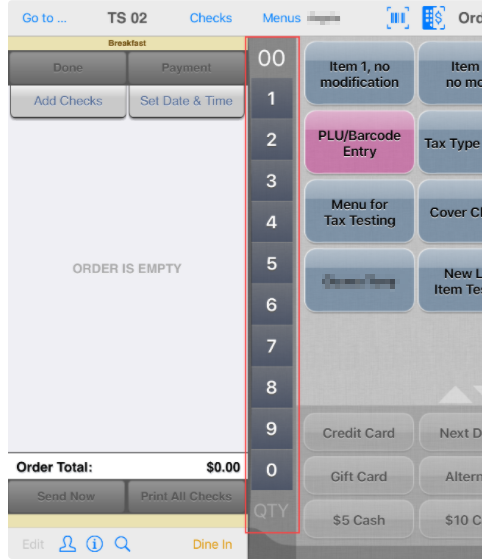
Ordering screen: Limit access to quantity keypad when ordering A vertical keypad is available on the NorthStar Order Entry app. The vertical keypad can be toggled to either select seat numbers (indicated by a seat icon at bottom) or to select quantity (indicated by QTY at bottom). This feature allows sites to manage use of the vertical keypad, allowing it to be used only for seating (when enabled) or for seating and quantity by tapping the icon at bottom to toggle between the two modes (seating and quantity). Documentation: Limit Access to Quantity Keypad |
Configuration | Operation |
|---|
Access is restricted by job type.
Path: Users > Jobs > Workflow - Select Allow access to Quantity keypad 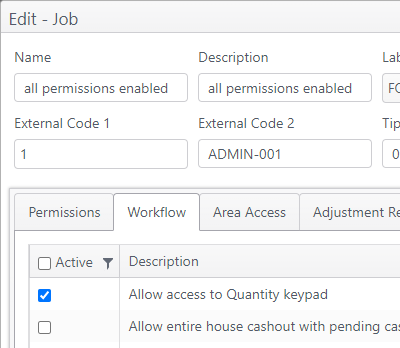
Optional: Keypad can be toggled between seat number and quantity when both are enabled. If seat number functionality is enabled for a site and area(s) within a site, users will have access to the seat number keypad, but not the quantity keypad. Path: Edit a site > General - Select Enable seat number 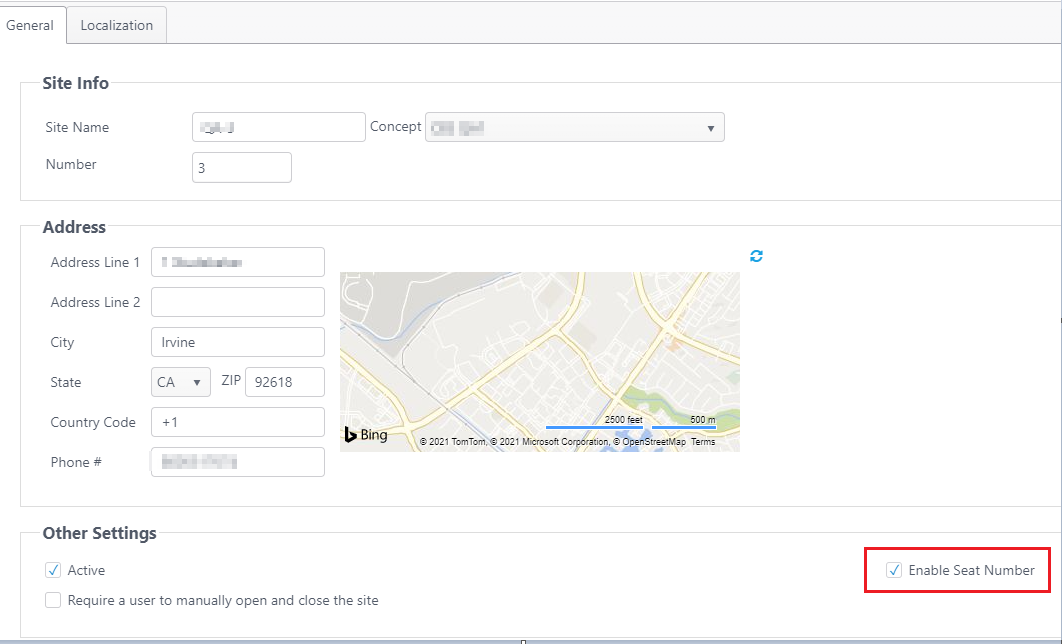
Path: Edit a site > Areas - Select Enable seat number 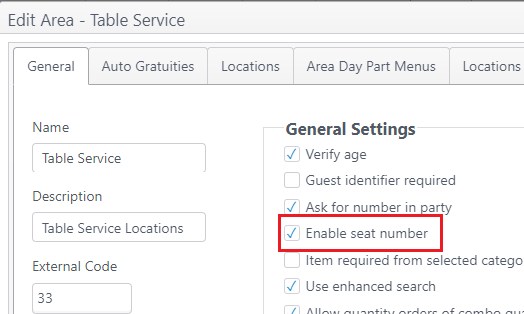
| - ECM setting: Enable seat number (site and area) = selected
The user can access the seat number keypad and order by seat number.
- ECM setting: Jobs: Allow access to Quantity keypad= selected
User can access the quantity keypad and order items by tapping quantity.
- ECM setting: Enable seat number (site and area) = not selected
- ECM setting: Jobs: Allow access to Quantity keypad= not selected
User cannot access either the quantity keypad or the seat number keypad.
|
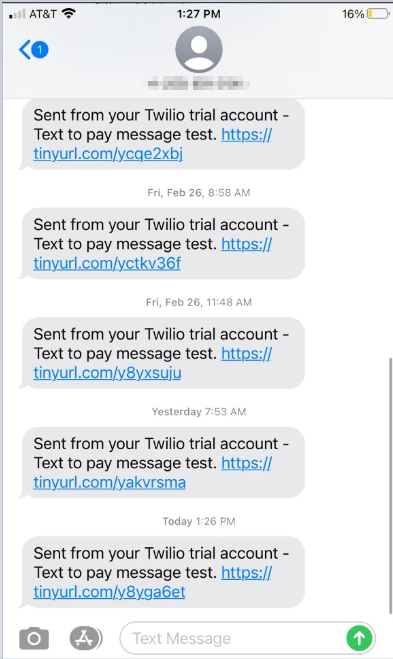
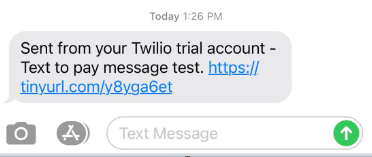
Text to Pay Enable text messaging with link to payment app Staff can send a text (SMS message) to guest's mobile device with a link to NorthStar Pay.
(Text is sent using the Twilio communication platform for messaging.)
Documentation: Text to Pay |
Configuration | Operation |
|---|
Add text-to-pay payment message by sitePath: Edit a site > Receipts > Bar/QR Codes tab - Text-to-pay message - Enter message text to be sent to guest's mobile device via SMS message (message sent by Twilio).
- Message may be up to 1000 characters.
- Example: Tap link for safe, secure payment.
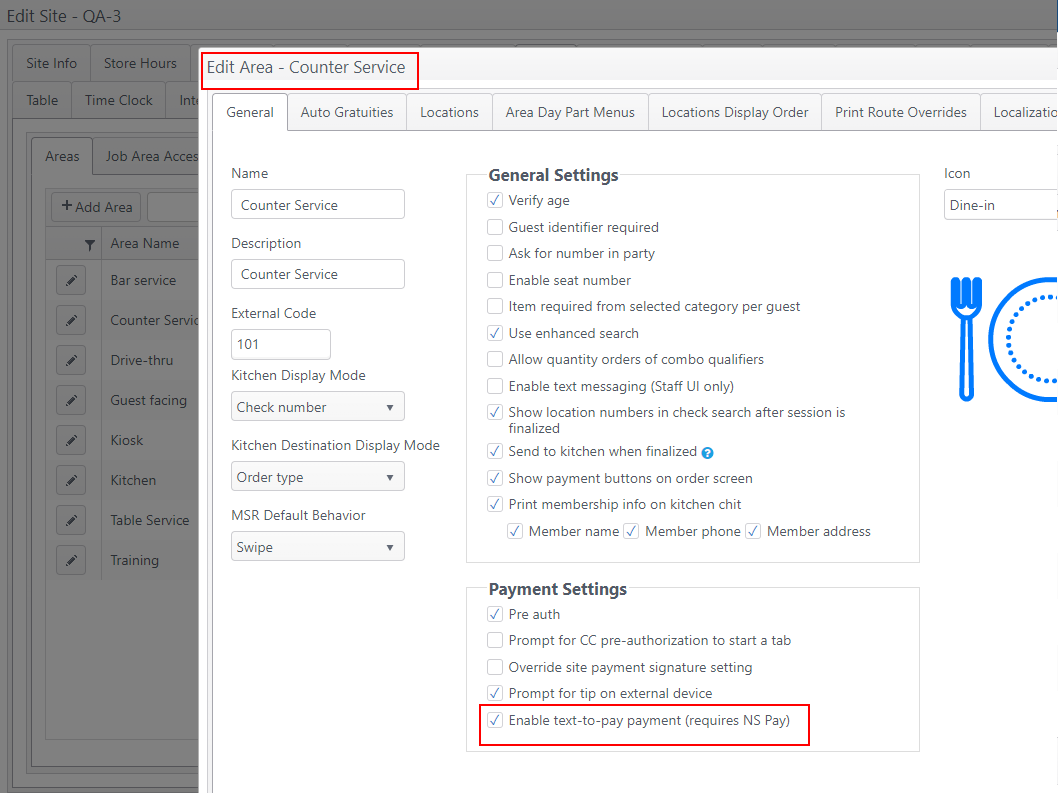
Enable text-to-pay payment by areaPath: Edit a site > Areas - In Payment Settings, select Enable text-to-pay payment (requires NS Pay)
| There are three areas from which the staff can tap a Send text to pay link to send a text to the guest's mobile device with a link to NorthStar Pay: - Rewards/Customer pop-up
- Guest identifier pop-up
- Payment screen using the Guest Identifier pop-up
Rewards/Customer pop-up- Order items on app and tap Send Now to send items to kitchen.
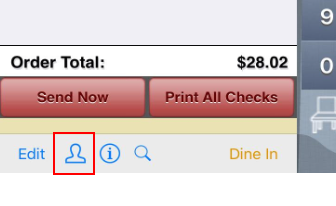
- Tap customer icon (blue head) to open the Rewards pop-up.
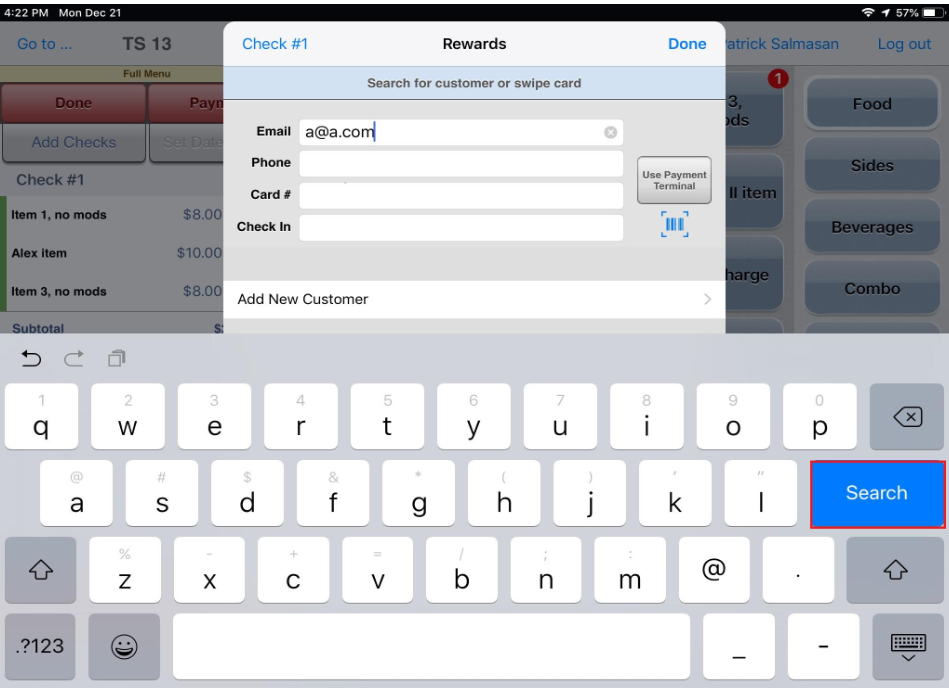
- Search for customer and attach customer to check.
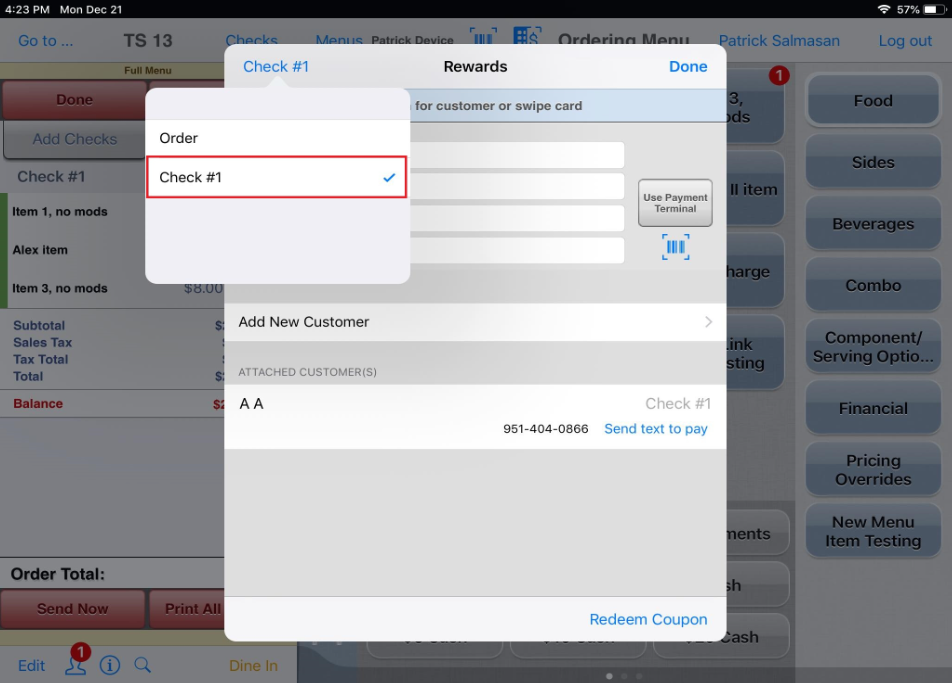
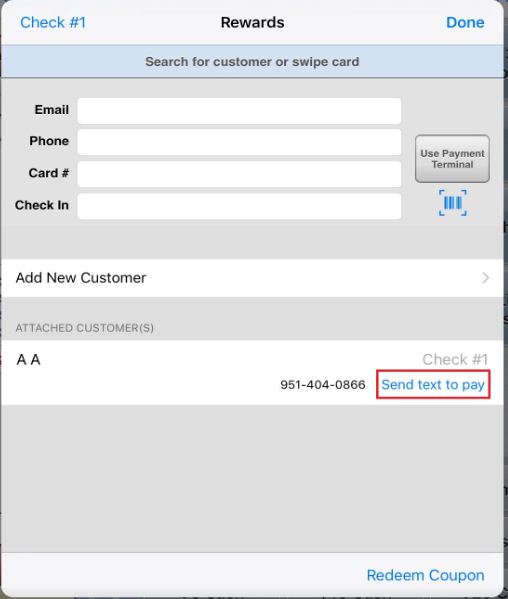
- Text message is sent to guest's phone number with link to NorthStar Pay. Guest taps link to complete payment on NorthStar Pay.
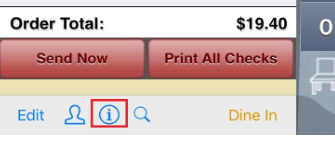
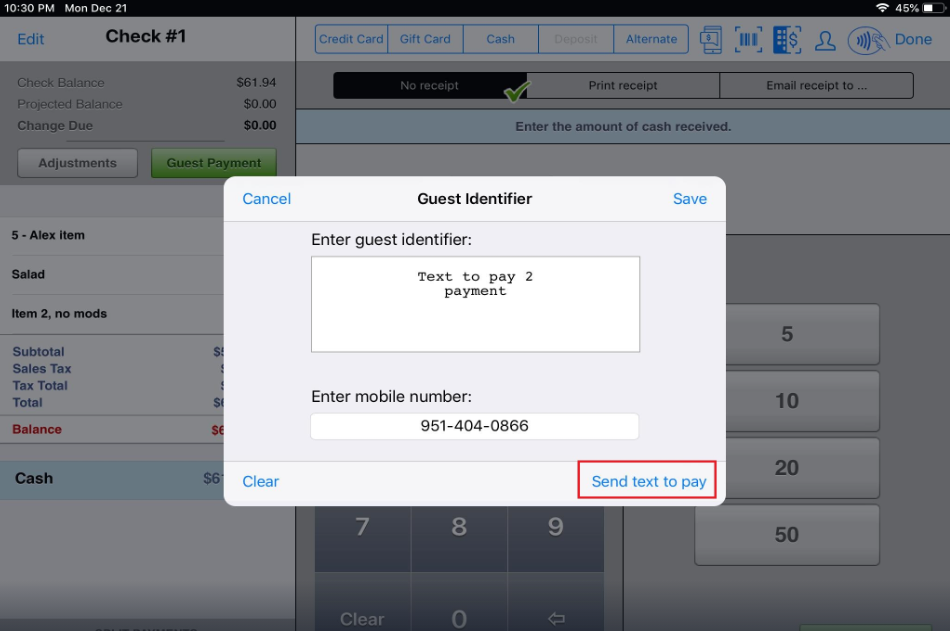
Guest Identifier pop-up- Order items on app and tap Send Now to send items to kitchen.
- Tap guest identifier icon
 to open the guest identifier pop-up. to open the guest identifier pop-up.
- Enter the guest identifier details and guest's mobile number. Tap Send text to pay.
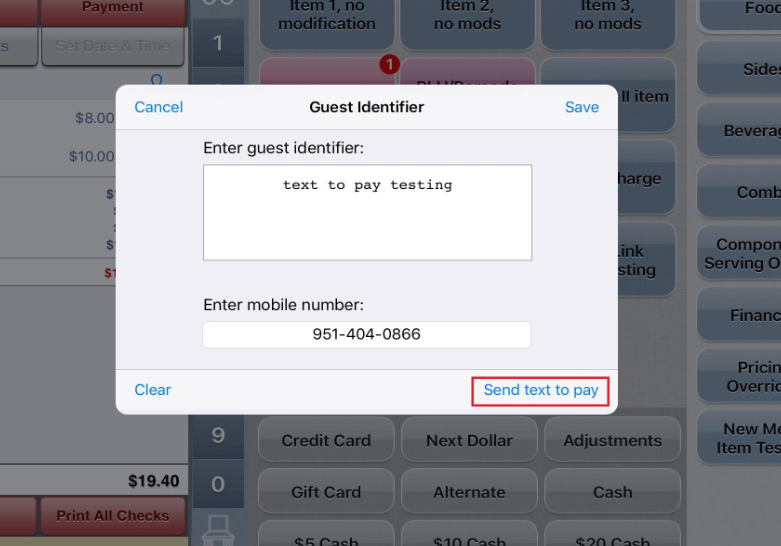
- Text message is sent to guest's phone number with link to NorthStar Pay. Guest taps link to complete payment on NorthStar Pay.

Payment screen- Order items on app and tap Send Now to send items to kitchen.
- Tap Payment.
- On the Payment screen, tap the send to text icon.
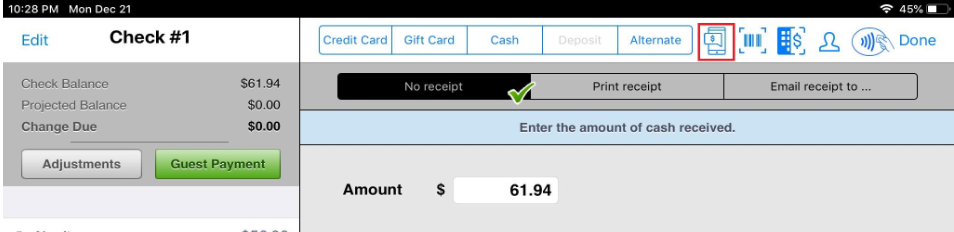
- The guest identifier pop-up will open.
- Enter the guest identifier details and guest's mobile number. Tap Send text to pay.
- Text message is sent to guest's phone number with link to NorthStar Pay. Guest taps link to complete payment on NorthStar Pay.
|
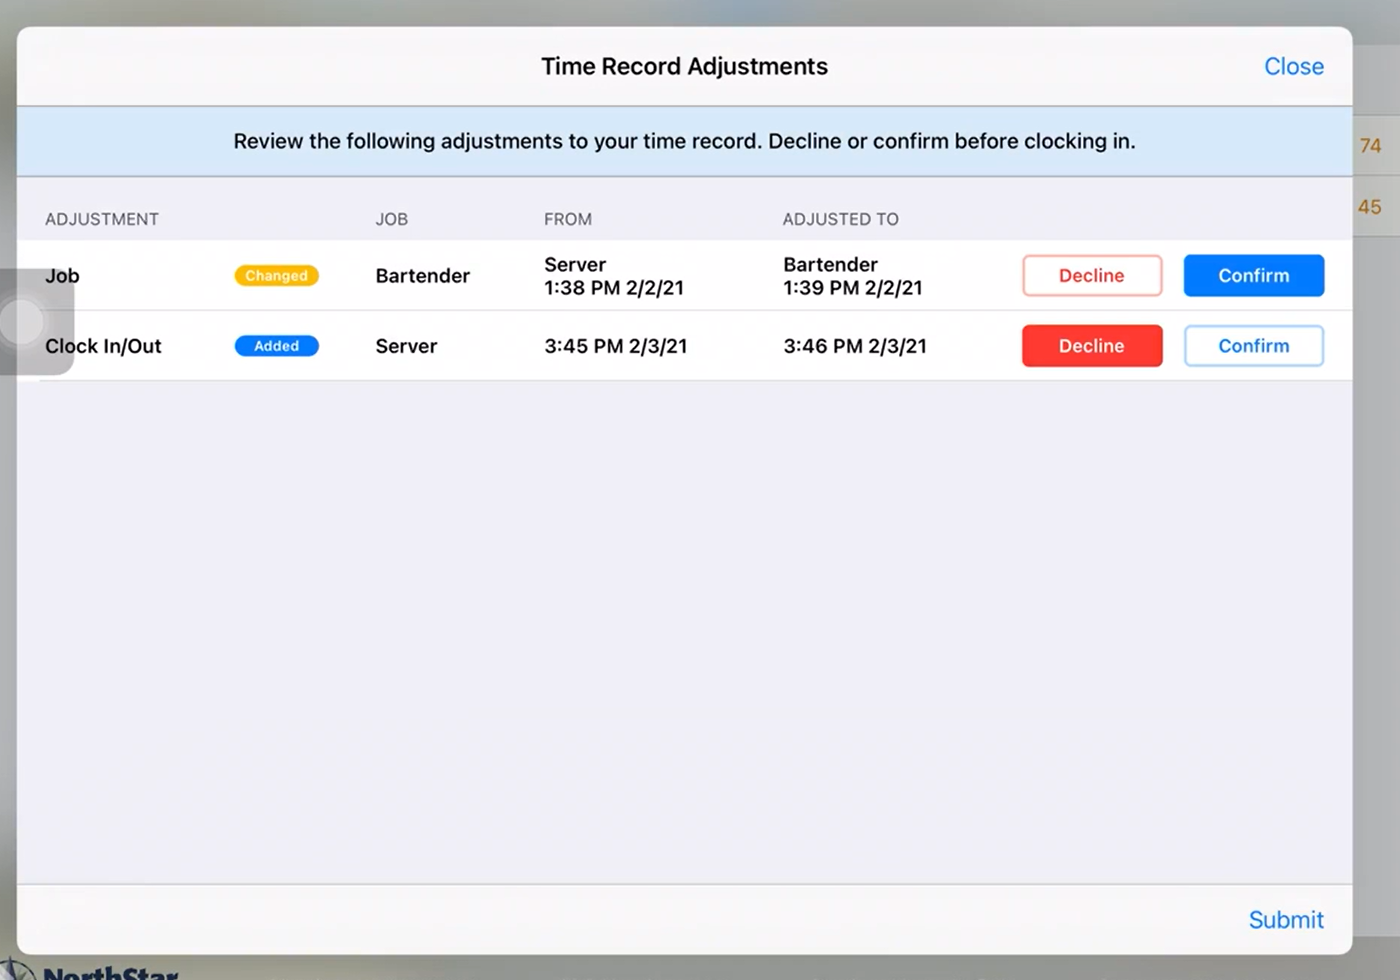
Time Record Adjustment Acknowledgement When managers make adjustments to a staff member's time record, the staff member is notified the next time they log in. (Time record adjustments include editing, adding or deleting a time record.) - Staff must confirm the adjustment in order to continue with their clock in.
- If staff declines to acknowledge, the manager and staff member must resolve the conflict before the staff member can clock in.
- Manager can override the adjustment acknowledgement to allow the staff member to clock in without confirming.
Documentation: Time Records: Acknowledge Adjustments Setup: Time Clock, Job Permissions |
Configuration | Operation |
|---|
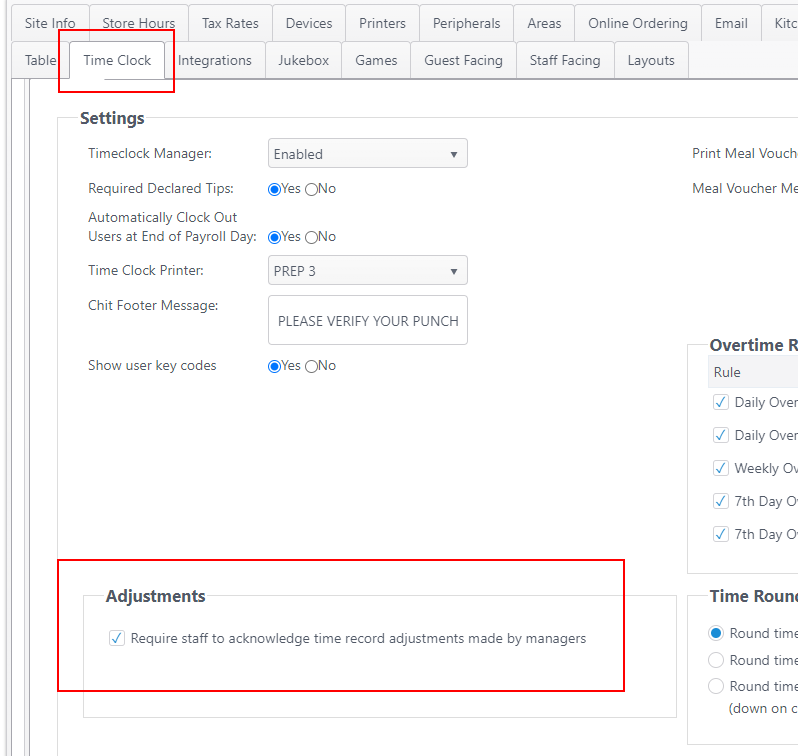
Time Clock setting Path: Edit a site > Time Clock > - Select: Require staff to acknowledge time record adjustments made by managers
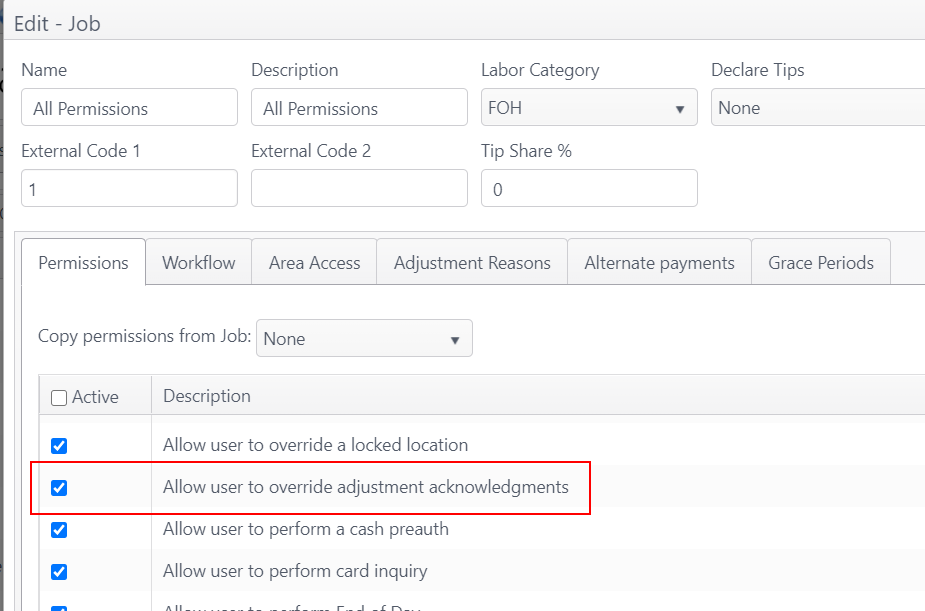
Job Permission Job permission by a manager/supervisor is required to override adjustment acknowledgment and allow staff to clock in without acknowledging their time record adjustment. Override can be applied for staff and the manager. Override remains in effect until end of day. Path: Users > Jobs > Permissions - Select: Allow user to override adjustment acknowledgements
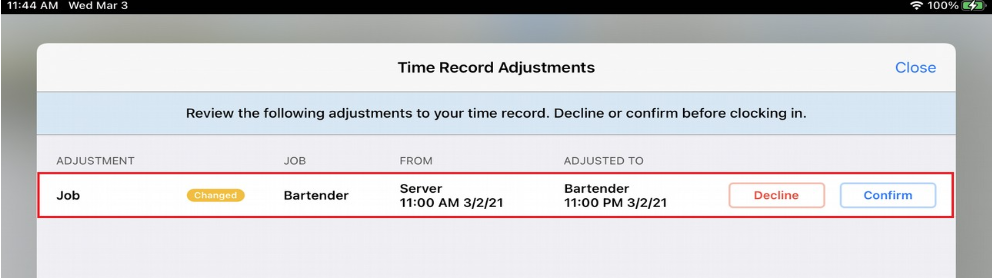
| Basic workflowManagers can adjust time records for current or previous pay periods. - Manager adds a new time record.
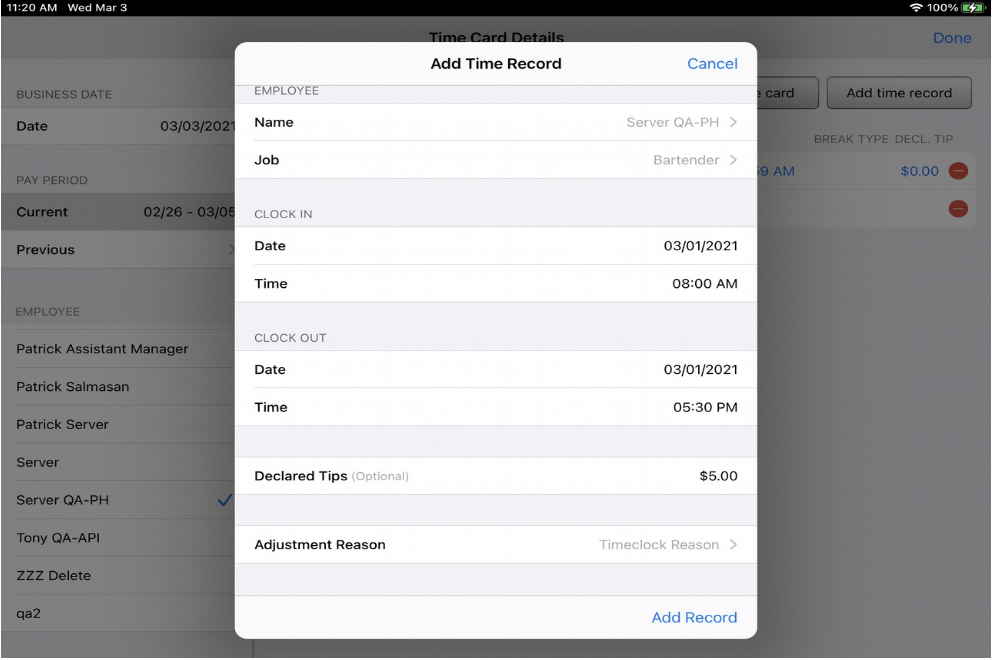
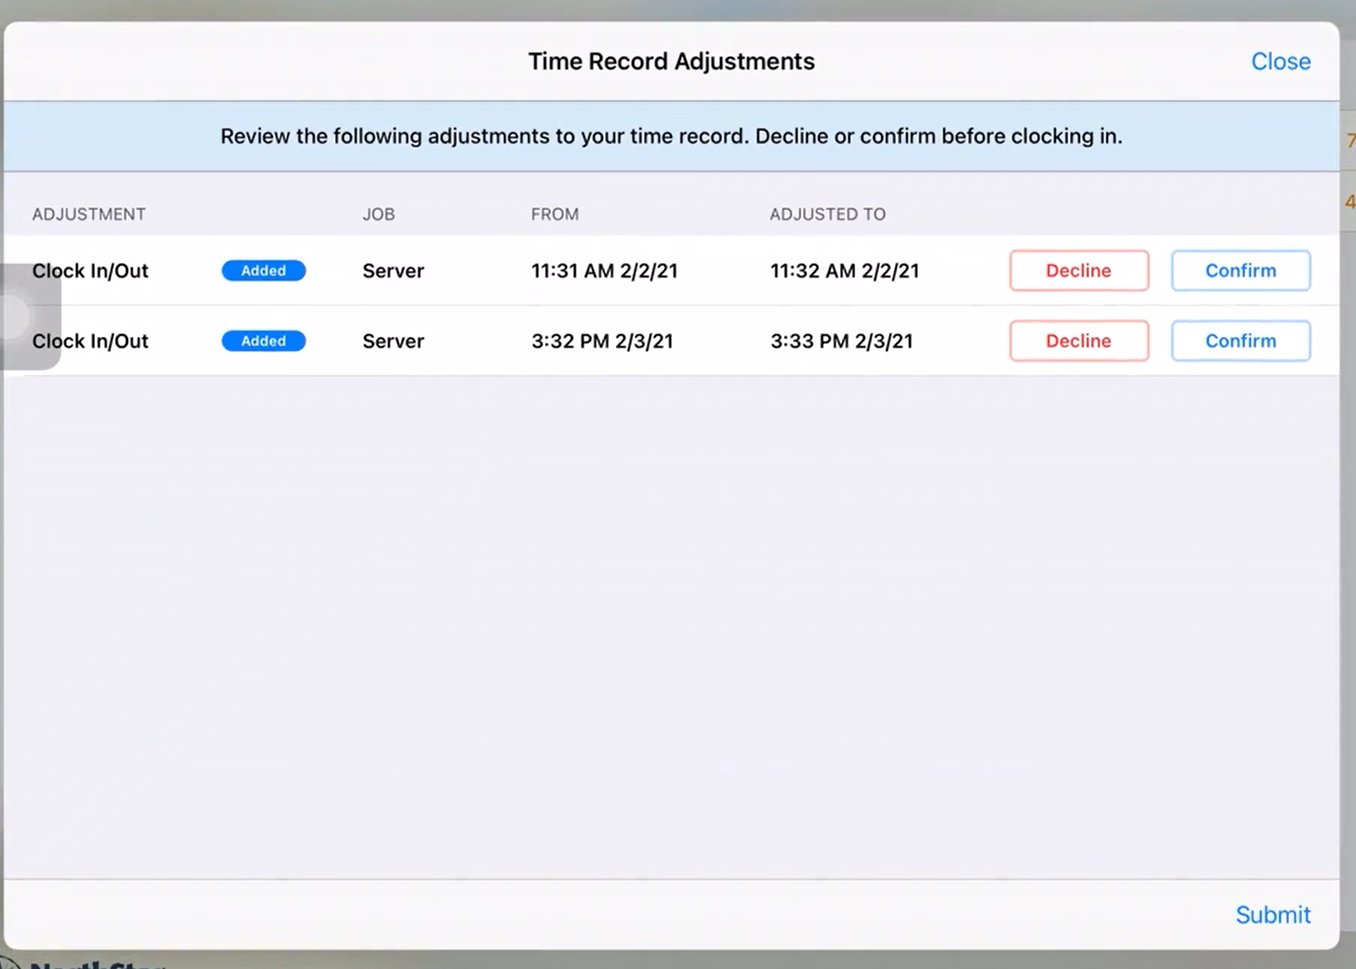
- Staff member logs in. Time Record Adjustments page reflects the added time record. Staff has option to Decline or Confirm adjustment before clocking in.
- Tap Submit without declining or confirming; an error will display and staff member is logged out.
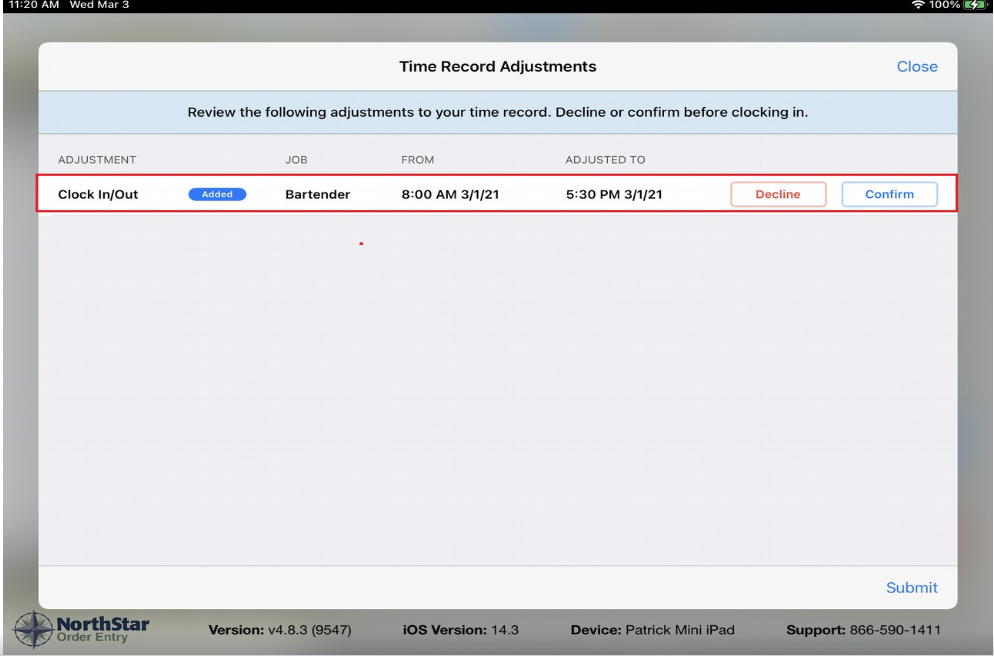
- Tap Decline and Submit. Staff is logged out.
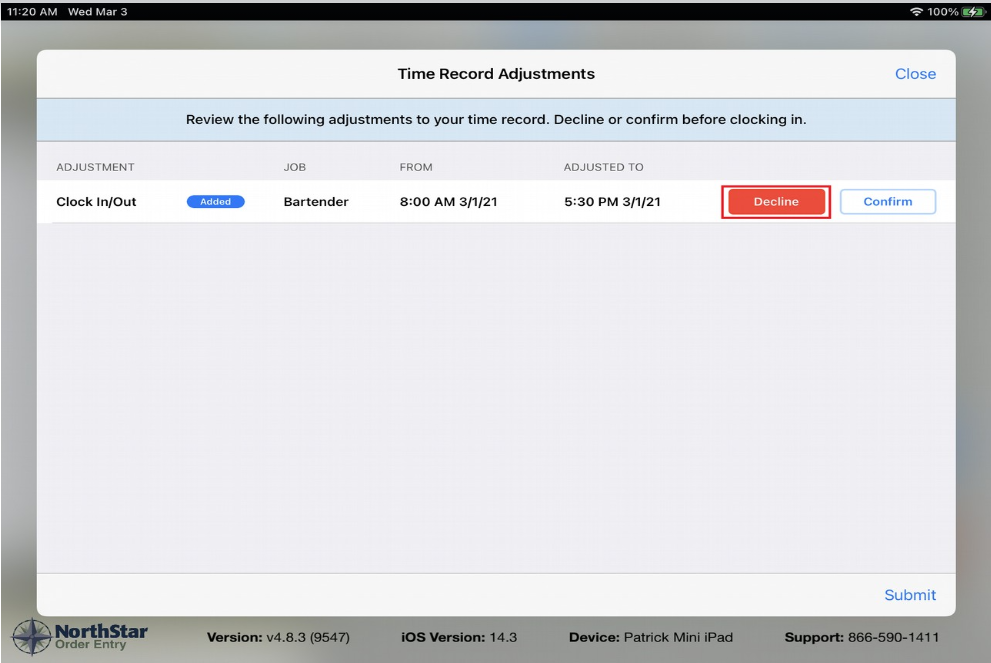
- Log in again. On Time Record Adjustments, tap Confirm and Submit.
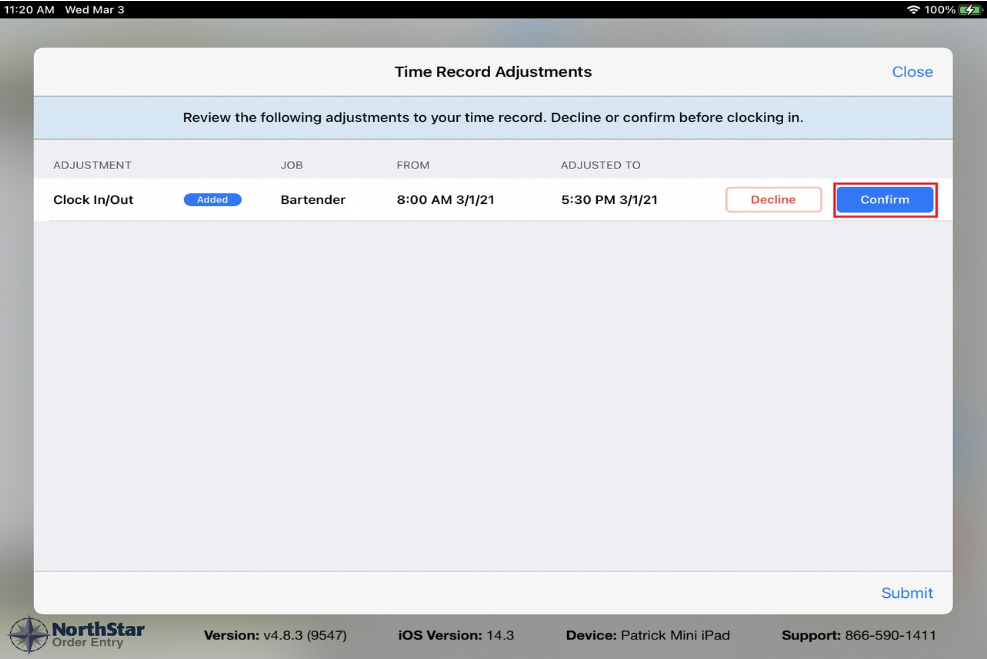
- After confirming, if staff member has not clocked in previously, they are redirected to the time clock to clock in.
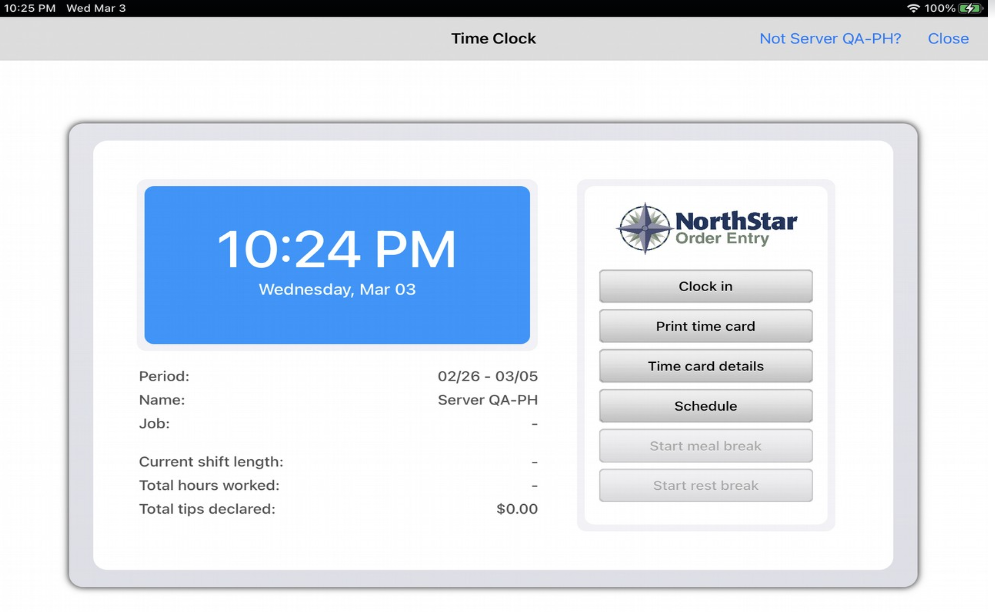
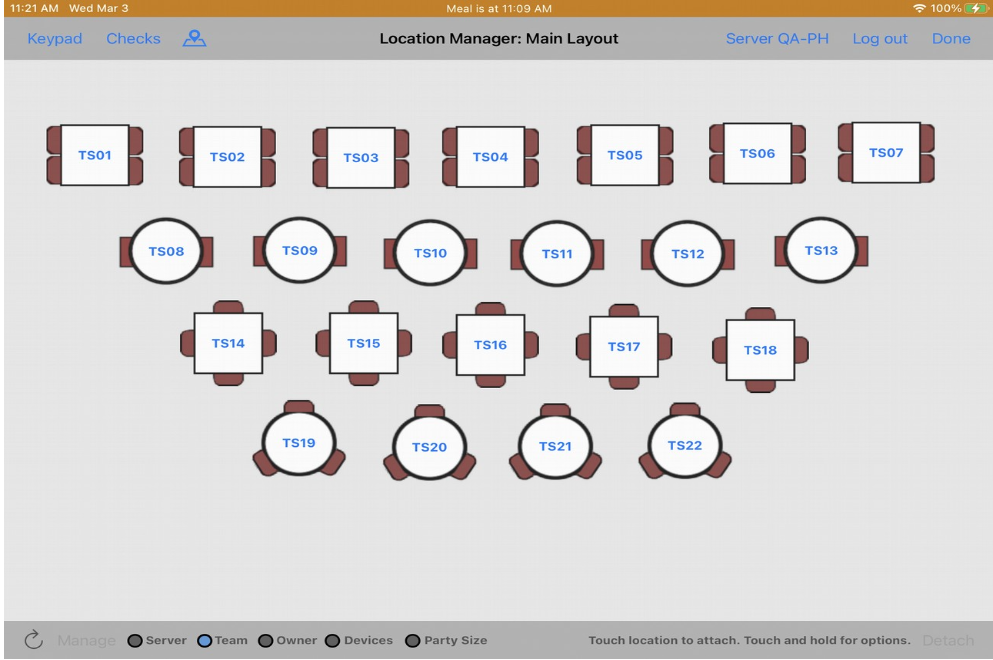
- If staff member is already clocked in, they are redirected to the location manager.
Multiple adjustments and selections- Manager makes several adjustments to staff member's time record.
- Staff member confirms two and declines one, then taps Submit.
- Staff member is logged out due to declining one adjustment.
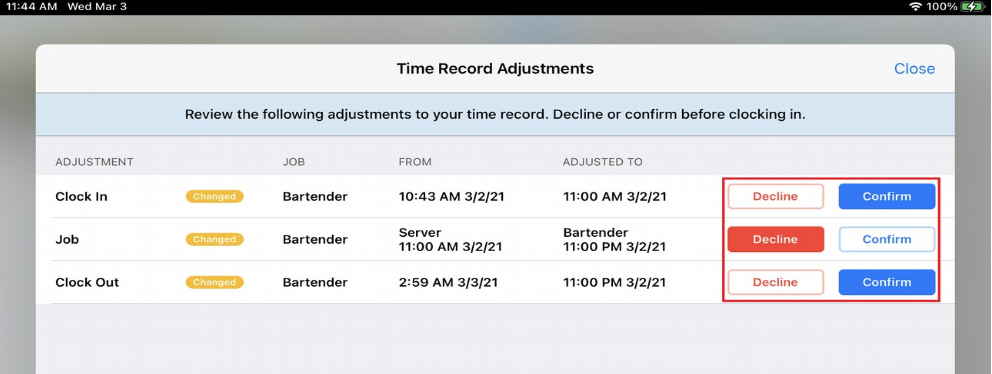
- Staff member logs back in. Time record adjustments page shows the remaining declined adjustment.
Manager view A manager view will be shown if any of the following job permissions are selected: - Can change the break type a user clocked out for
- Can change the job a user clocked in to work
- Can change the time punched in or out
- The manager's Time Record Adjustments view shows declined adjustments from staff members. (Displays at login or by clicking user name at top then Acknowledge Adjustments.)
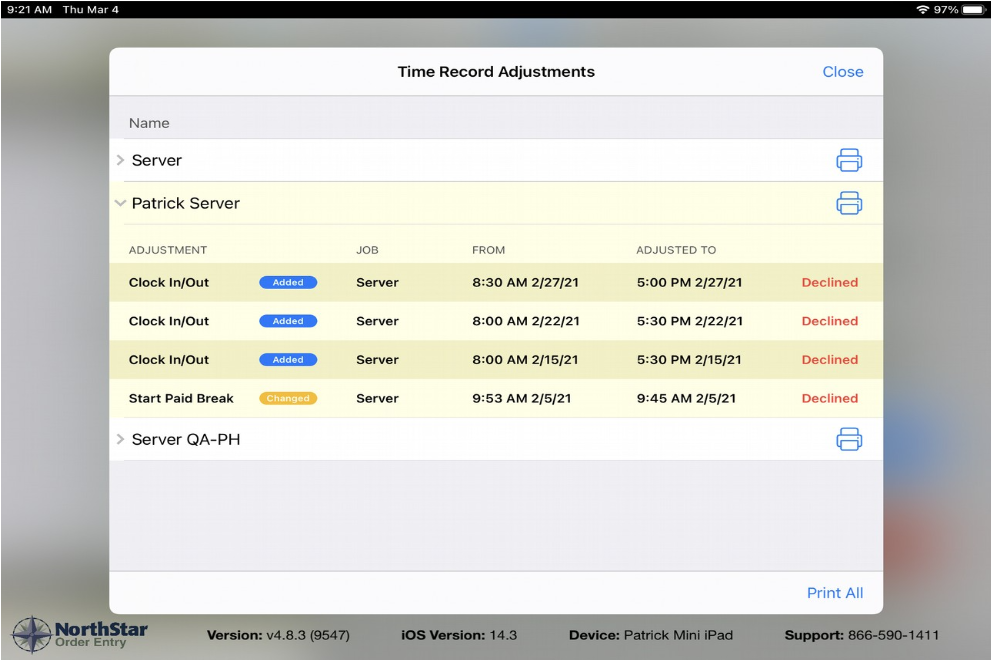
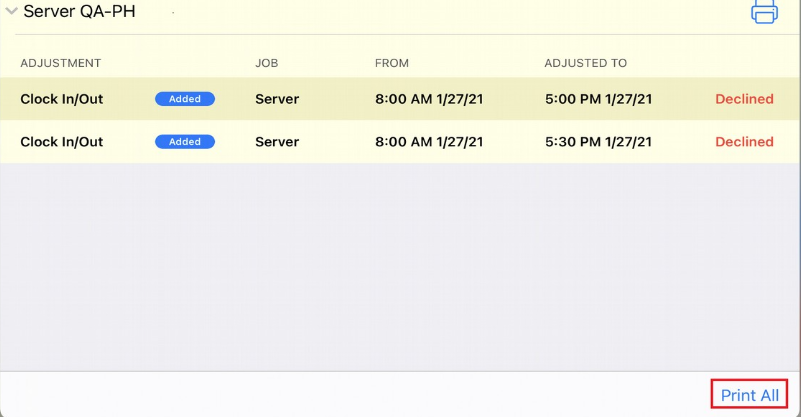
- Tap the printer icon to print a report of a staff member's declined adjustments from the manager view.

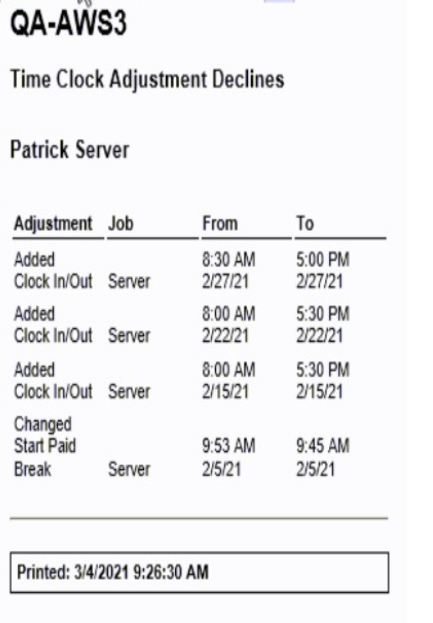
- Tap Print All to print all records.
Manager Override Manager can override the adjustment acknowledgement to allow the staff member to clock in without confirming the adjustment. The manager can also override their own adjustment acknowledgements. - Manager job must have permission to override adjustment acknowledgements.
Path: Users > Jobs > Permissions Select: Allow user to override adjustment acknowledgements - Override remains in effect until end-of-day.
- Override requires card swipe (not keypad entry).
- Staff user will continue to receive acknowledgment notice but will be able to dismiss screen and log in.
Workflow 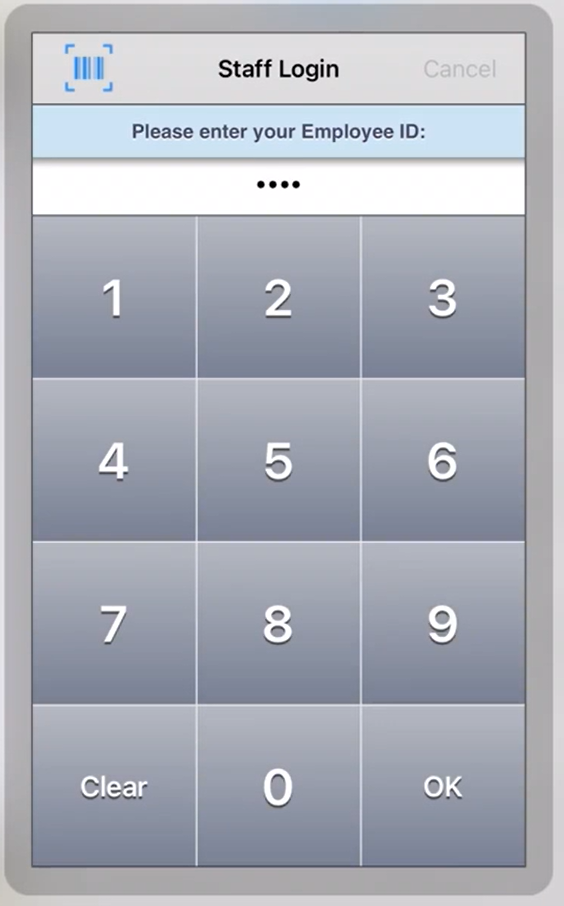
- Time Record Adjustments screen shows adjustments.
- Manager swipes card to override acknowledgement screen. User logs in again and then can clock in successfully.


View Time Records Adjustments - Staff and management can view outstanding adjustments to be acknowledged.
- Click user name then click Acknowledge Adjustments.
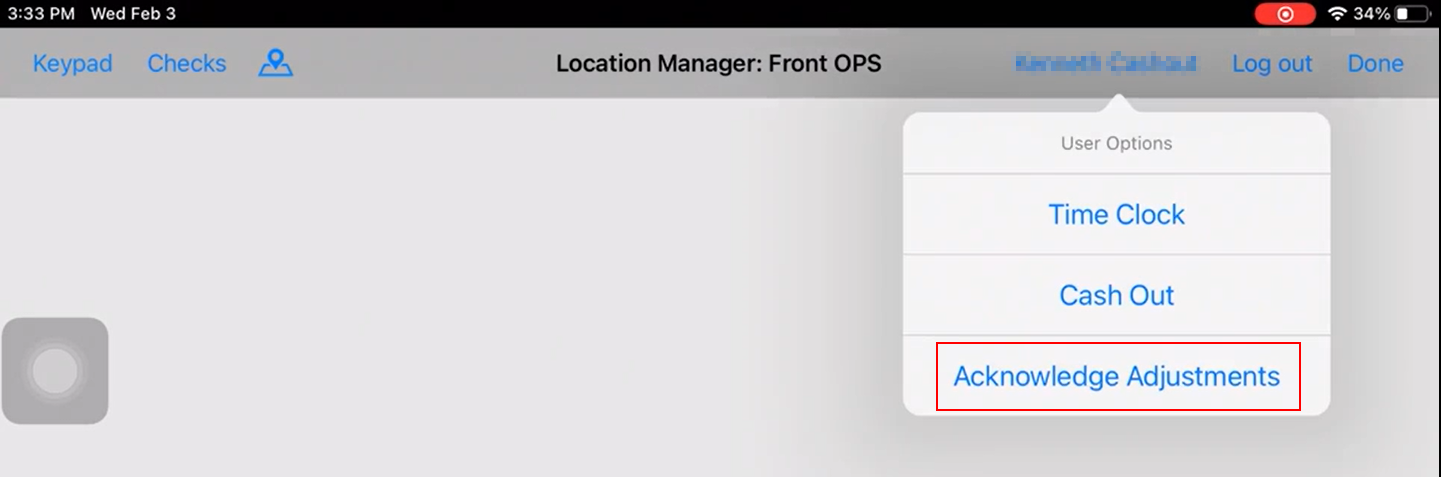
- Time Records Adjustments page shows outstanding adjustments to be acknowledged.
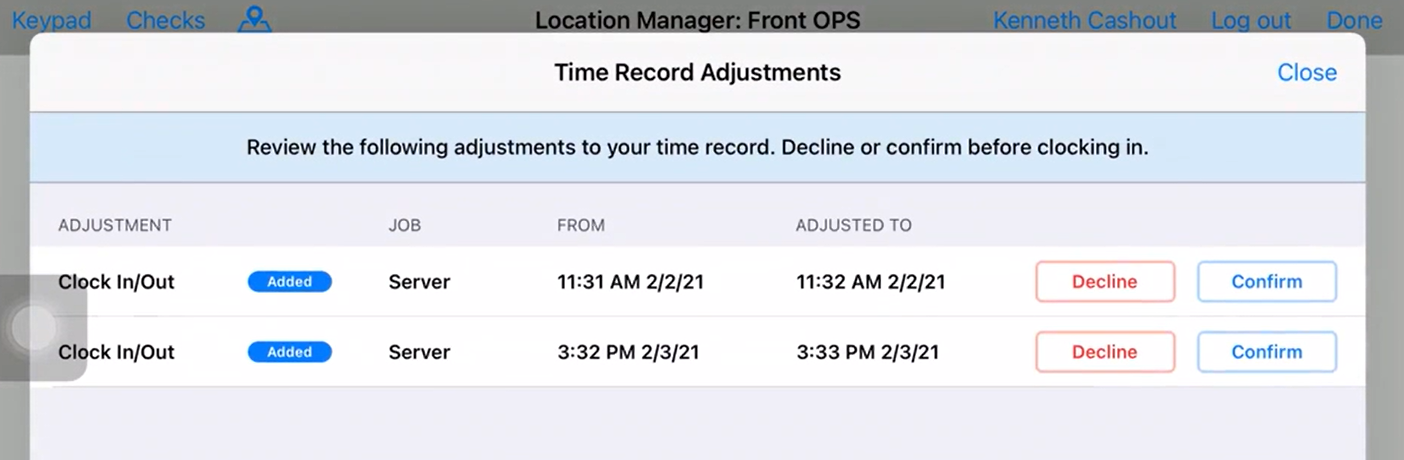
- User can confirm or deny adjustments.
|
Add Print Receipt to check finalization screensA Print Receipt button has been added to all check finalization screens for ease in printing/reprinting receipts. |
| N/A | Table service 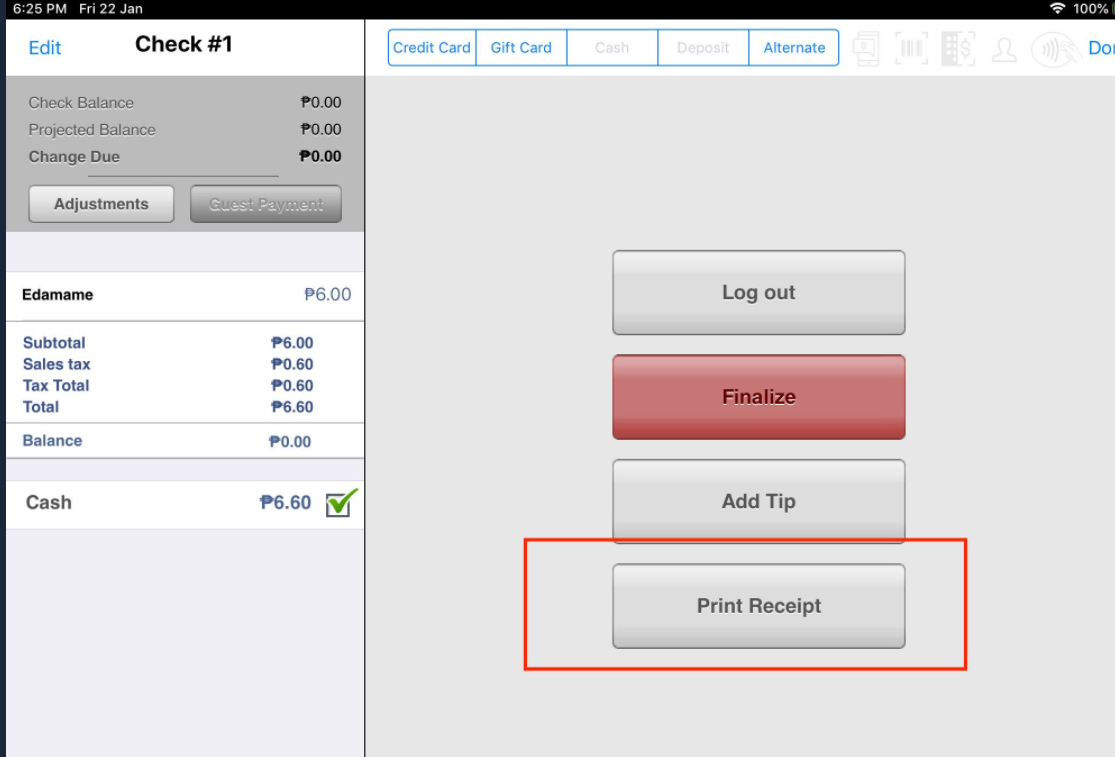
Drive thru 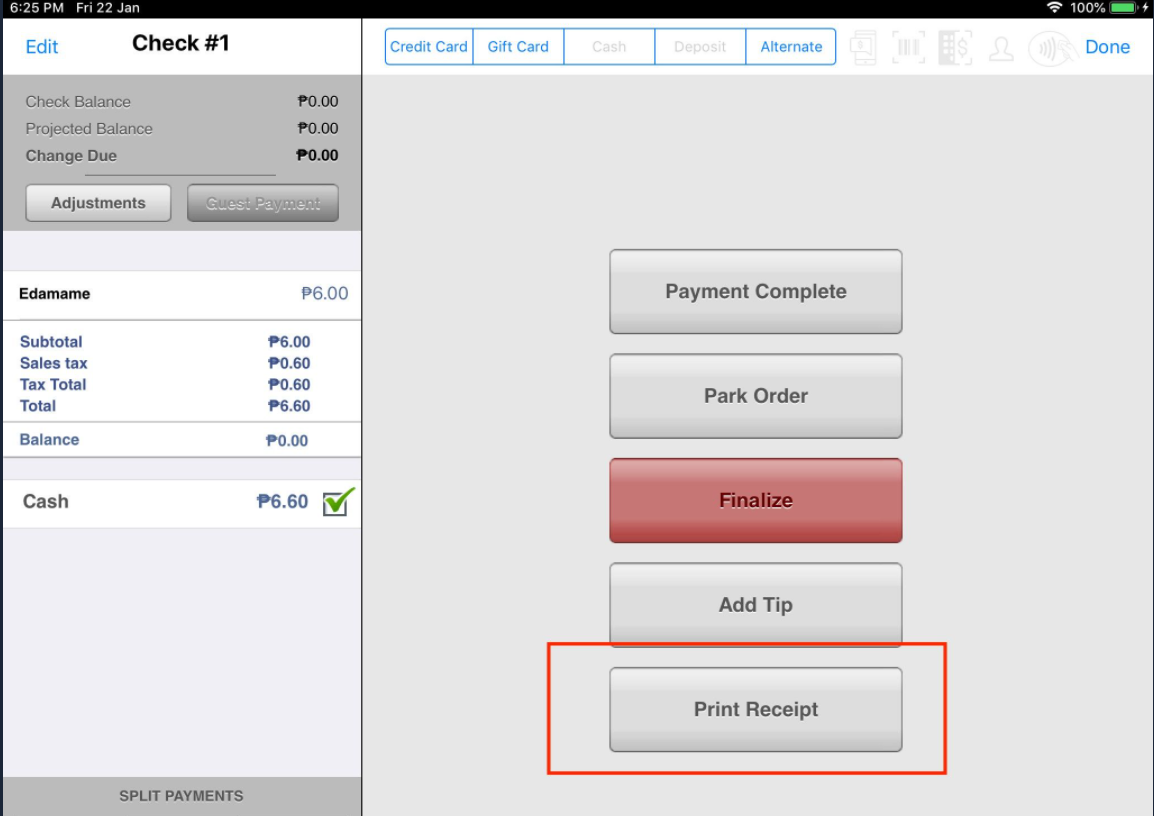
Counter service, guest facing, kiosk 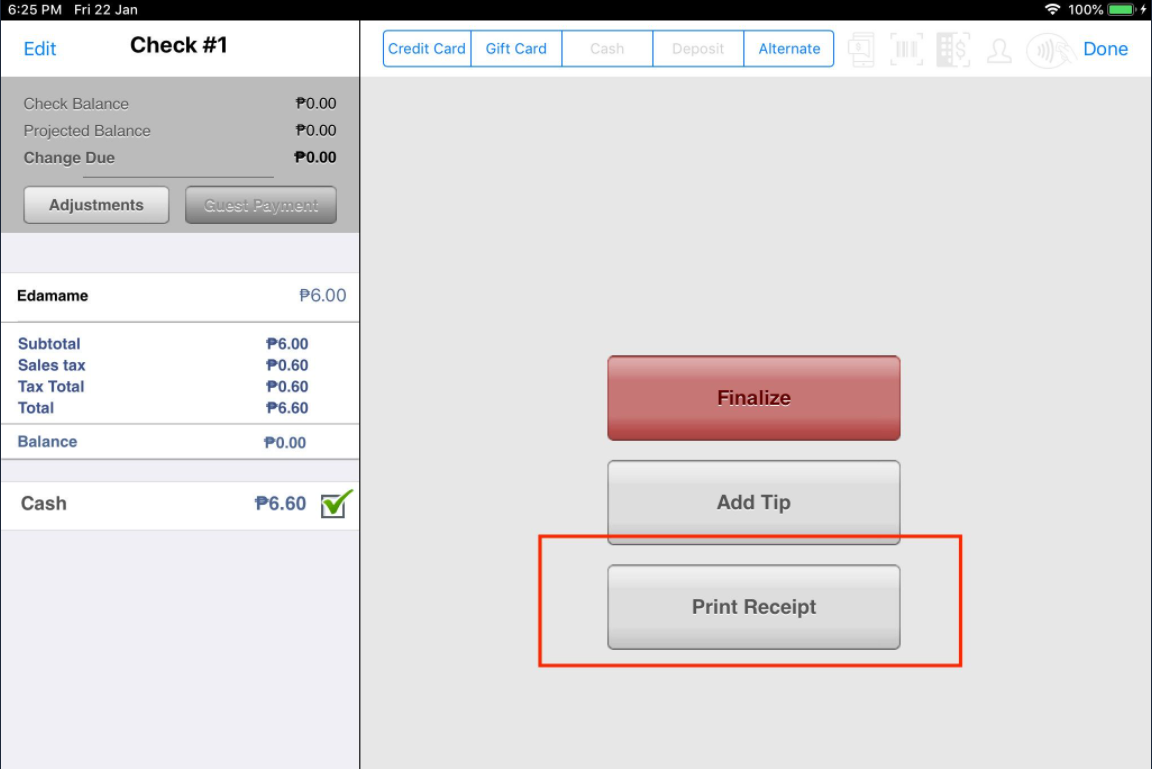
|
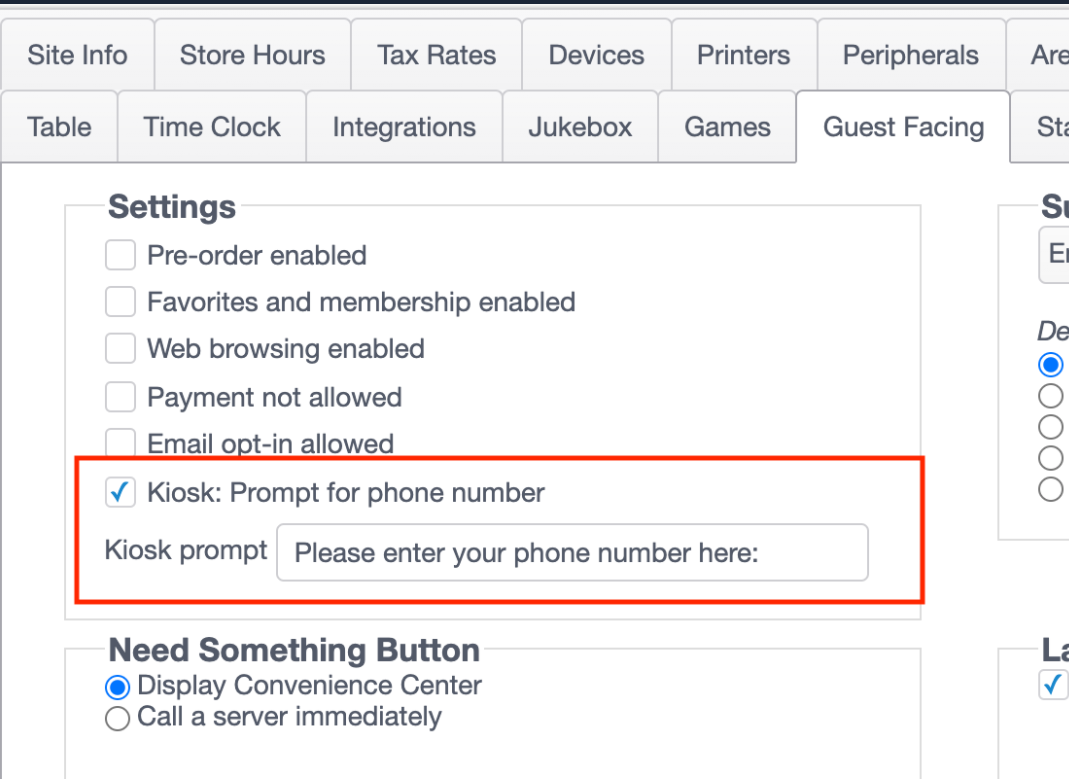
Create a custom message to prompt the kiosk user to enter their phone number before payment. Setup: Guest Facing (Sites) |
Configuration | Operation |
|---|
Path: Edit a site > Guest Facing - Select Kiosk: Prompt for phone number
- In the Kiosk prompt text box, enter the text to be shown in the app's guest interface.
| - Place an order at the kiosk and tap I want to pay.
- The kiosk prompt text with keypad will display.
- Enter the phone number and tap Confirm.
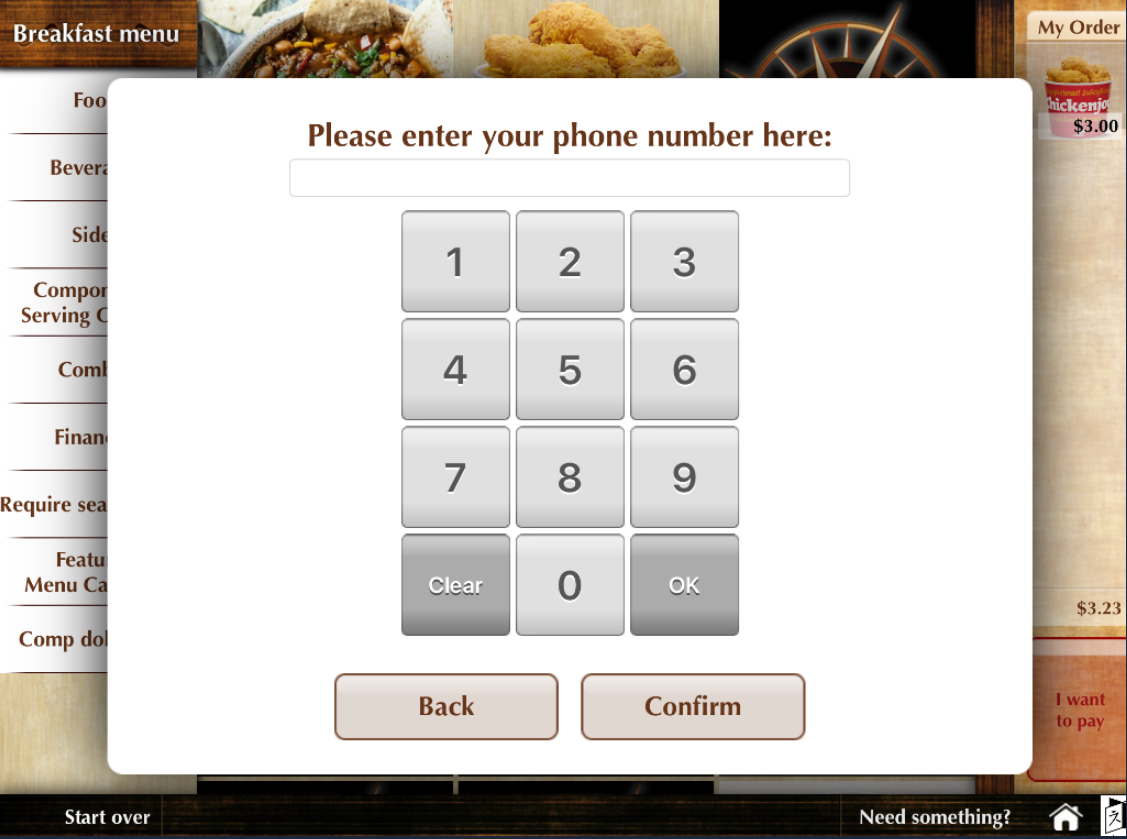
Note: If both the Kiosk prompt and the Kiosk Area setting Guest identifier required are selected, the kiosk phone number prompt will appear. |
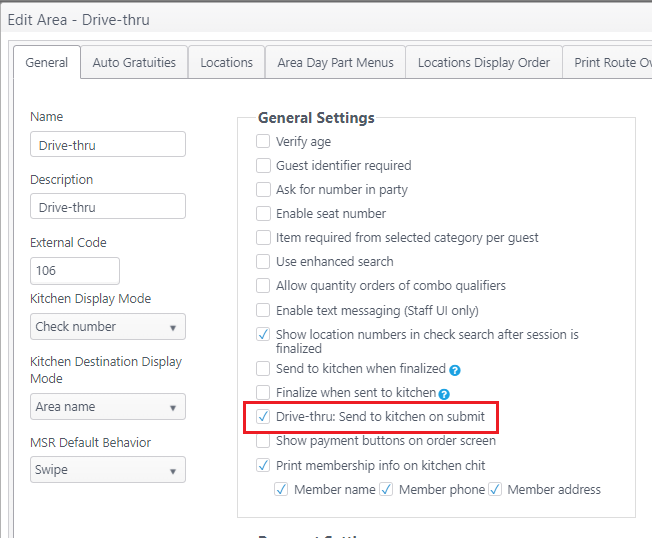
Drive thru: Send order to kitchen on submit; controlled by areaWhen this setting is selected for an area, items ordered in that area are sent to the kitchen when the order is submitted. If setting is not selected, items are sent to the kitchen as they are ordered. Documentation: Drive Thru Order Workflow Setup: Add an Area |
Configuration | Operation |
|---|
The ability to send ordered items to kitchen on submit is controlled by area. Path: Sites and Groups > Edit site > Areas > Edit area - Select: Drive-thru: Send to kitchen on submit
| - Order items. (Note red indicator bar next to items indicating order has not been sent.) Click Submit Order to send ordered items to kitchen.
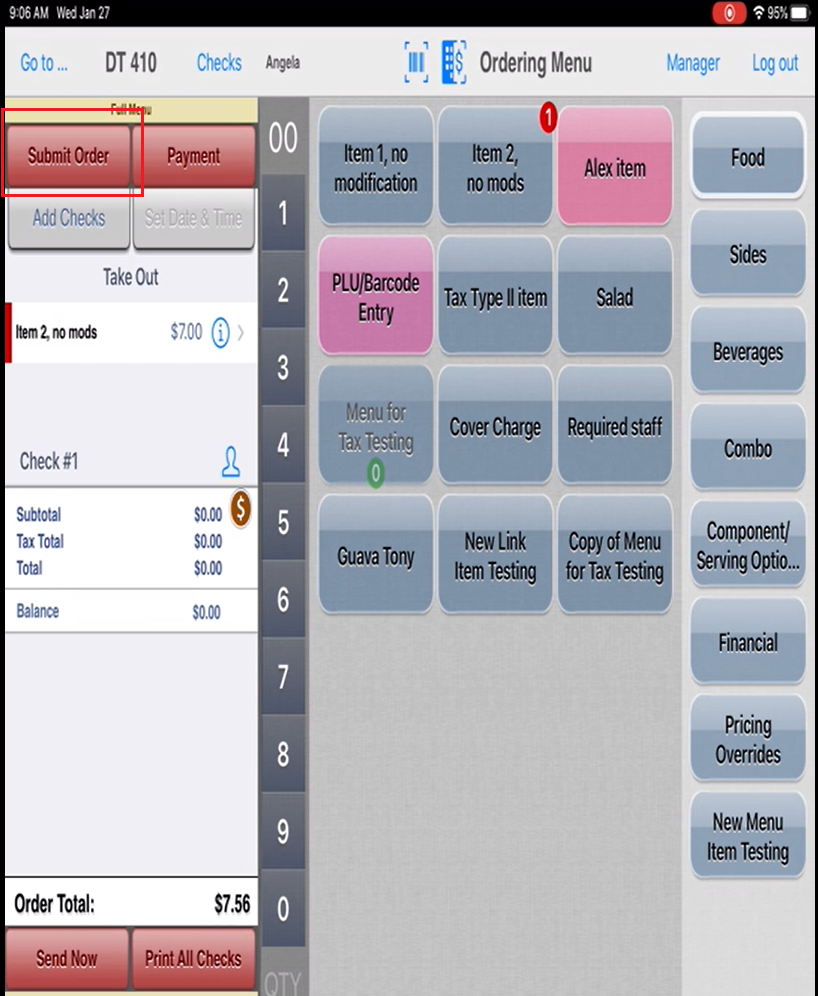
- Green indicator bar indicates order has been sent. Done button shows in place of Submit Order.
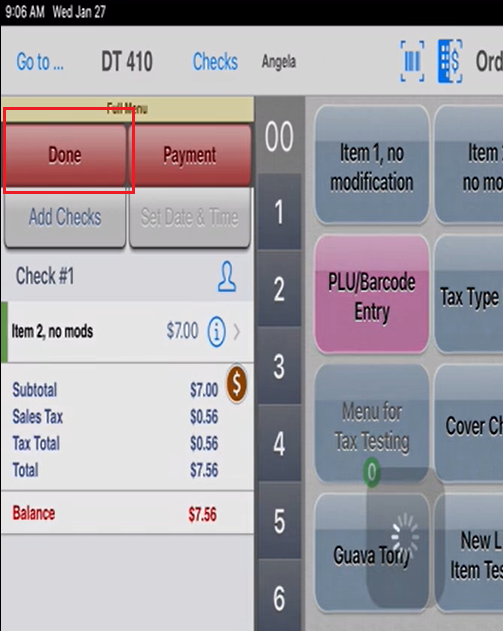
- Order is cleared from location and location is ready to accept next order.
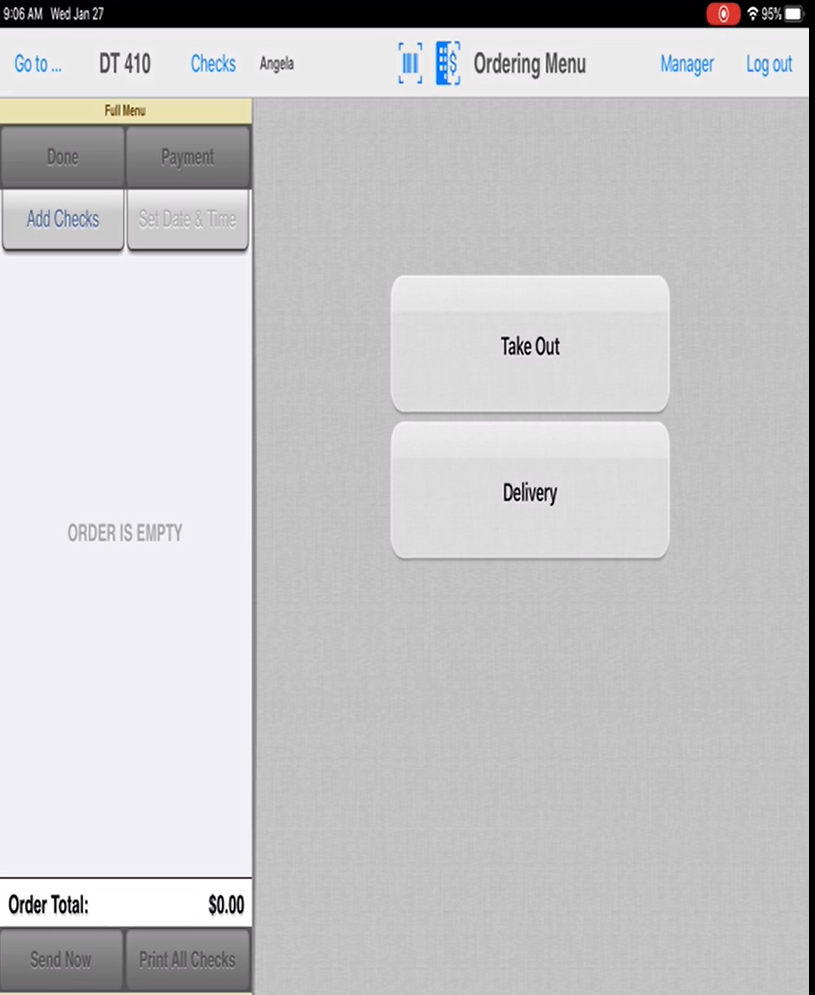
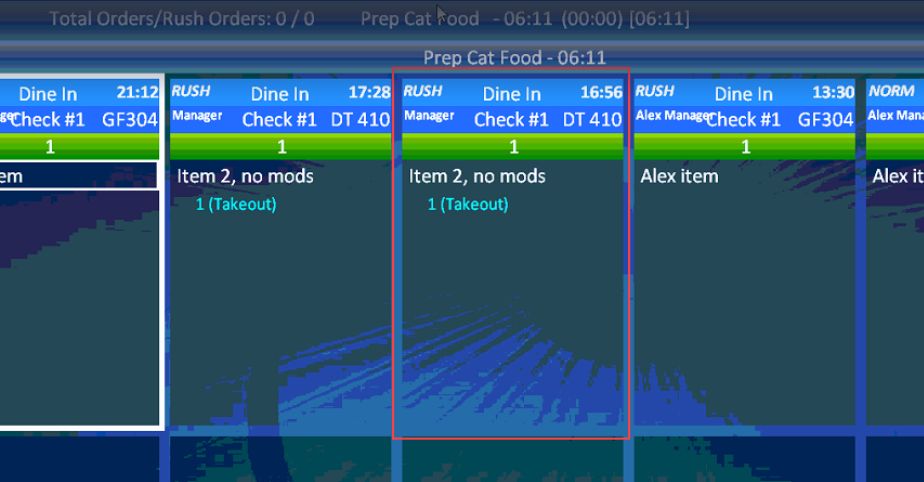
- Order appears on kitchen display.
|
Order Entry Server Release |
|
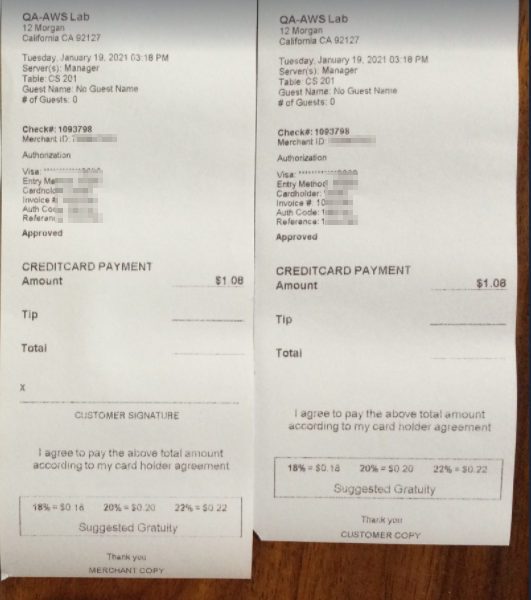
Print Duplicate Receipts: Exclude credit card authorization chits NorthStar Order Entry release v. 4.8 added the ability to print a duplicate receipt. The feature has been improved to exclude credit card authorization chits from duplicate printing. Documentation: Print Duplicate Receipt Setup: Printers (Sites) |
Configuration | Operation |
|---|
Edit a site > Printers - Select Duplicate Receipt Printer 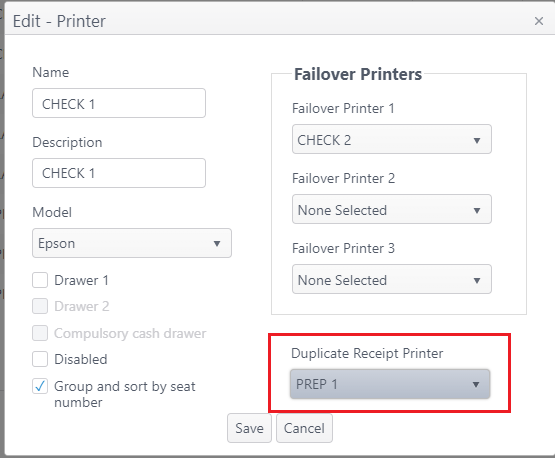
Edit a site > Areas > Edit a location - select print settings 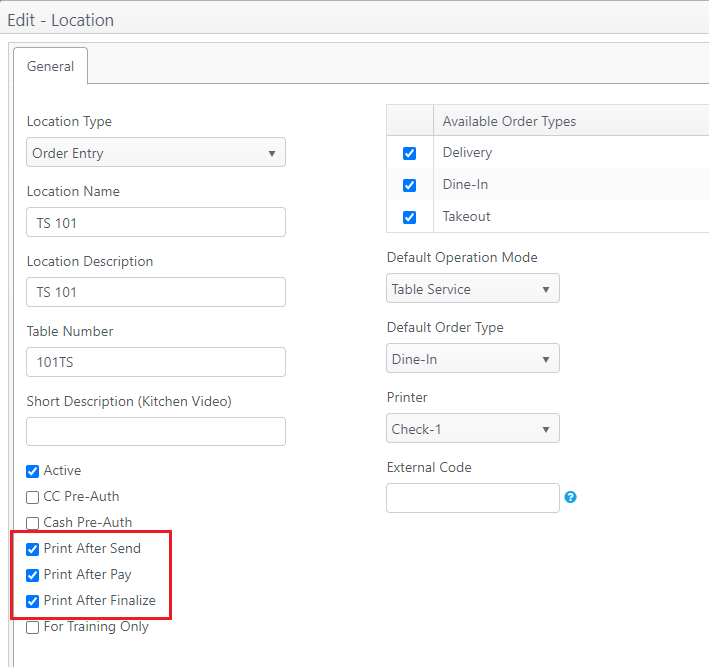
|
Only one copy each of credit card merchant copy and customer copy is printed.
 |
Card Processor: Shift4 enabled for PAX S300Shift4 has been enabled for credit card payment on PAX S300 payment device. |
|
Configuration | Operation |
|---|
Path: Edit site > Payment - Click Add Processor
- Select (PAX) Shift4 | Credit
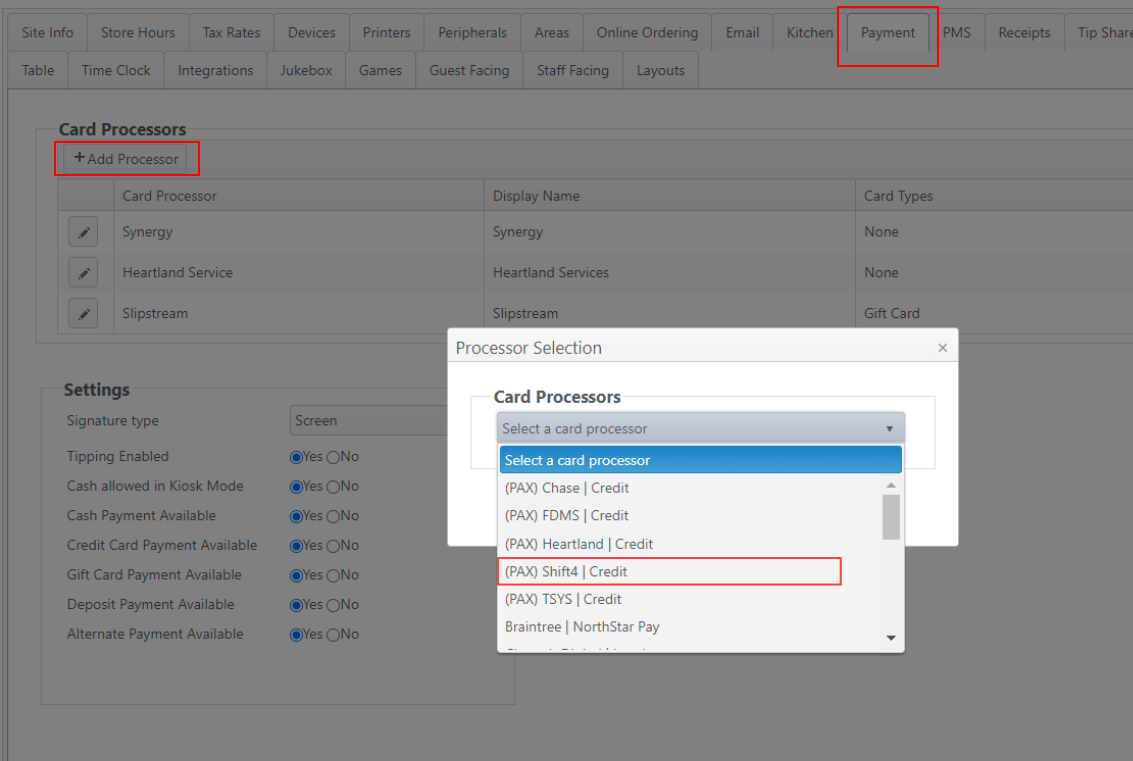
| Payment, tip and refund can be performed on PAX payment device with Shift4 as payment processor. Payment 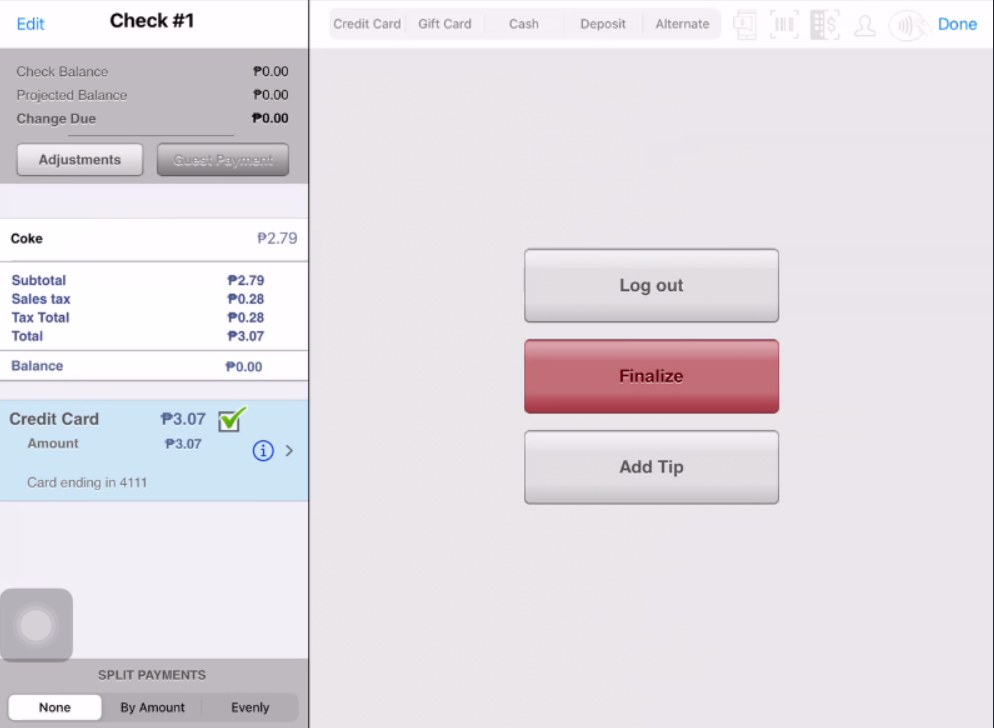
Add tip 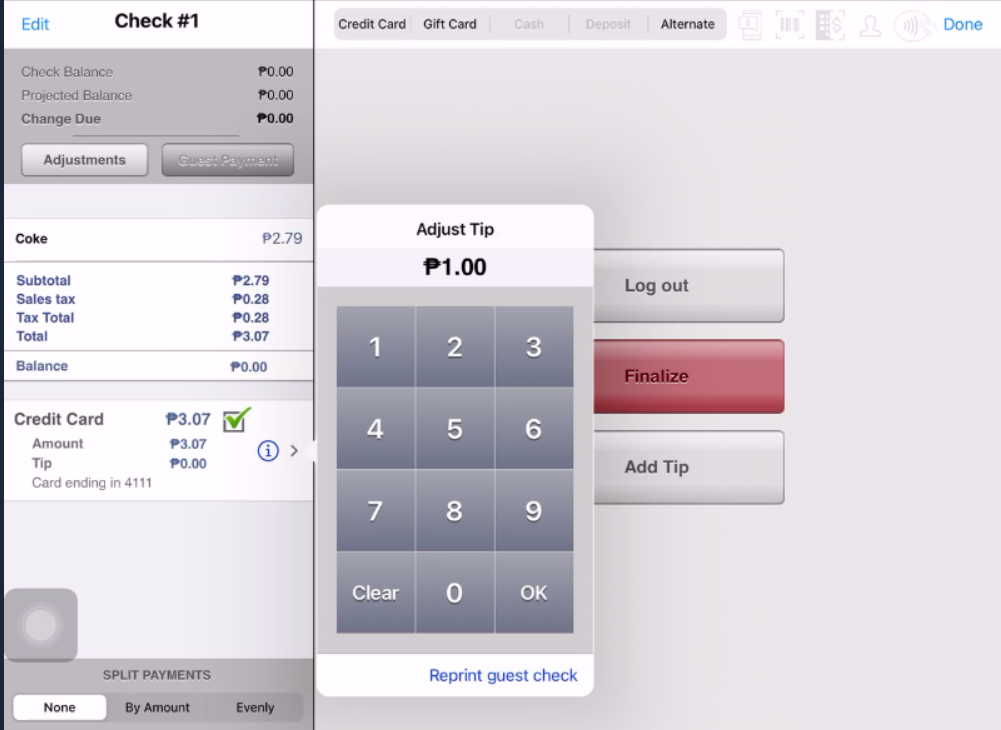
Apply refund 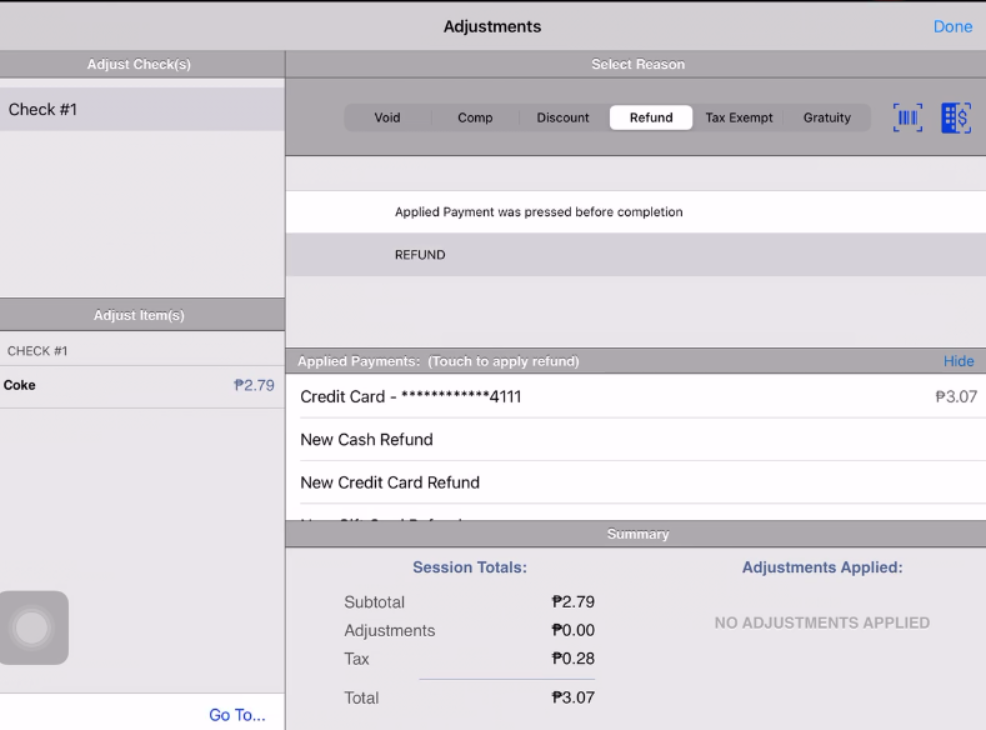
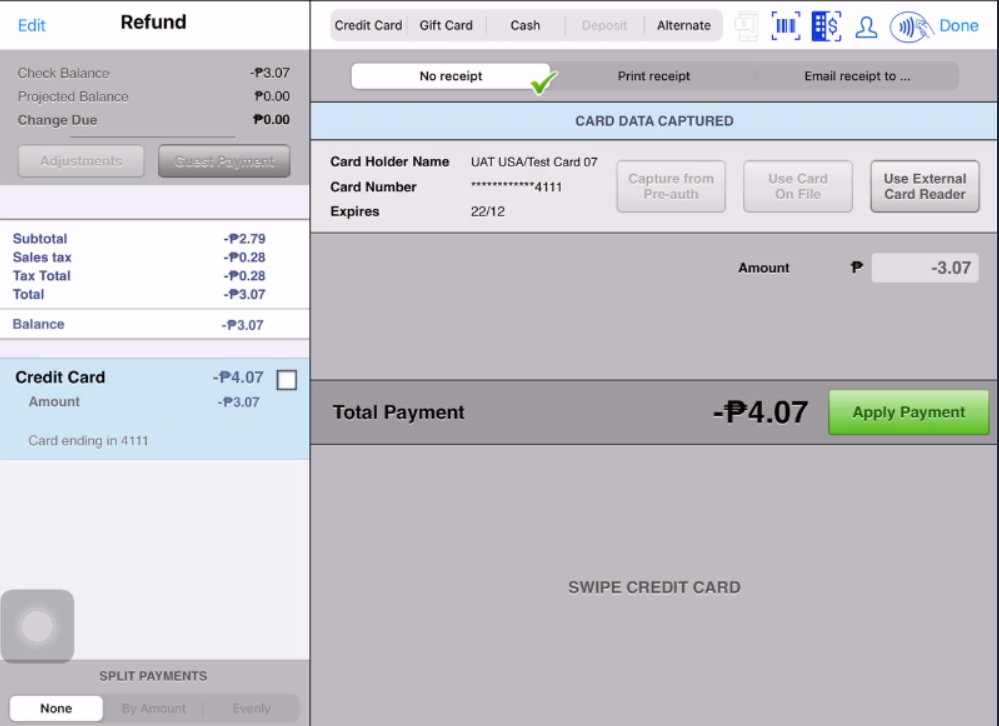
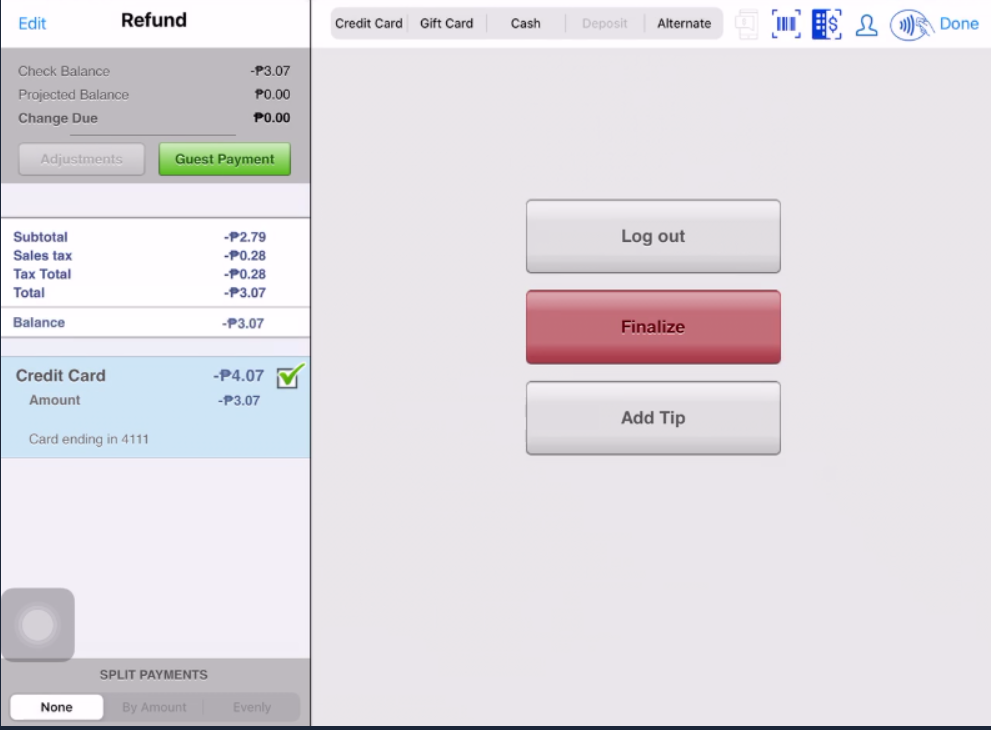
|
QSR Kitchen Display - Placements: Group components applied to entire item separately from individual placements A menu item can be configured to have more than one placement, e.g., a pizza with left and right placements. Components added to or removed from the entire item are now shown as applied to the item as a whole, not as placements. |
Configuration | Operation |
|---|
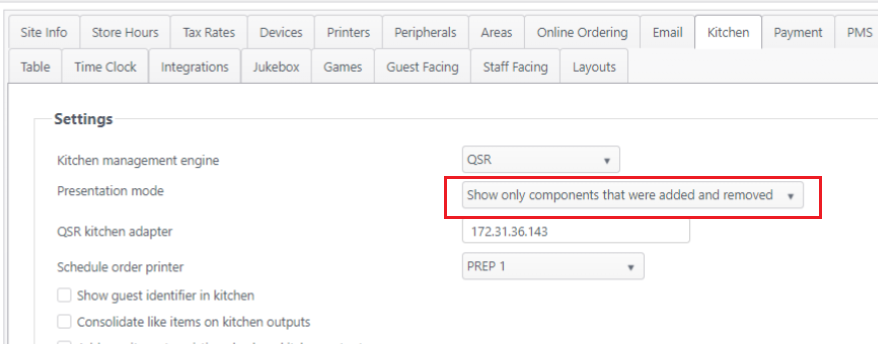
Pre-conditions - Path: Edit site > Kitchen
Select setting: Show only components that were added and removed
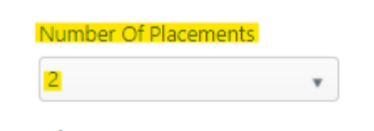
 - Path: Products > Menu Items > Edit a menu item
Number of Placements: select more than 1 placement
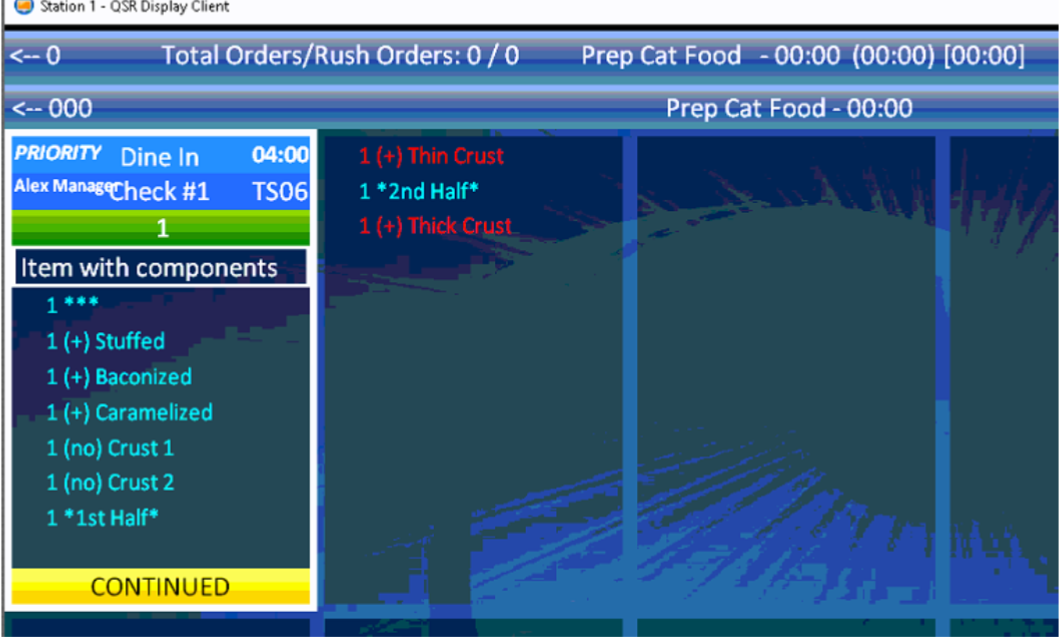
| When pre-conditions are set, the QSR display will show only the components that were added and components that removed. Example: Screen shows: - Components added to both halves (entire item): Stuffed, Baconized, Caramelized
- Default components Crust 1 and Crust 2 are removed
- Component Thin Crust added to 1st half
- Component Thick Crust added to 2nd half
|
|
|
ACD Payment Improvements (feature added post-release) |
|
Configuration | Operation |
|---|
OE-16230 Improvements made to payments with the Advanced Customer Display Improvements include UI fixes and the following: Pair eDynamo device from Payment screen ACD Payment on iDynamo 6 through EMV and swipe Automatic pairing with available devices
| Pair eDynamo device from Payment screen- From Payment screen, tap NFC button to initiate payment workflow
- External card reader pop-up will display and then will prompt user to pair the payment device
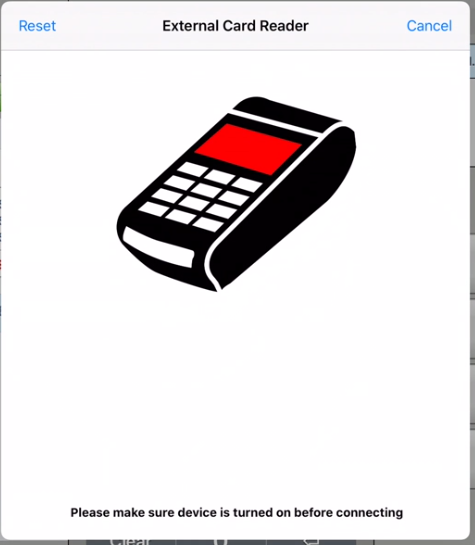 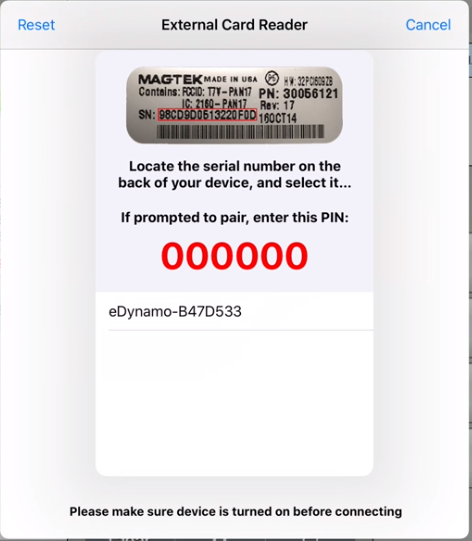
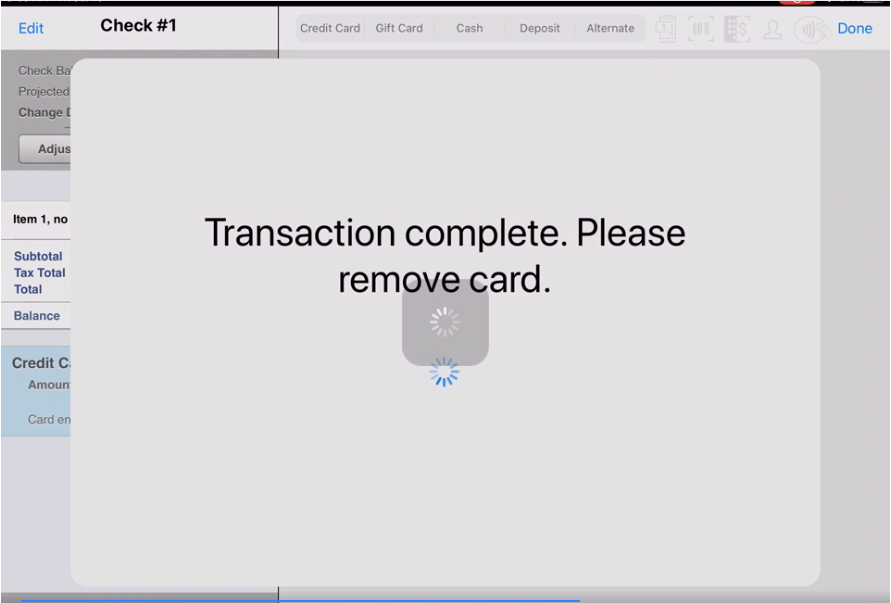
- After pairing is complete, the user will be prompted to insert the payment card to complete payment on the eDynamo payment device.

- A message will display when payment is complete and check can be finalized.
ACD Payment on iDynamo 6 through EMV and swipe Previously, payment could be made using PAX and eDynamo payment devices. This improvement allows users to pay using an iDynamo6 device, either through EMV or card swipe. 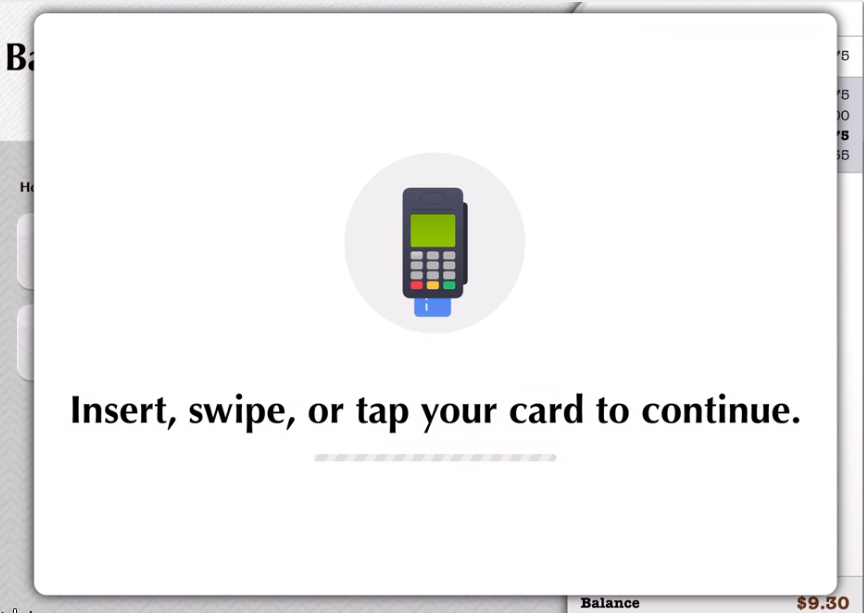
Automatic pairing with available devices- When iDynamo6 is detached from iPad, automatically connect to a paired eDynamo.
- When eDynamo is detached from iPad, automatically connect to a paired iDynamo6.
|