Twilio Setup and Credentials for ECM Instances (SQL Included)
- Alger Alama
- Rose Eliff (Unlicensed)
Twilio is a service needed for NorthStar Order Entry in order to be able to send texts and updates to clients regarding orders placed in restaurants that utilize our point-of-sale.
Without Twilio credentials, restaurant sites will not be able to utilize the features: Text to Pay or Dispatch Dashboard.
Twilio Account
- Attain a Twilio account through the Product Owner or CTO.
- Log in to https://www.twilio.com/login.
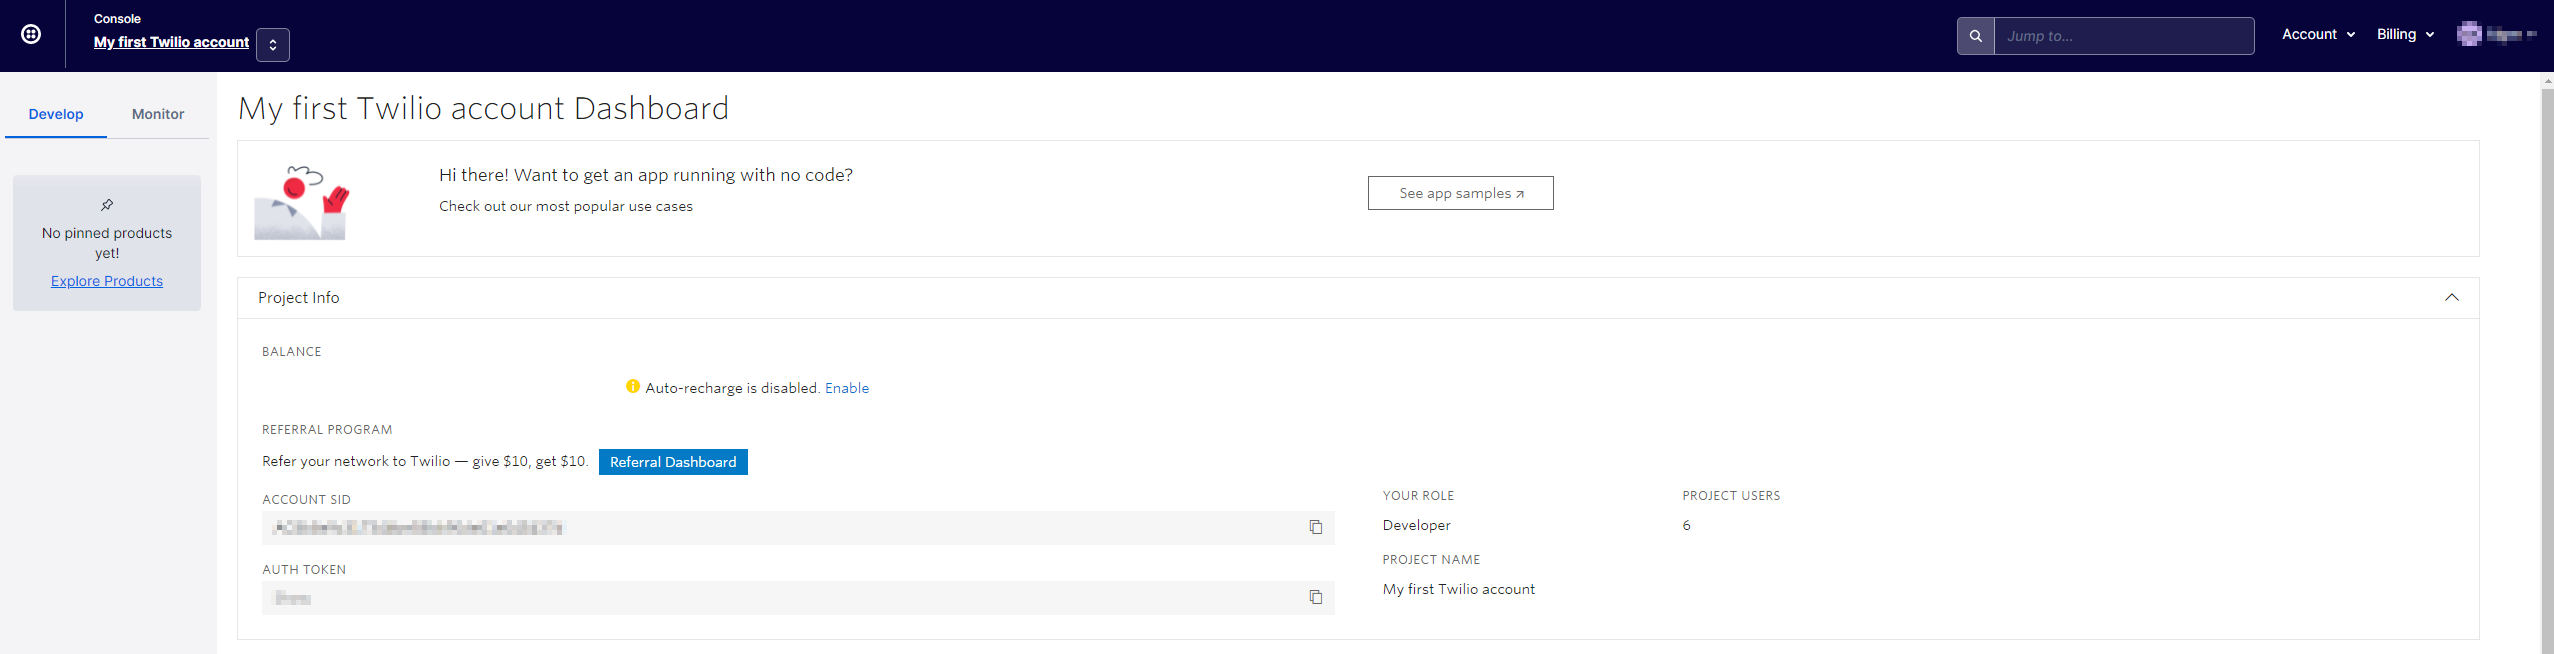
- Your Twilio account Dashboard should look similar to the picture below with additional customizable sections.
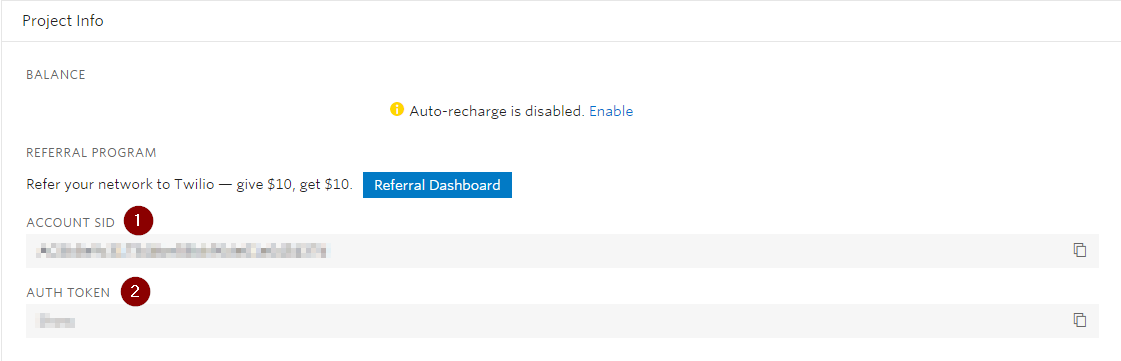
Account SID and Auth Token
The Project Info section holds both the:
- Account SID
- Auth Token
These two are required in order to implement our text based features. Make note of both in your account.
Purchase a New Twilio Phone Number
A new phone number might need to be implemented for an ECM Instance. (Approval needed by Product Owner/CTO/CEO.)
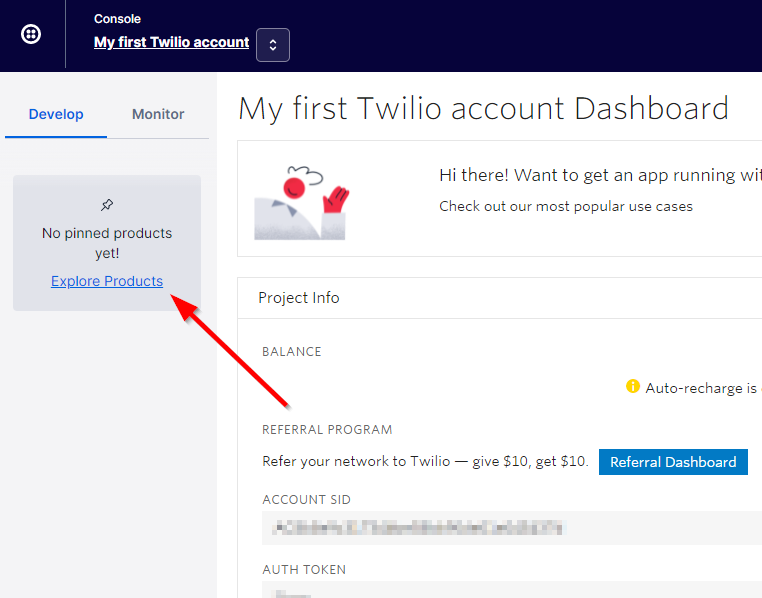
- Click Explore Products on left panel of the dashboard.
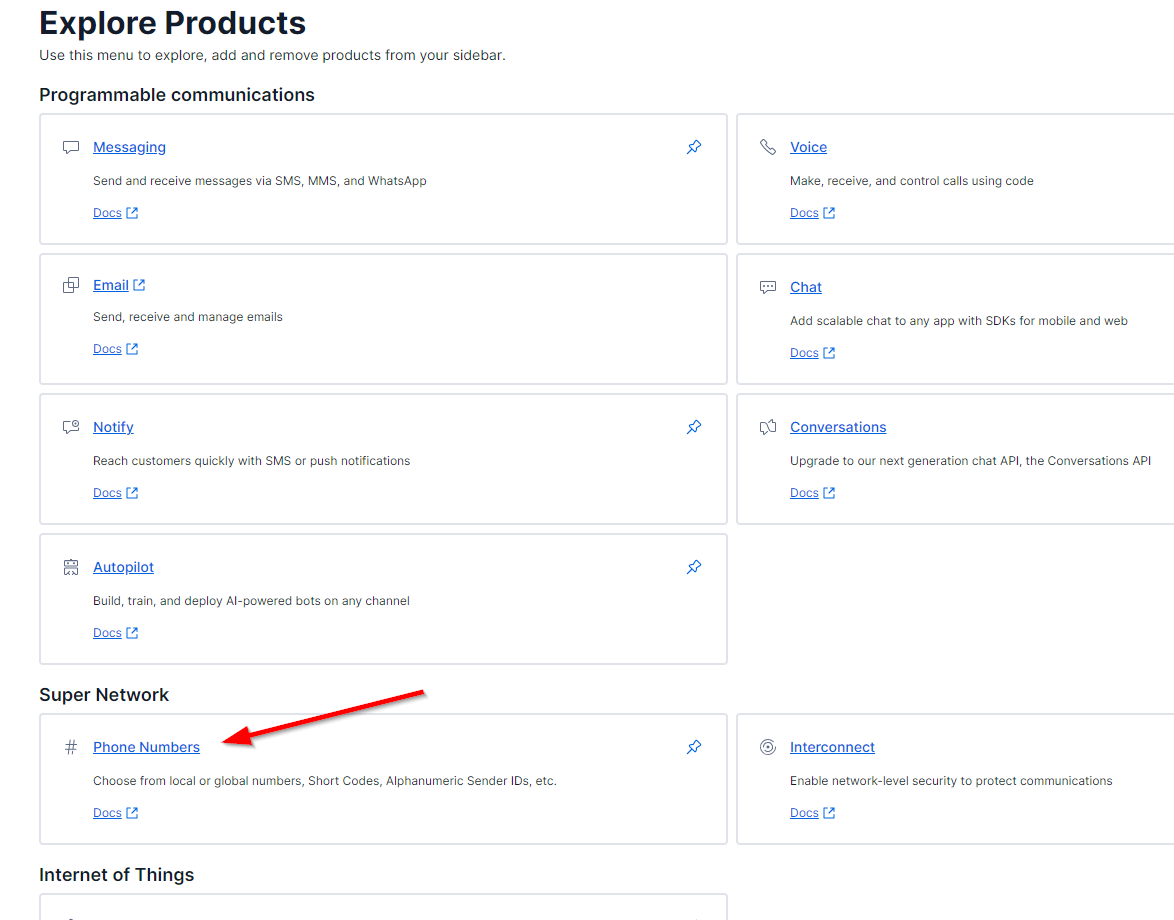
- Click Phone Numbers under Super Network
- Click Manage
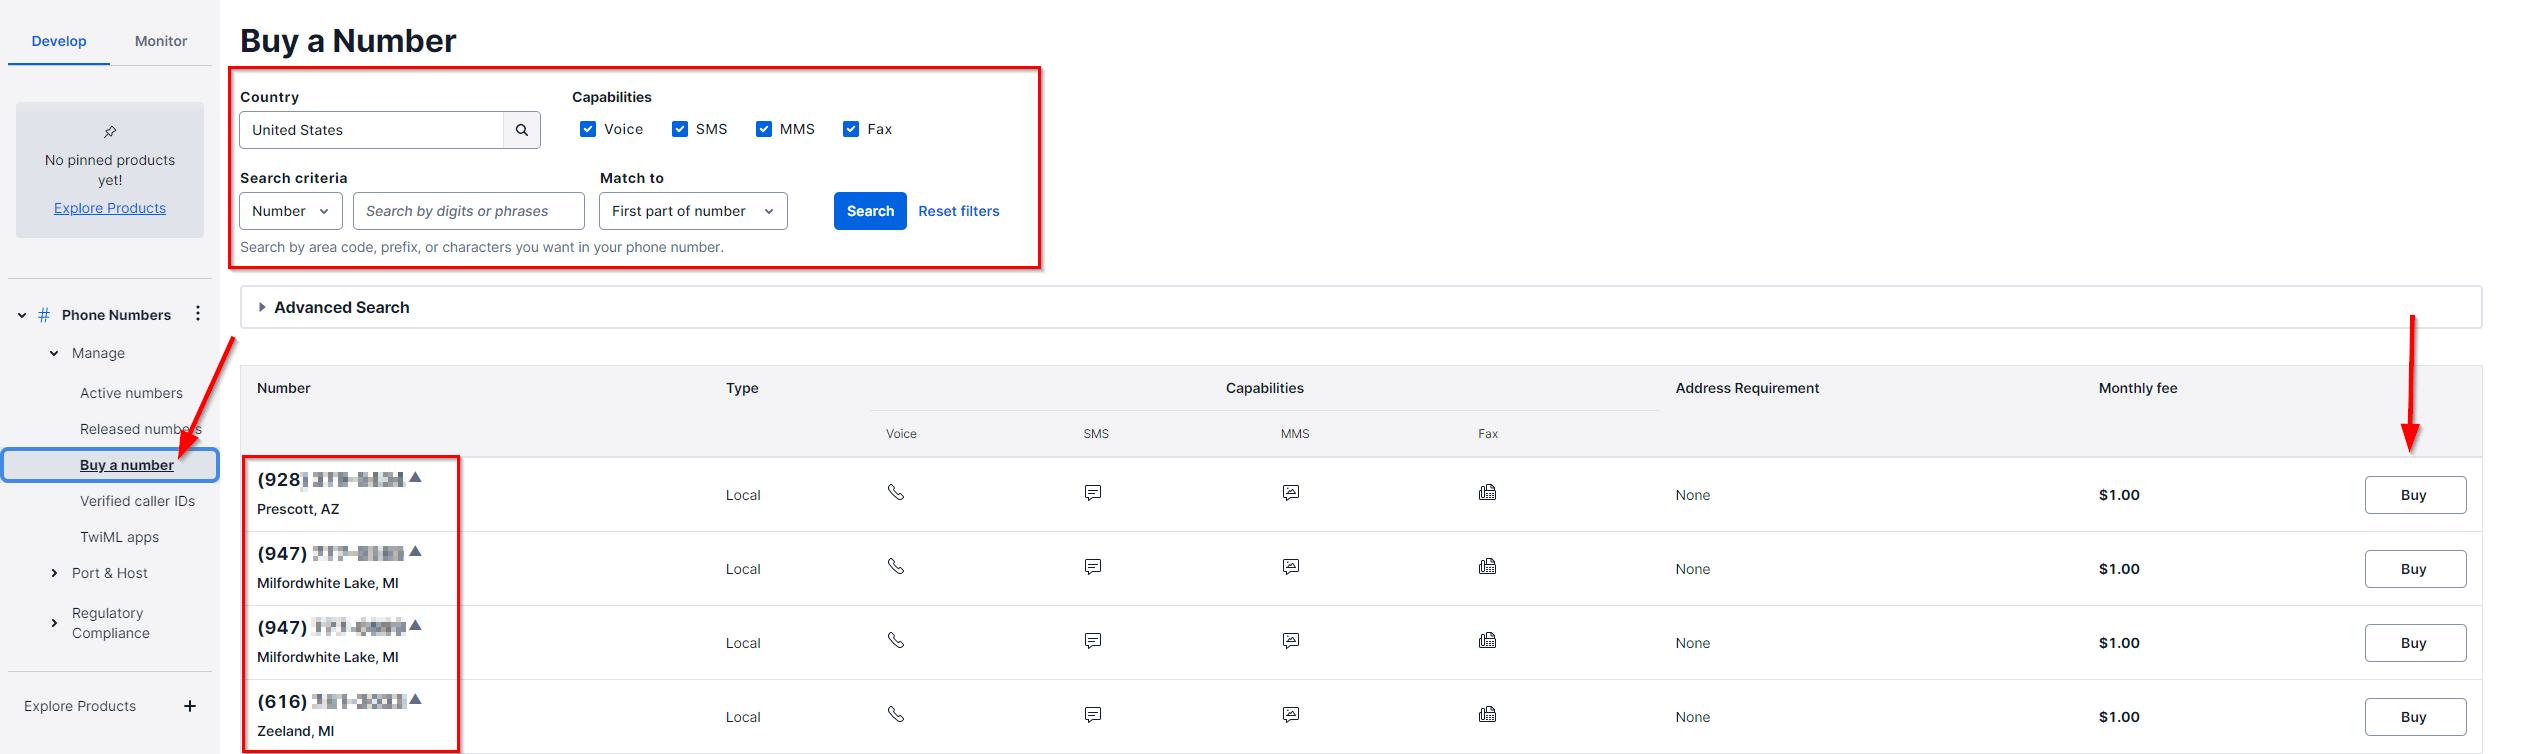
- Click Buy Number
- Input search criteria. (Utilize Advanced Search for access to beta numbers and specific requirements.)
- All purchasable numbers will be listed.
- Click Buy
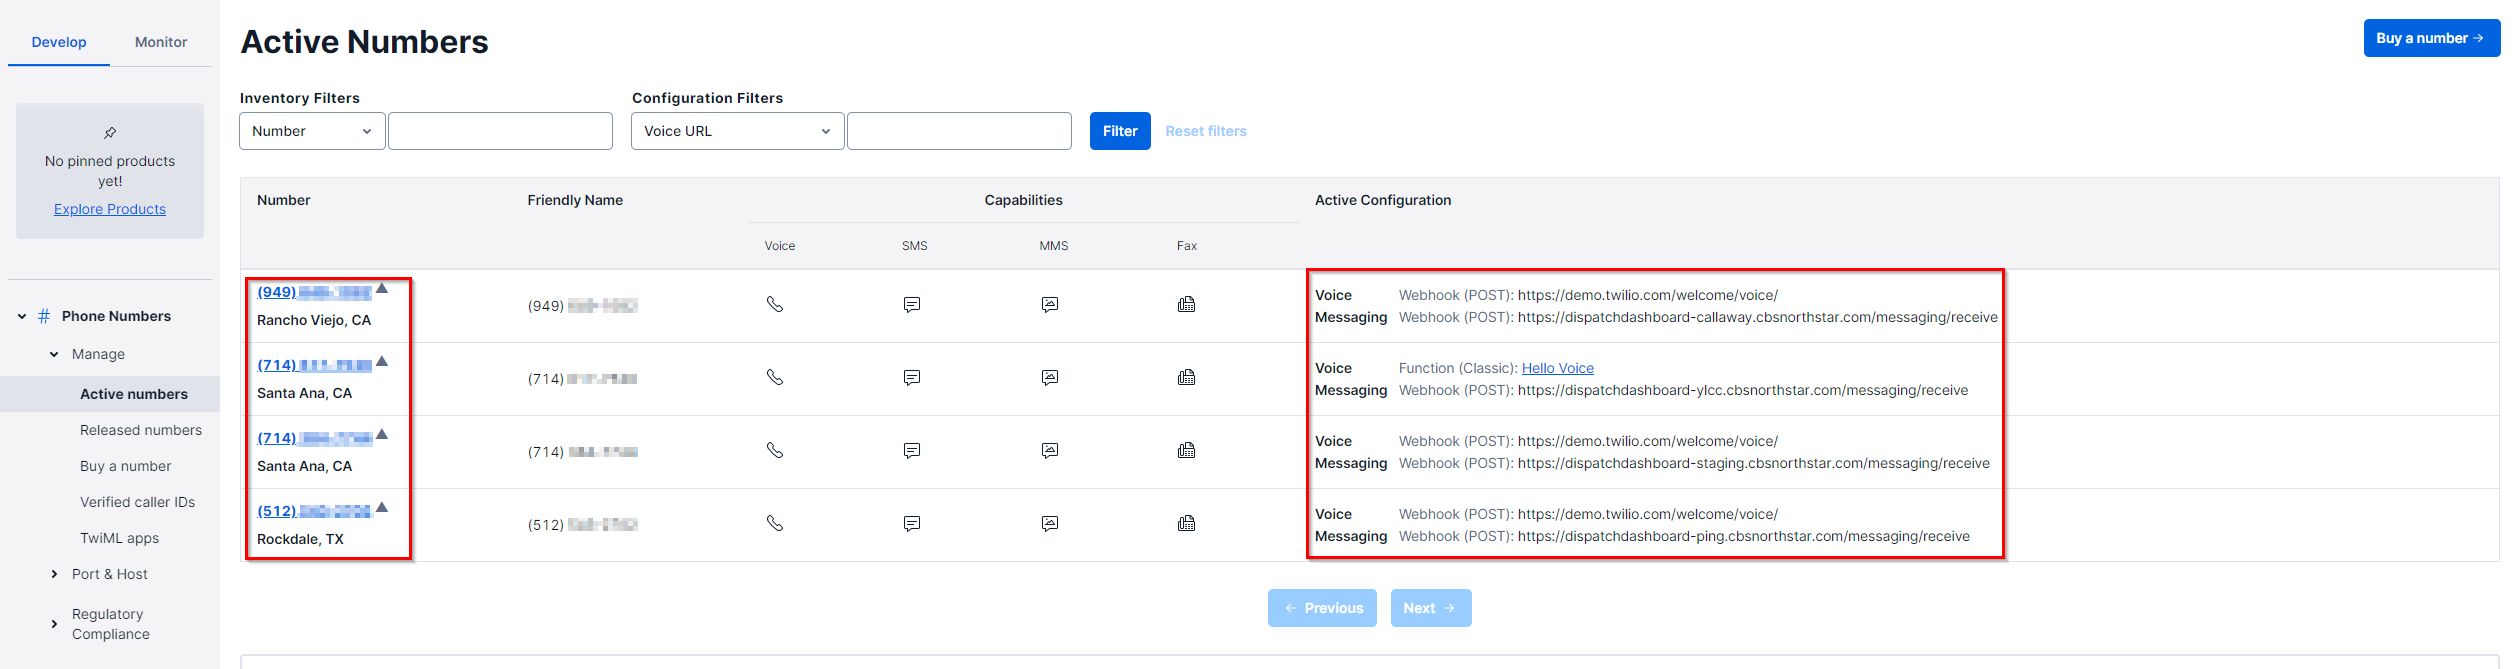
- Click Active Numbers under Manage to display all purchased phone numbers.
- Phone numbers will display the city they are connected to.
- Active Configuration will display the Webhooks that are currently utilizing the phone number (if applicable).
Apply Twilio Data to ECM Instance (SQL)
This section is for employees trained in SQL. If you are unaware of how to utilize these queries, please speak to your shift lead on escalation procedures.
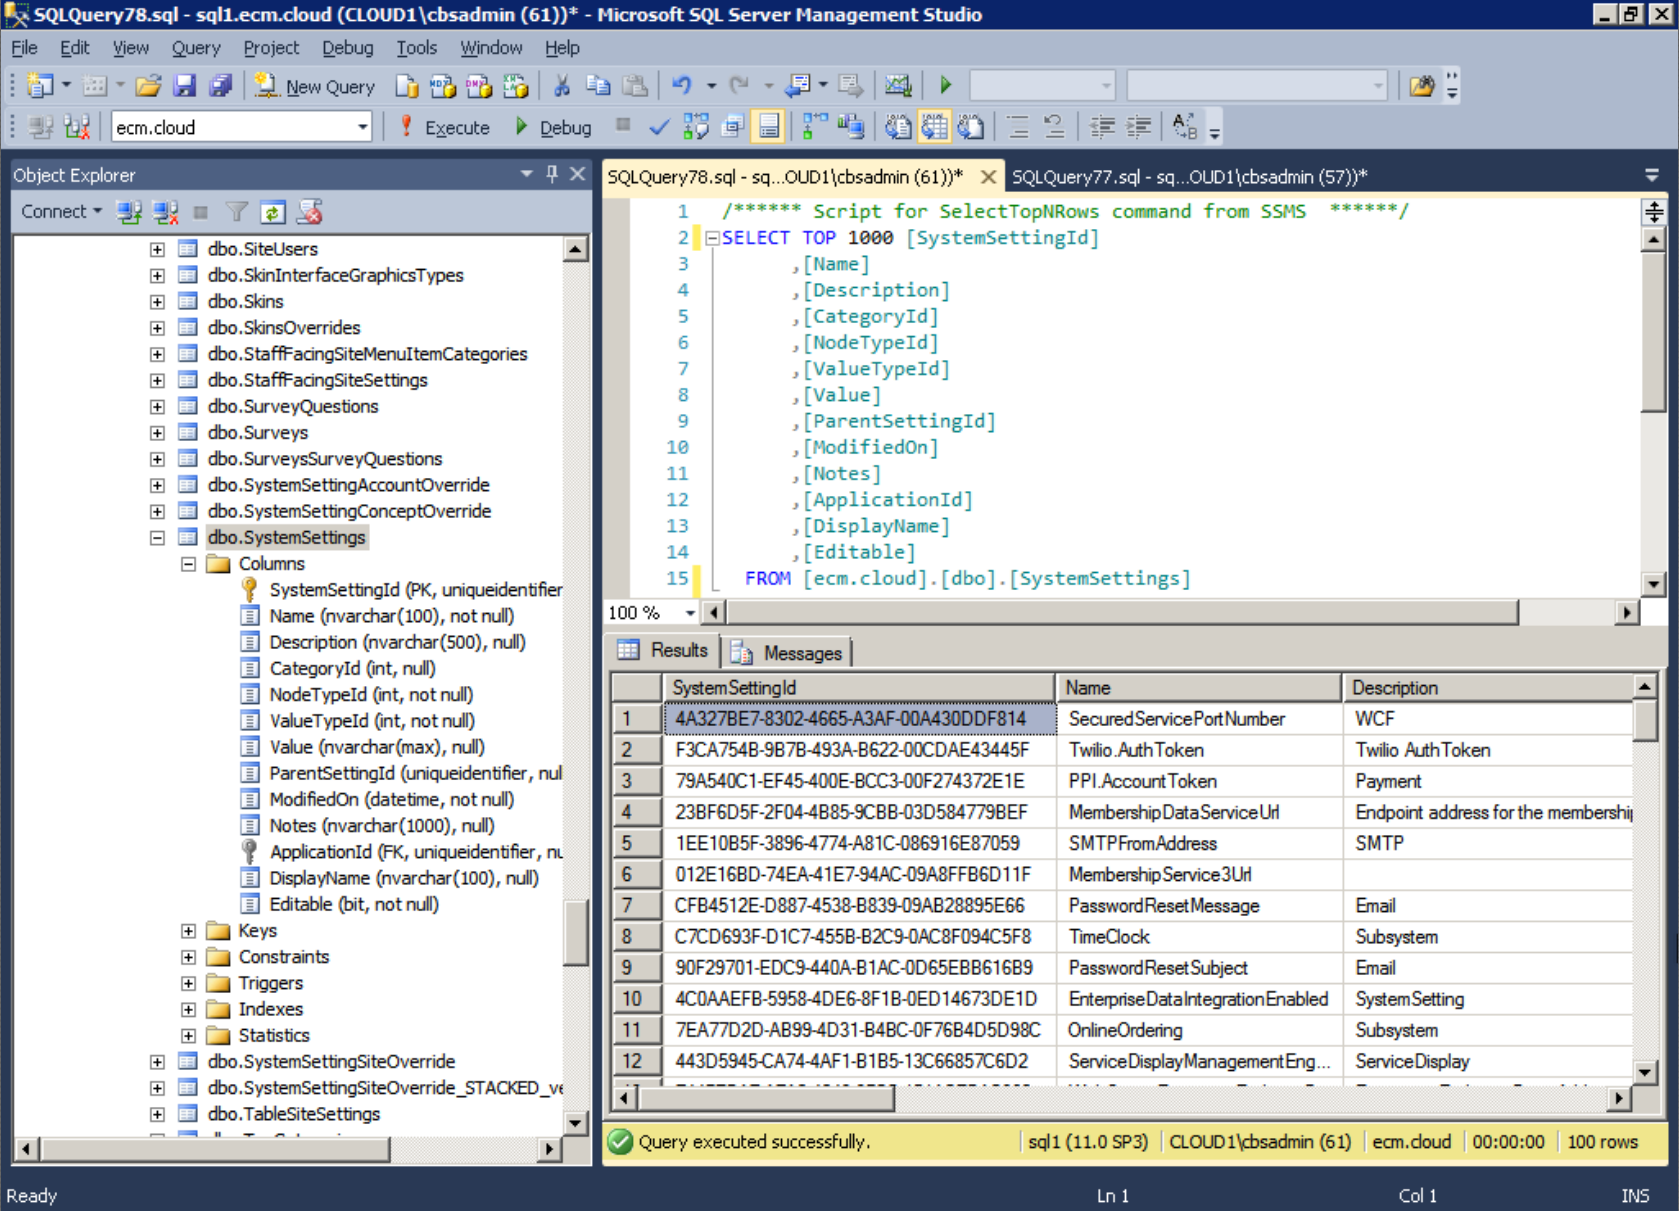
Now that you have an Account SID, Auth Token, and phone number, you can run this SQL query to apply the changes to the ECM.CLOUD database. These queries will change the values in the DBO.SYSTEMSETTINGS section of the database.
- Log into ECM Instance server (Callaway Edge1, East Lake Edge1, Dornoch Edge1, etc. in Bomgar).
- Open SQL Management Studio.
- Click ecm.cloud under Databases.
- Right click dbo.SystemSettings and choose Select Top 1000 Rows.
- Press CTRL+N for a new SQL Query page.
- Enter the query below and change the set value sections to their indicated changes. (i.e., Auth Token, Account SID, etc.), then click Execute.
Begin transaction update [ecm.cloud].[dbo].[SystemSettings] set value ='Auth Token' where SystemSettingId ='F3CA754B-9B7B-493A-B622-00CDAE43445F' update [ecm.cloud].[dbo].[SystemSettings] set value ='Account SID' where SystemSettingId ='C73ABD0C-F803-4341-992D-2EE72FF2393F' update [ecm.cloud].[dbo].[SystemSettings] set value ='Phone Number' where SystemSettingId ='E249932E-F457-4F8B-A94E-5826BC46F065' Select * from SystemSettings where name like '%twilio%' Rollback Select * from SystemSettings where name like '%twilio%' |
|---|
- This initial query will show the differences in the changes, comparing them before and after, because of the Rollback clause.
- After review, change Rollback to Commit.
Verify ALL CHANGES are correct before running the commit query below.
Begin transaction update [ecm.cloud].[dbo].[SystemSettings] set value ='Auth Token' where SystemSettingId ='F3CA754B-9B7B-493A-B622-00CDAE43445F' update [ecm.cloud].[dbo].[SystemSettings] set value ='Account SID' where SystemSettingId ='C73ABD0C-F803-4341-992D-2EE72FF2393F' update [ecm.cloud].[dbo].[SystemSettings] set value ='Phone Number' where SystemSettingId ='E249932E-F457-4F8B-A94E-5826BC46F065' Select * from SystemSettings where name like '%twilio%' Commit Select * from SystemSettings where name like '%twilio%' |
|---|
- Click Execute to solidify changes to database.
- Navigate to C:\inetpub\ECM\ECM\.
- Edit ecm.web config.
- Change the Phone Number section and input the new number purchased.
- Save and Close.
- Completed.