Features and Improvements - ECM Release 2021-05-10 (175.2)
Issue No. | Summary | Operation |
|---|---|---|
Dispatch Dashboard - ECM configurationThis describes only the ECM configuration. The POS application will be available in an upcoming NorthStar App/Server release. Optional feature - Requires Account Application Access The Dispatch Dashboard is an NSOE application. Application access must be enabled for the account. Please contact your NorthStar representative to have this application enabled for your account. | ||
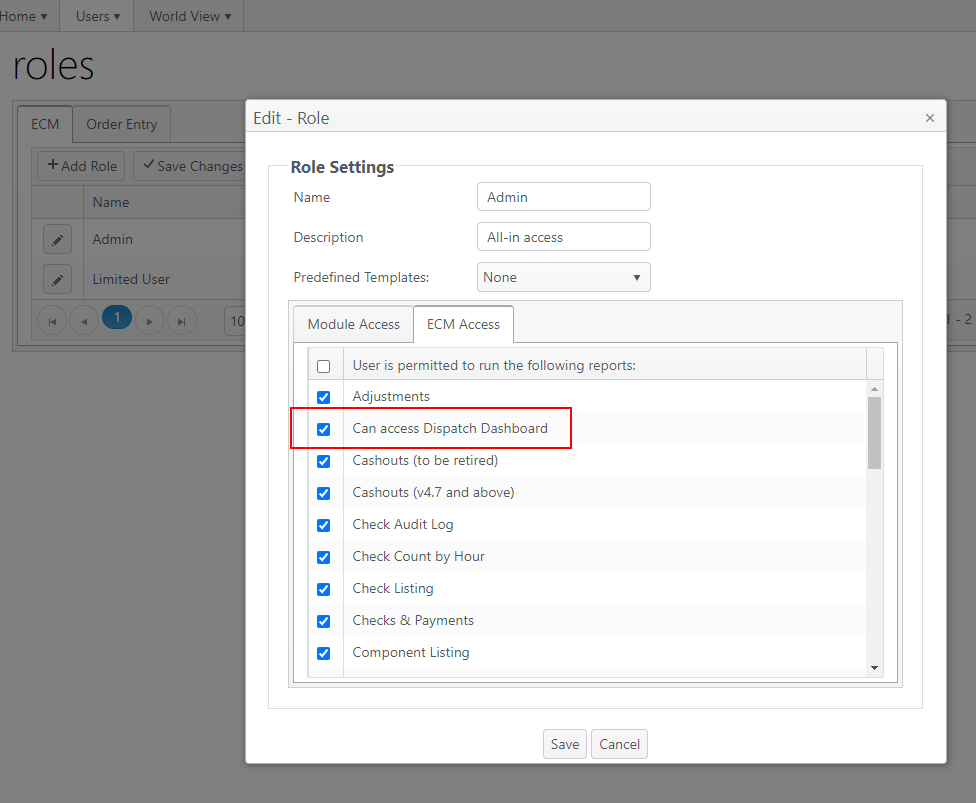
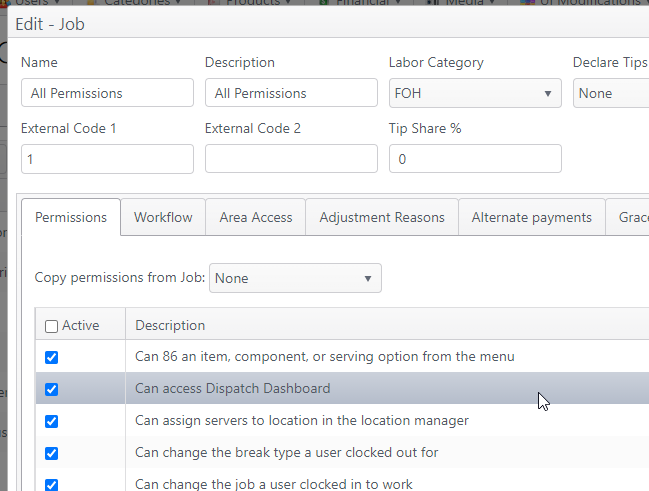
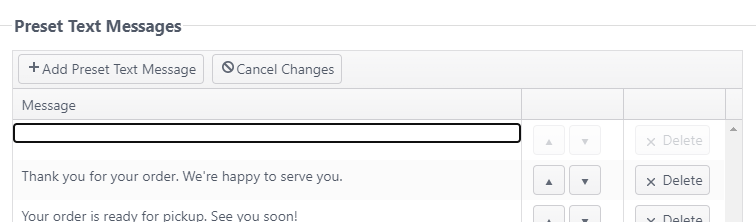
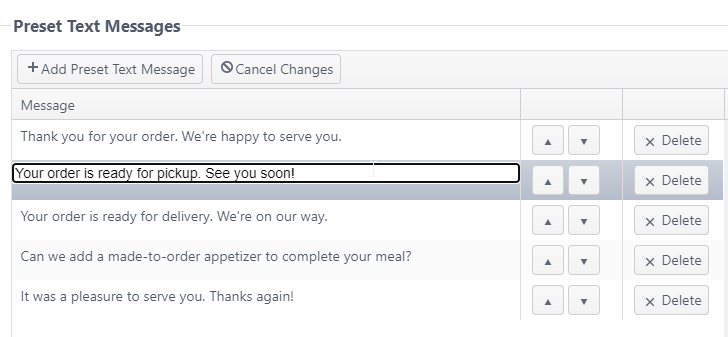
OE-15554 OE-15555 | ECM: Add application and settings tab for Dispatch Dashboard ECM: Add permission and access to Dispatch Dashboard | The dispatch dashboard is a web application that can be used to view and manage online/phone orders from one dashboard for efficient expediting and order management. When completed, the dashboard web page will display all open (non-finalized) orders and their current state. Staff and guests will have the ability to communicate via text message. Text messages can be preset for easy selection. This describes only the ECM configuration. The application will be available in an upcoming NorthStar App/Server release. Pre-condition - Make Dispatch Dashboard application activeCBS system administrator must enable the Dispatch Dashboard application in the client account.
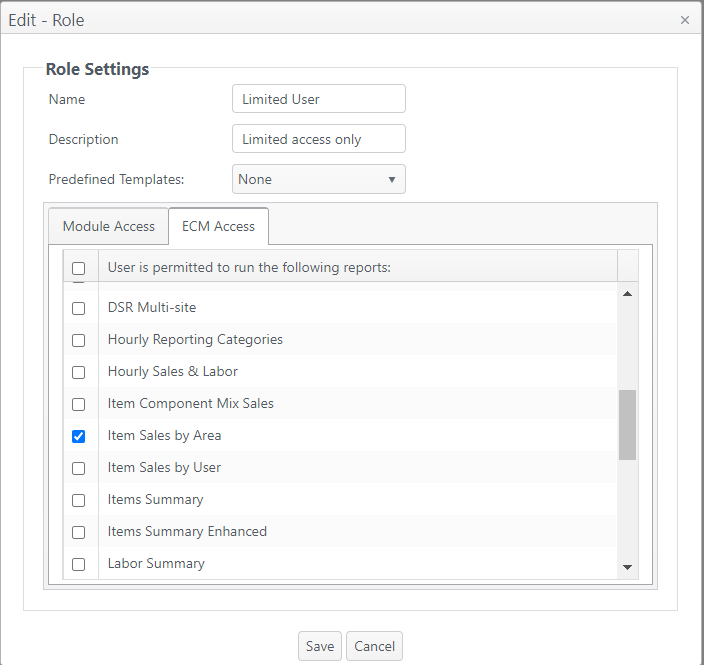
ECM Access and Job Permission
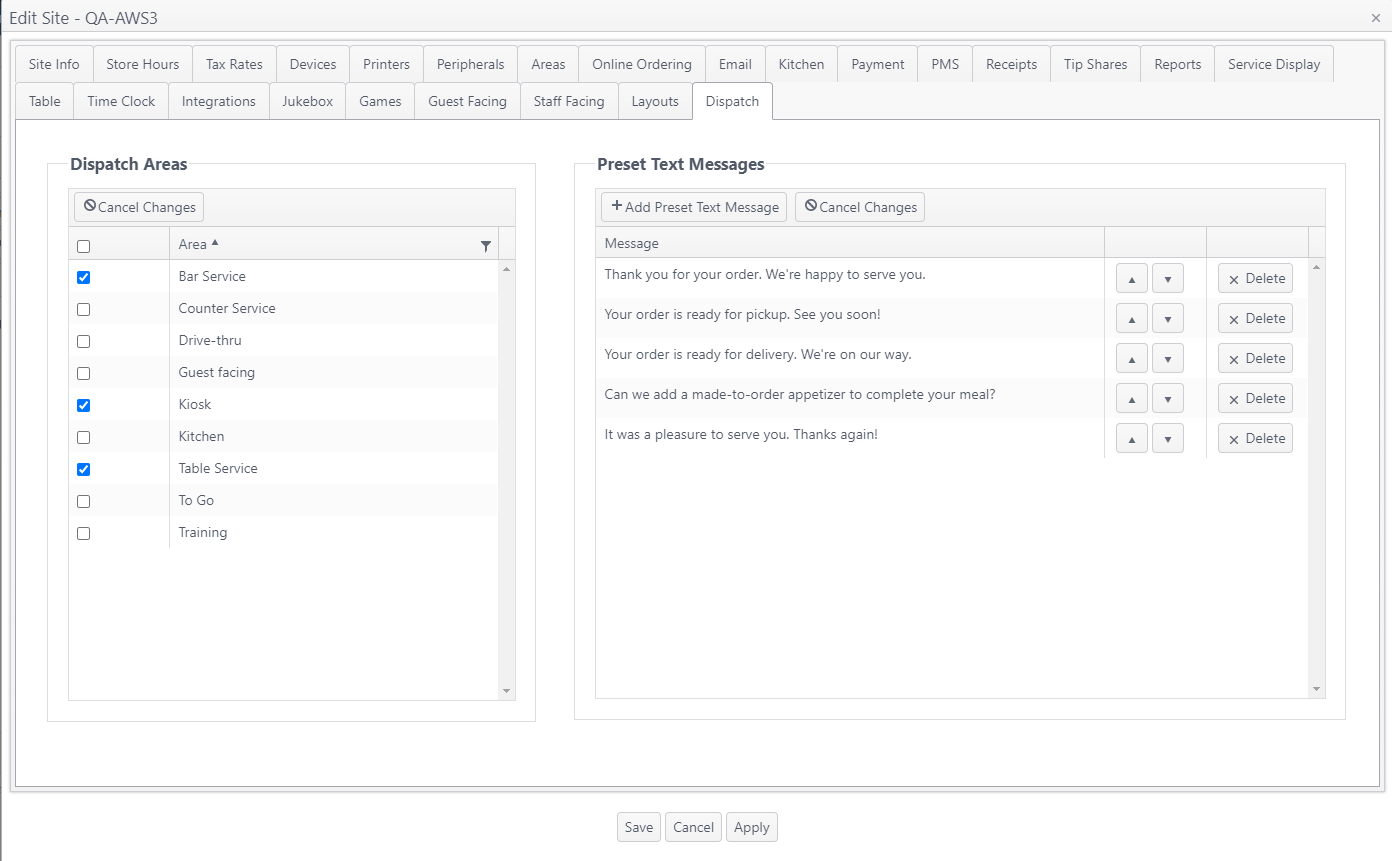
Site Configuration
Dispatch Areas
Preset Text Messages
|
Deployment Improvement | ||
| OE-15831 | Site Deployment: Make deployment function asynchronous to improve speed when deploying multiple sites | Previously, when deploying multiple sites to publish, a user had to wait for all sites to be added to the queue to continue using ECM. Improvement: Site deployment method has changed to be asynchronous, so when multiple sites are requested to be deployed, the sites are added to the deployment queue in the background. Status can be checked on Publishing -> Publish. |
ECM Report: Item Sales by Area | ||
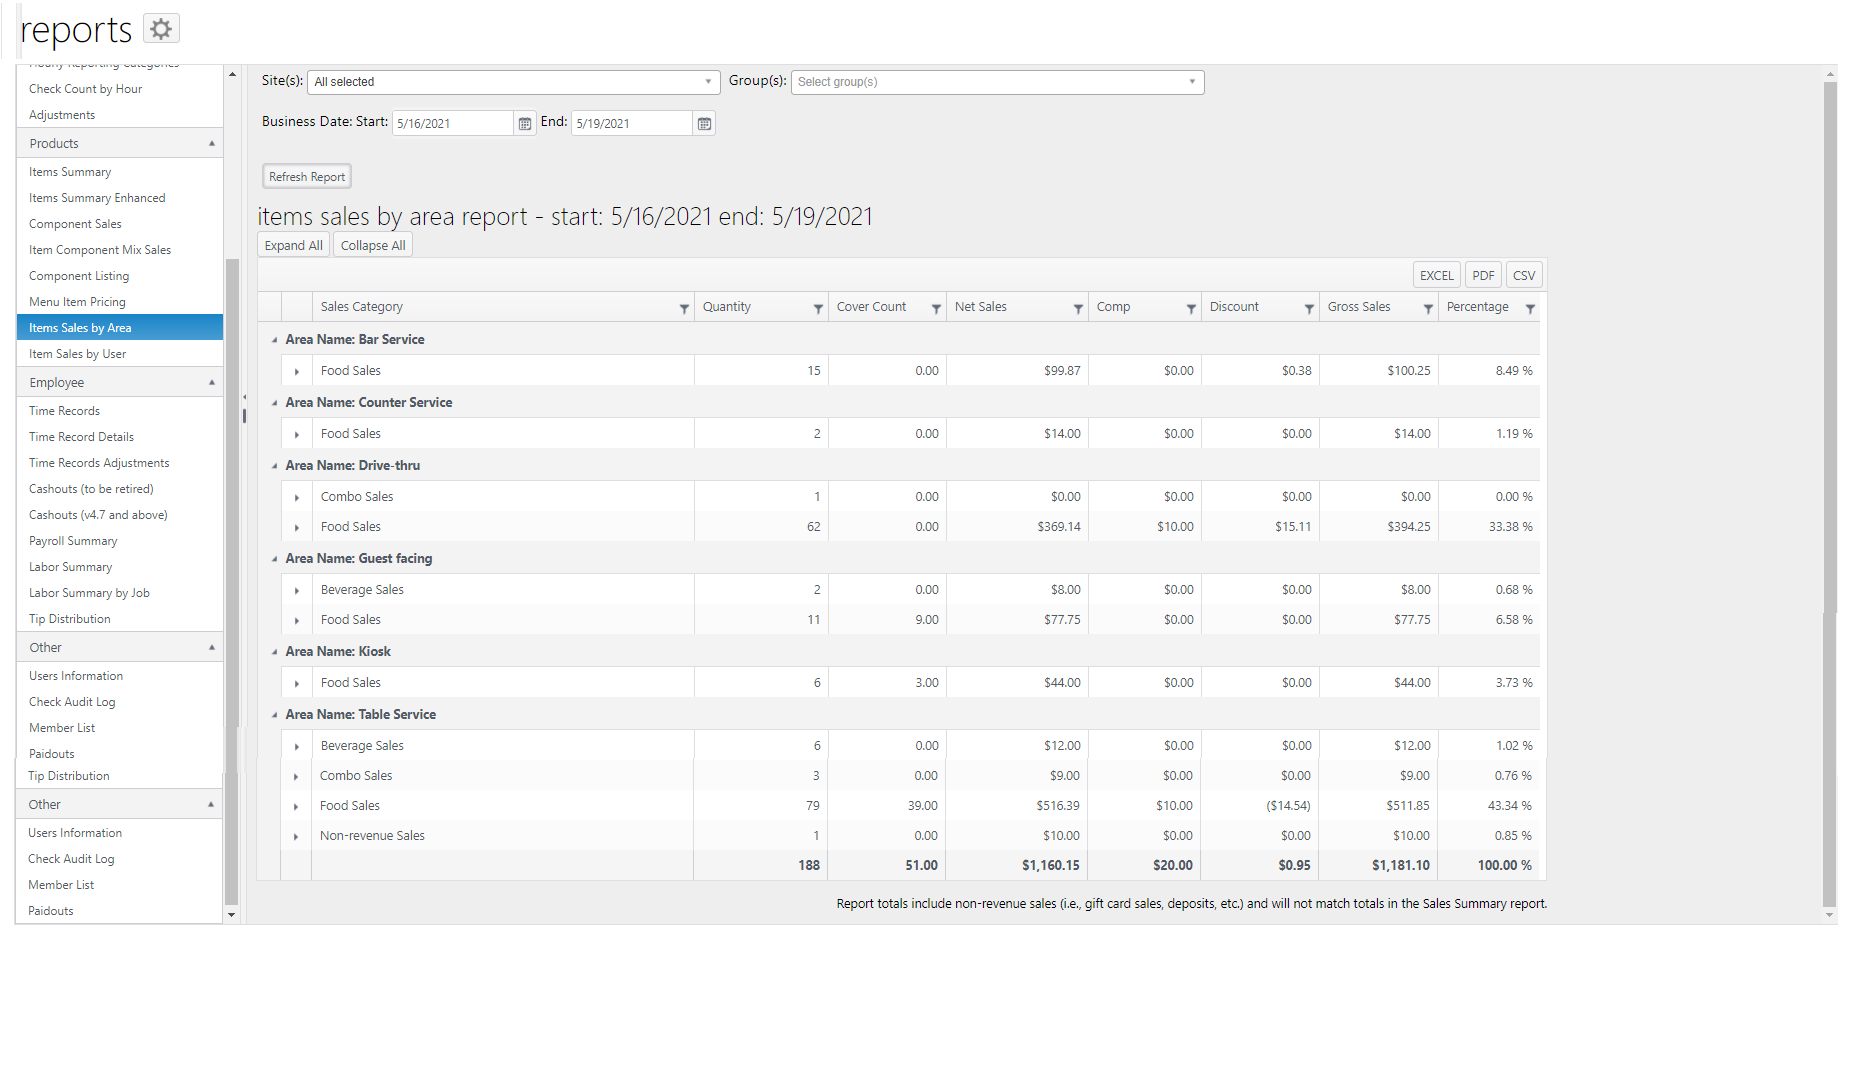
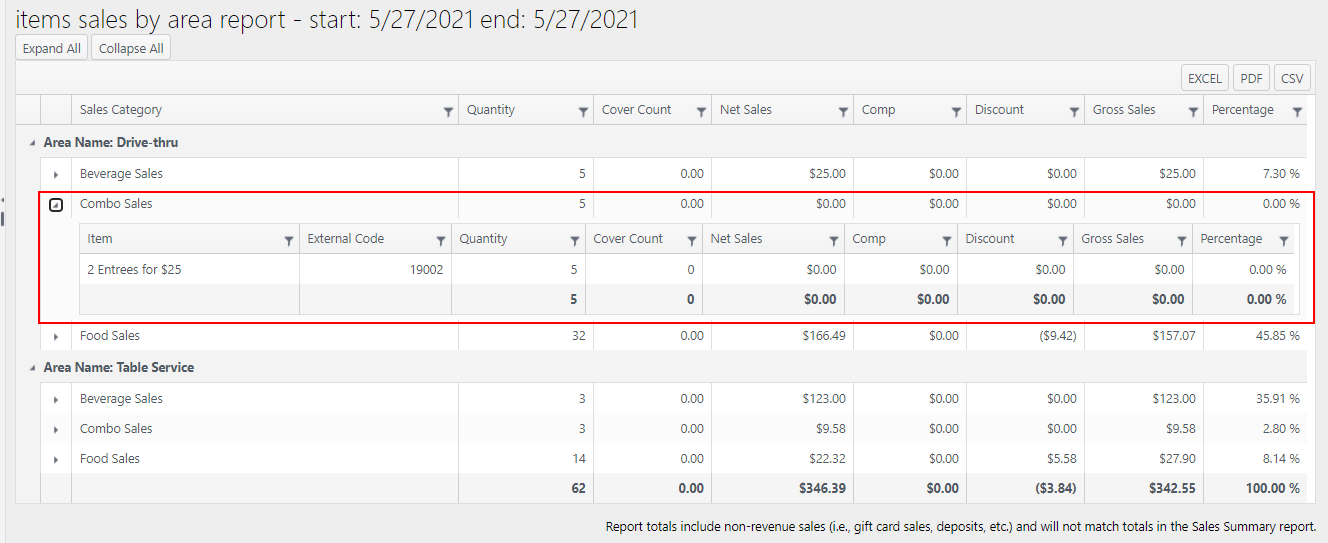
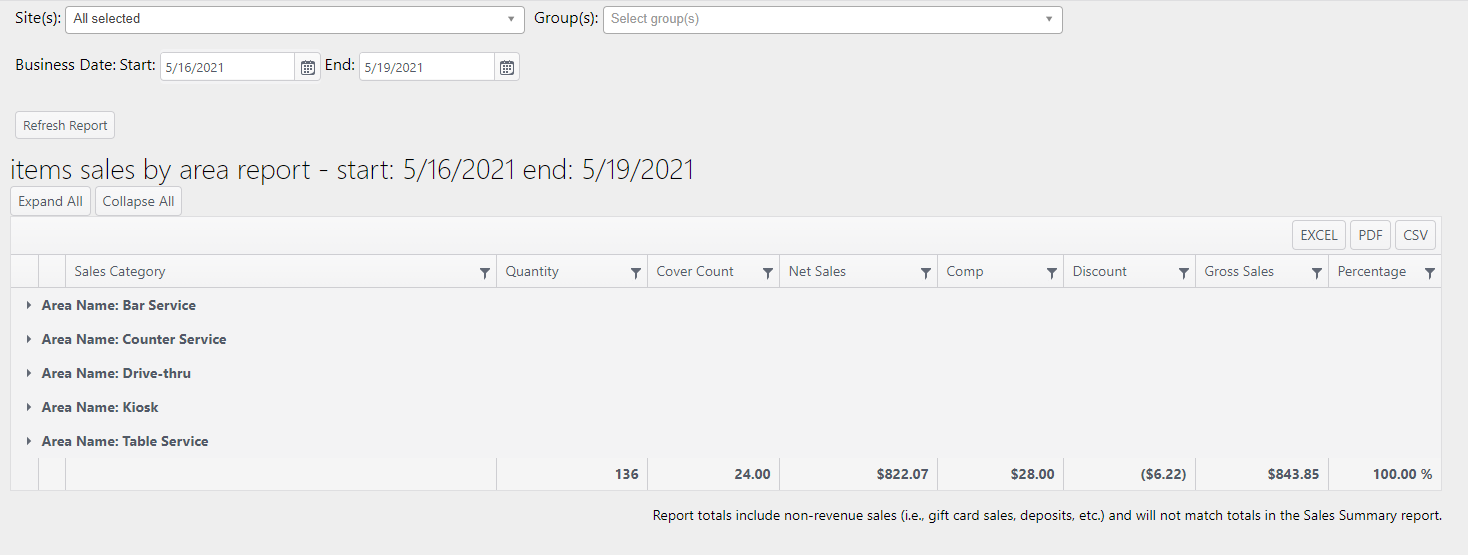
| OE-14247 | ECM Reports: Item Sales By Area Report | The Item Sales by Area report is a new ECM report.
Description:
Expanded by sales category:
Expanded menu item sales detail by Sales Category: Collapsed view: |
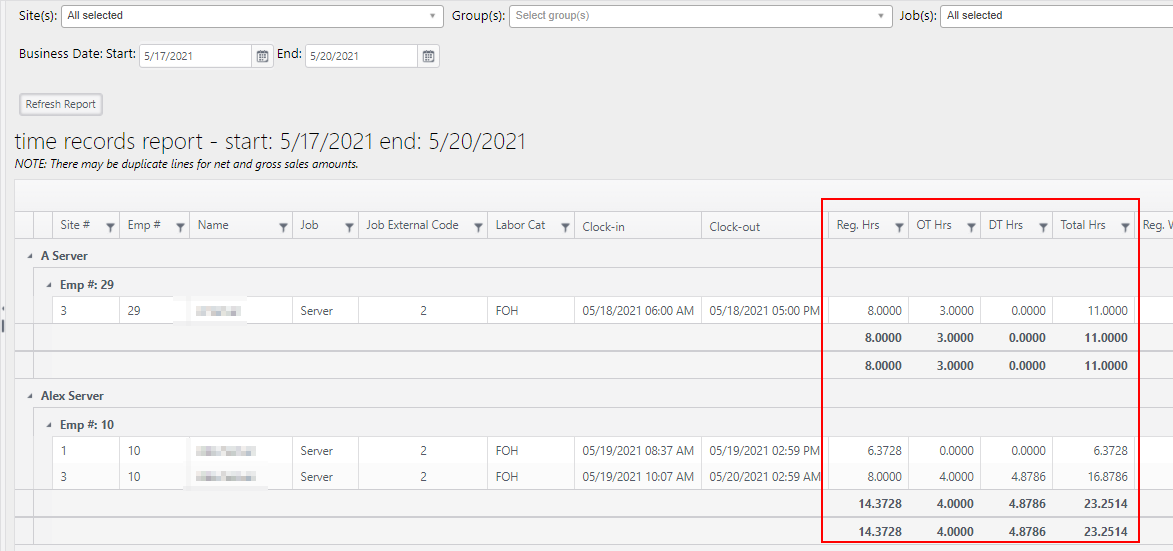
Time Record Report: Set number of decimal places for rounding hours | ||
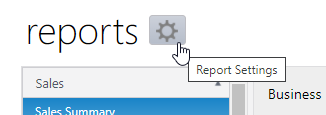
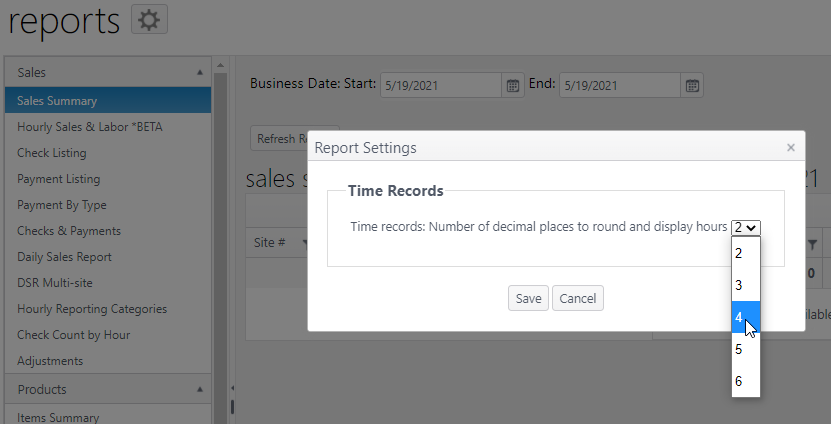
| OE-15933 | ECM Reports: Select number of decimal places to round and display employee hours on time record report | Optional feature - Account feature toggle required An account feature toggle must be enabled for your account to use this feature: Please contact your NorthStar representative to have this feature enabled for your account. This improvement allows Admin users to select the number of decimal places to use when rounding employee hours on time record reports. These reports include:
This feature is only available to an Admin user.
|
Time Record Adjustments Report: Show employee acknowledgment status | ||
| OE-15967 | ECM Time Record Adjustments Report: Show employee acknowledgment status for adjustments to time records | NorthStar Order Entry release 4.8.3 includes a new feature for employees to acknowledge adjustments made to their time cards by management. The Time Record Adjustments report has been improved to reflect these acknowledgments.
|
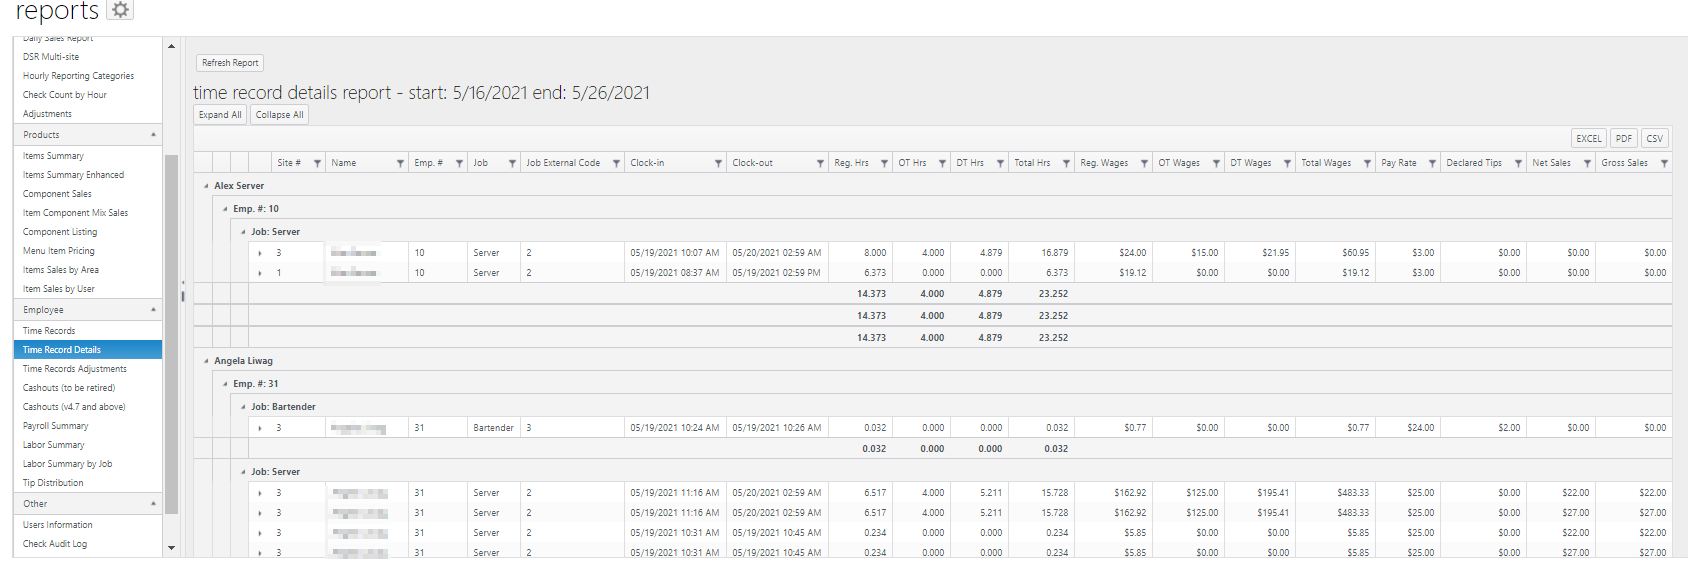
ECM Report: Time Record Details Report | ||
| OE-16035 | ECM Report: Time Record Details Report | The new Time Record Details report expands upon the Time Records report. The report reflects each employee clock-in, clock-out (including breaks) and adjustment to employee time records. The report can be run for one or more sites and for a range of one or more business dates.
Expanded record detail: |
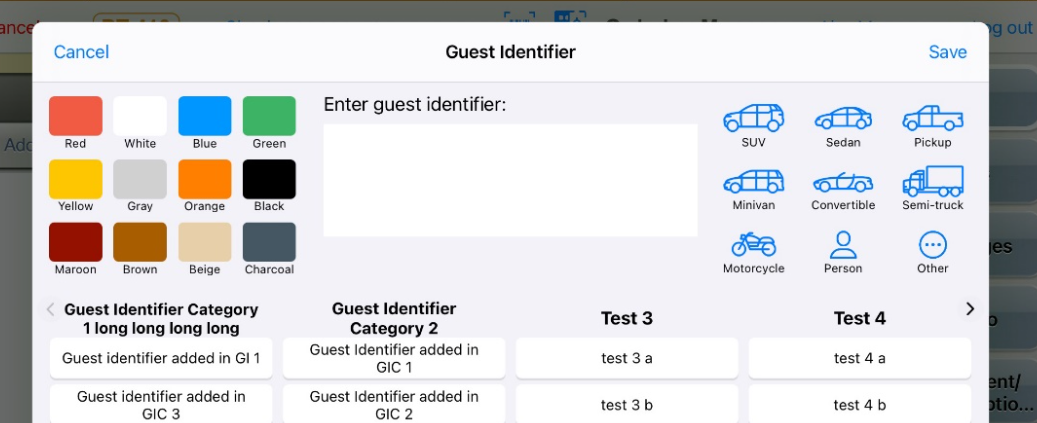
Area settings: Guest Identifier prompts and speed screens | ||
OE-15885 OE-16051 | ECM- Guest Identifier Speed screens Area Setting ECM - Guest Identifier improvements - Add settings to Edit Area: prompt for guest identifier; use icons for selection; revise seating prompt | Several improvements made to the Areas page in the Sites configuration. These settings allow each area to be configured as needed when using guest identifiers. 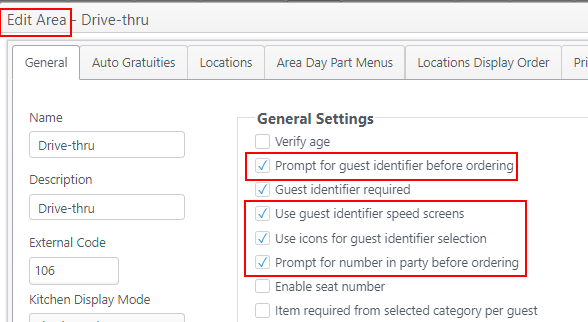
|
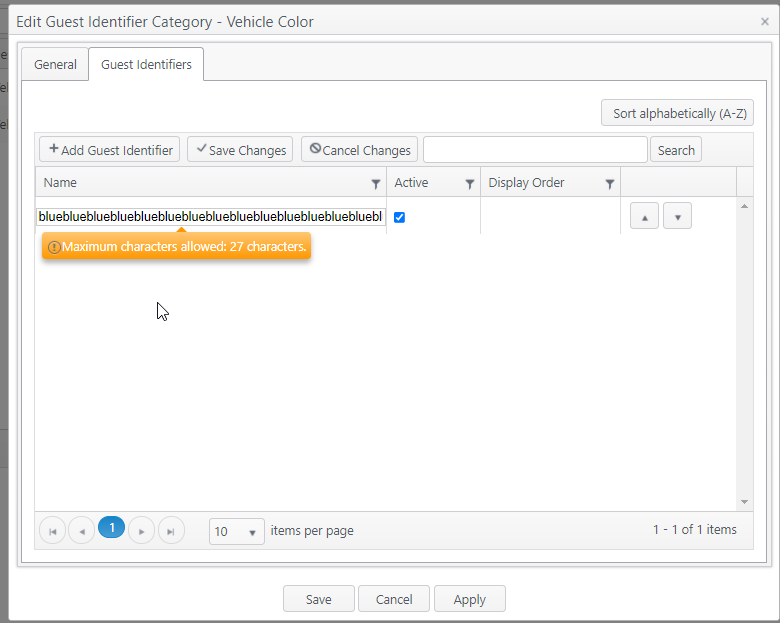
| OE-15995 | ECM: Limit Guest Identifier Name to 27 Characters | Guest Identifier names are now limited to 27 characters. This allows names to be printed in full on the guest check.
|
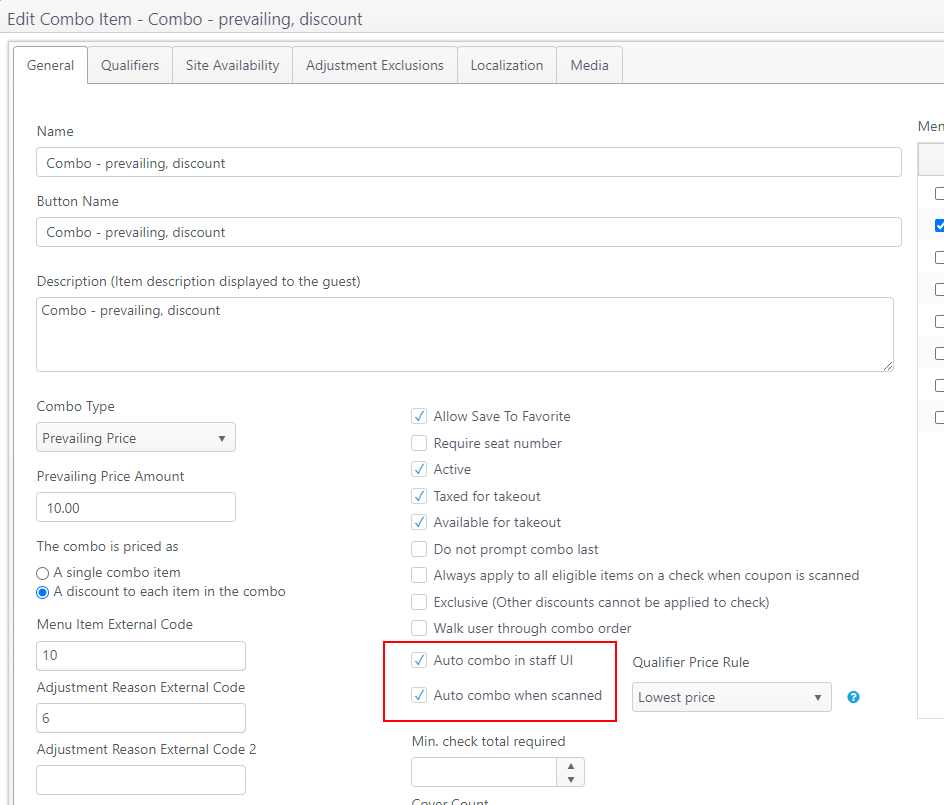
Combo setting: Create Combo Automatically in Staff UI | ||
| OE-16065 | ECM: Menu Item - Combo - Add Auto Combo in Staff UI setting | This describes only the ECM configuration. The POS application will be available in an upcoming NorthStar App/Server release. New setting added for combo menu items: Auto combo in Staff UI
|
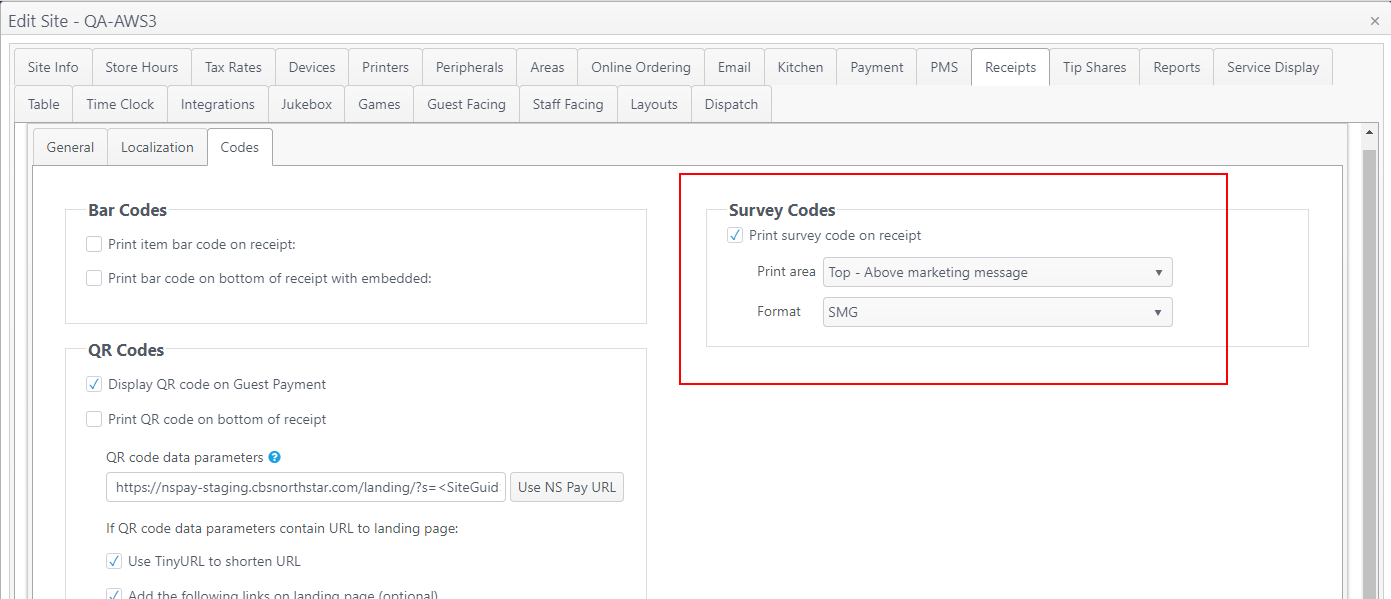
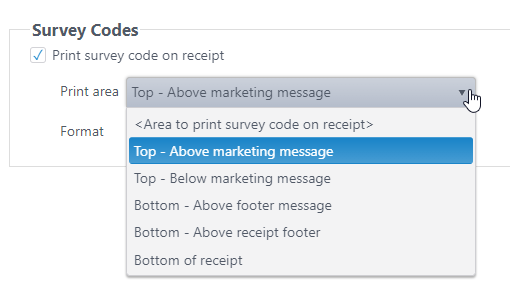
Receipts setting: Print survey code on receipt | ||
| OE-16052 | ECM: Sites > Receipts - Add new settings to enable survey code printing | This describes only the ECM configuration. The POS application will be available in an upcoming NorthStar App/Server release. Optional feature - Account feature toggle required An account feature toggle must be enabled for your account to use this feature: Please contact your NorthStar representative to have this feature enabled for your account. Path: Sites > edit a site > Receipts > Codes tab When this feature is enabled, a site can make the following selections on the Codes tab:
|


ECM documentation: Enterprise Content Management (ECM) (New features may be in progress.)