Create a Site and Sell an Item in 60 Seconds
Summary
In just a few steps, you can create a new site on ECM, create a sellable menu item and deploy it onto an iPad. The process is quick and easy!
Create your site
Create a Site
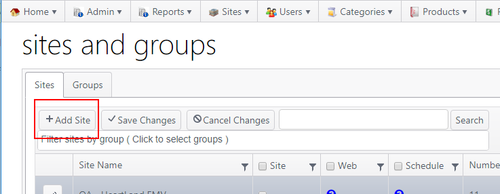
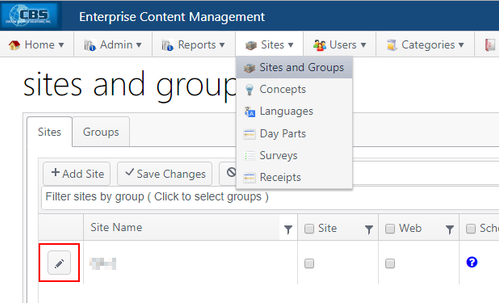
- Under Sites, click Sites and Groups

- On Sites and Groups, click Add Site
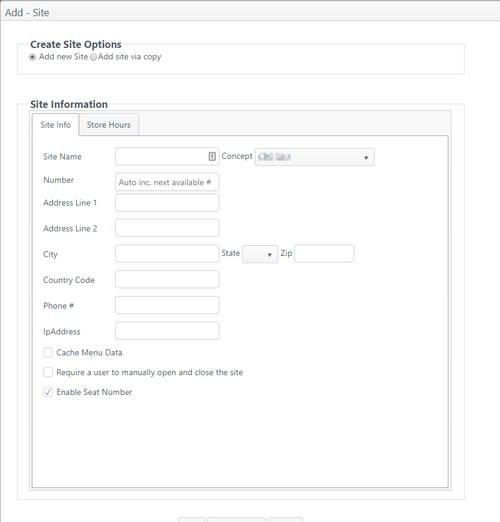
- Enter the site name, address, city, state and ZIP code on the form, then click the Store Hours tab
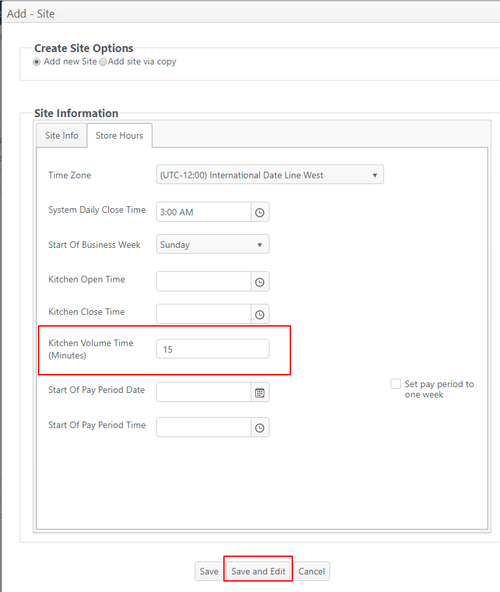
- Enter a kitchen volume time; click Save and Edit
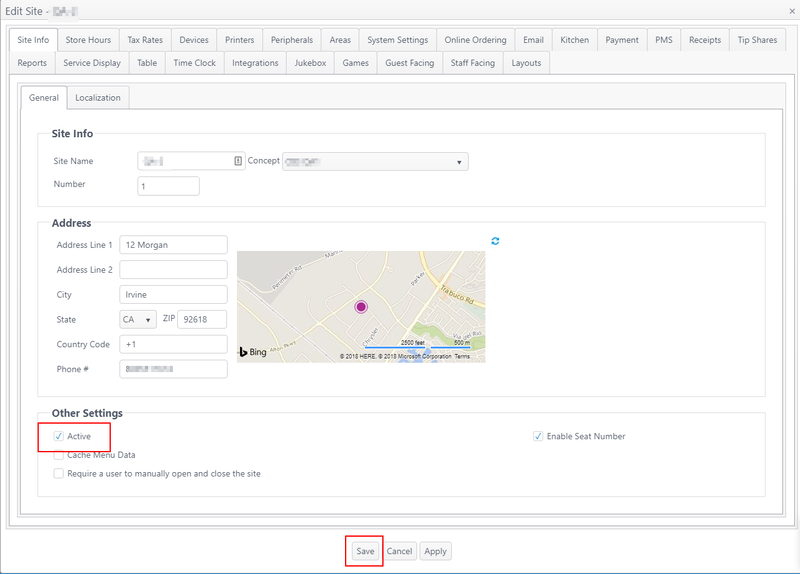
- Select Active; click Save
- The site is created.
Create your sellable menu item
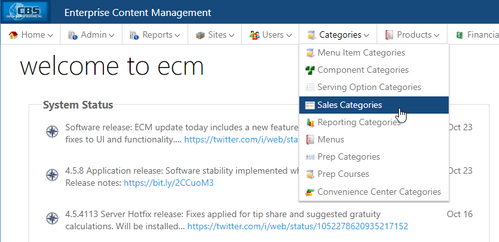
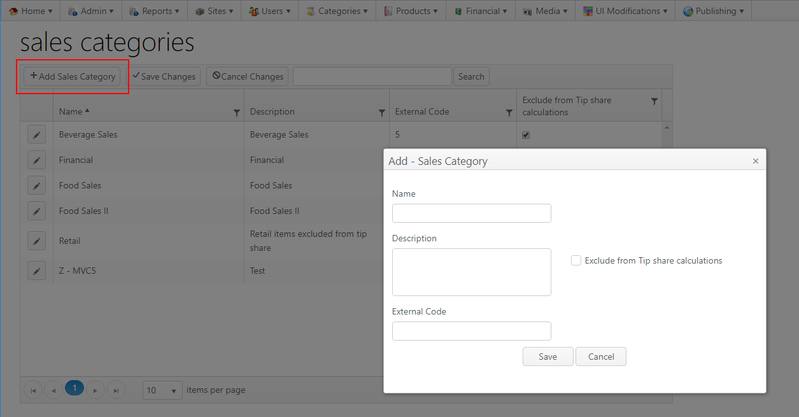
Create a Sales Category
- From Categories, click Sales Categories
- Click Add Sales Category to launch the Add - Sales Category pop-up
- Enter a name and description, then click Save
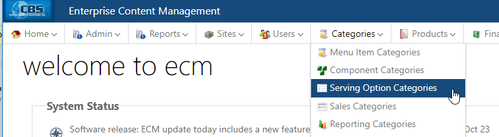
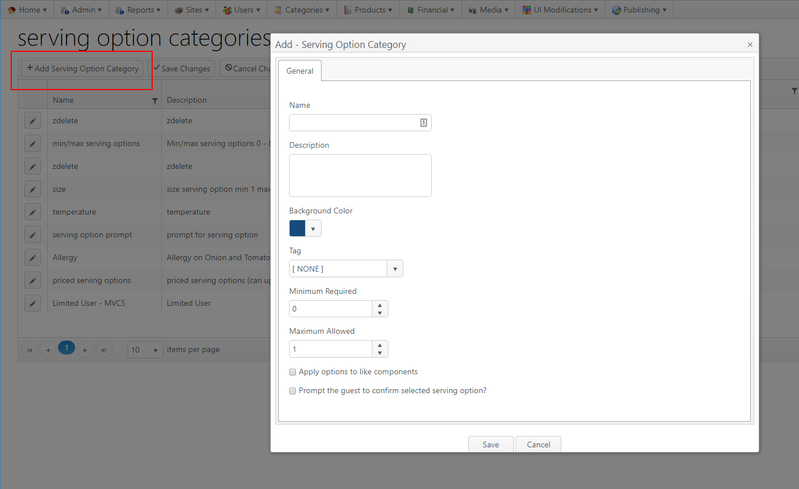
Create a Serving Option Category
- From Categories, click Serving Option Categories
- On the serving option categories page, click Add Serving Option Category
- Enter a name and description; click Save
Create a Component Category
- From Categories, click Component Categories
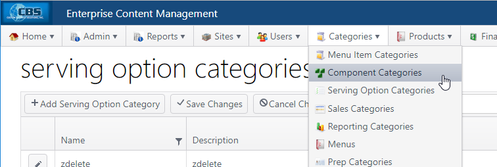
- On the component categories page, click Add Component Category
- Enter a name and description; click Save
Create a Menu Item Category
- From Categories, click Menu Item Categories

- On the menu item categories page, click Add Menu Item Category
- Enter a name and description; click Save

Create a Menu
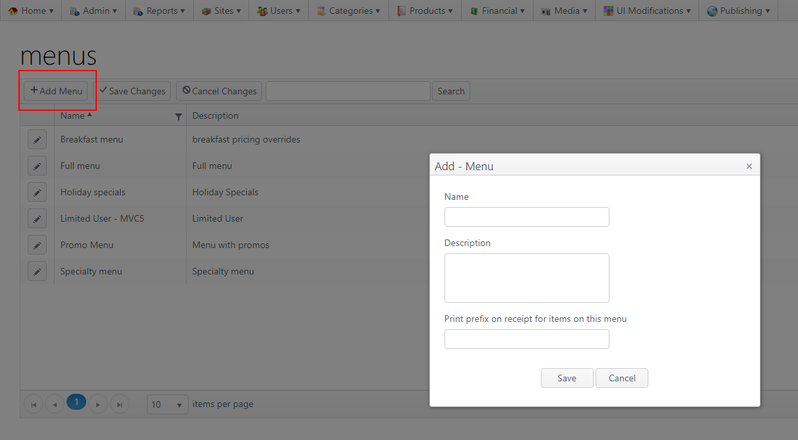
- From Categories, click Menus
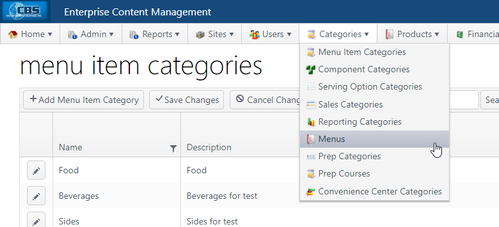
- On the menus page, click Add Menu
- Enter a name and description; click Save
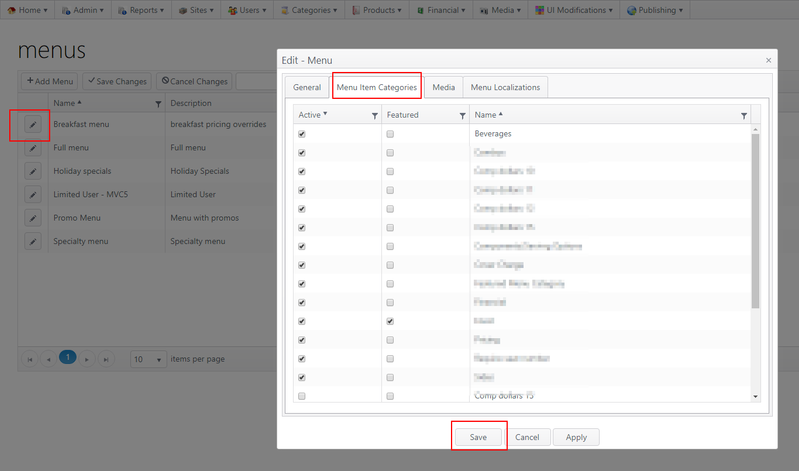
- Edit Menu - Add menu item category to menu
- Click the edit icon (pencil) next to the menu that was created
- On the Edit - Menu page, click the tab Menu Item Categories
- Select Active for the menu item category you created previously and click Save
Create a Menu Item
- From Products, click Menu Items
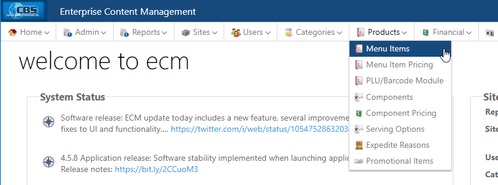
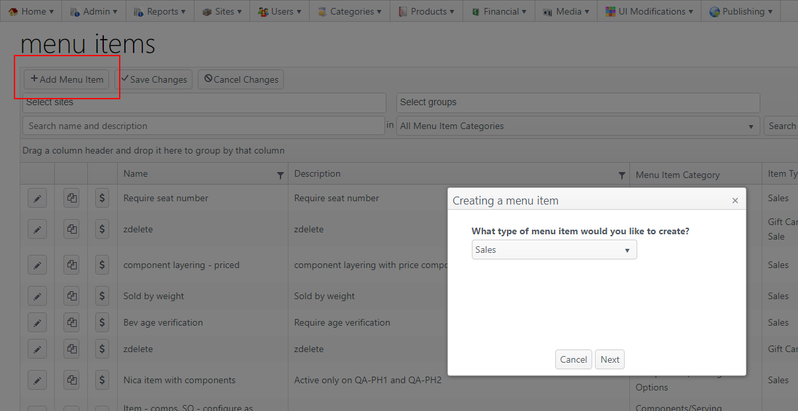
- On the menu items page, click Add Menu Item
- Choose Sales as the menu item type; click Next
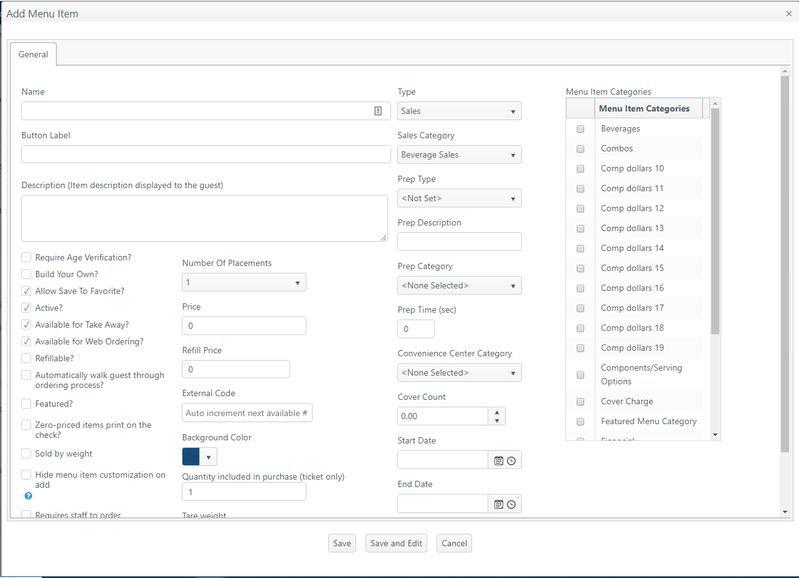
- On the Add Menu Item page, enter:
- Name
- Description
- Price
- Sales category
- Prep type
- Select the menu item category created previously to attach the menu item to the menu item category; click Save.
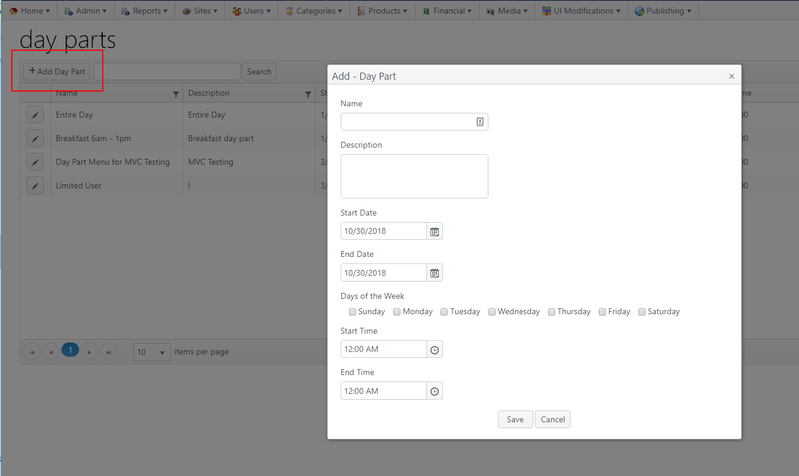
Add a Day Part Menu
- From Sites, click Day Parts
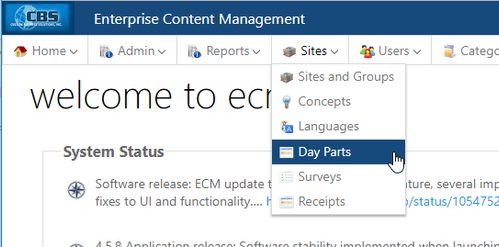
- On the day parts page, click Add Day Part
- On the Add Day Part page, enter:
- Name
- Description
- Start date and end date
- Select all days of the week; click Save
Edit your site: add your menu, location and payment processor
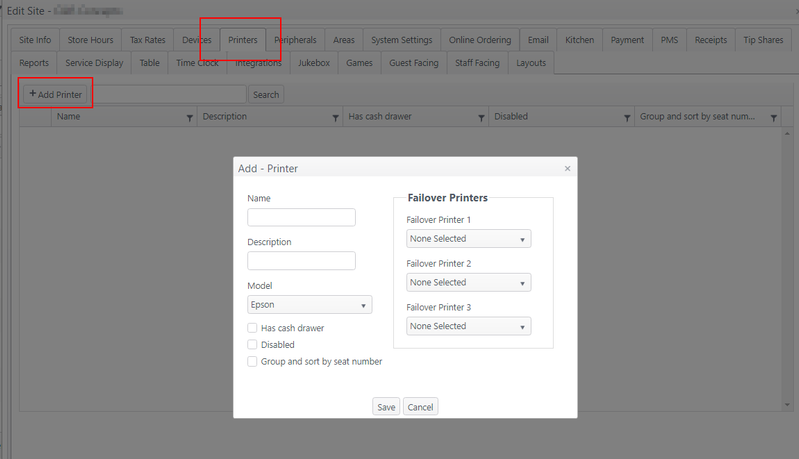
Create a Printer
- From Sites, click Sites and Groups
- Click the edit icon (pencil) next to the site that was created
- On the Edit Site page, click the tab Printers
- Click Add Printer
- Enter the printer name and description; click Save
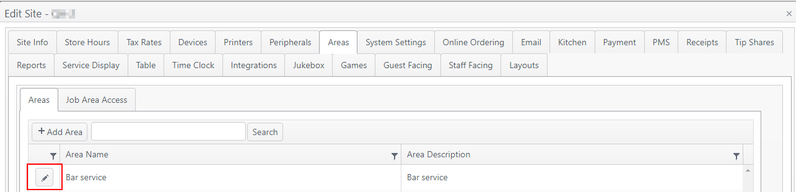
Create an Area
- From the Edit Site page, click the tab Areas
- Click Add Area
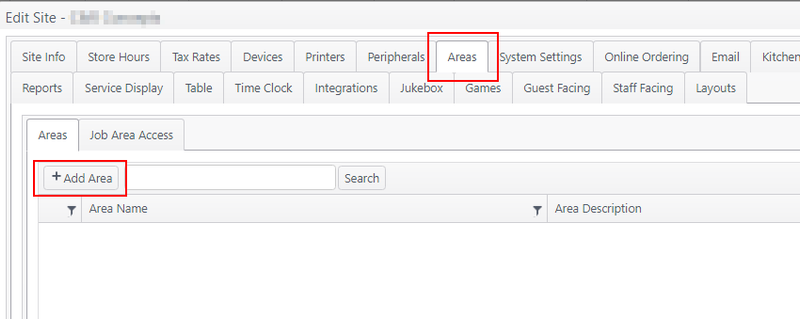
- On the Add - Area page, enter the area name and description; click Save

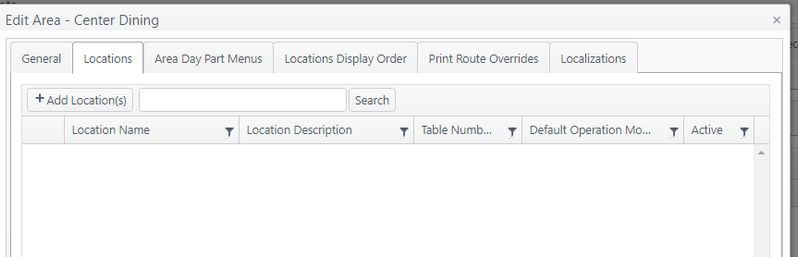
Create a Location
- From the Areas page, click the edit icon (pencil) next to the area that was created
- On the Edit Area page, click the tab Locations
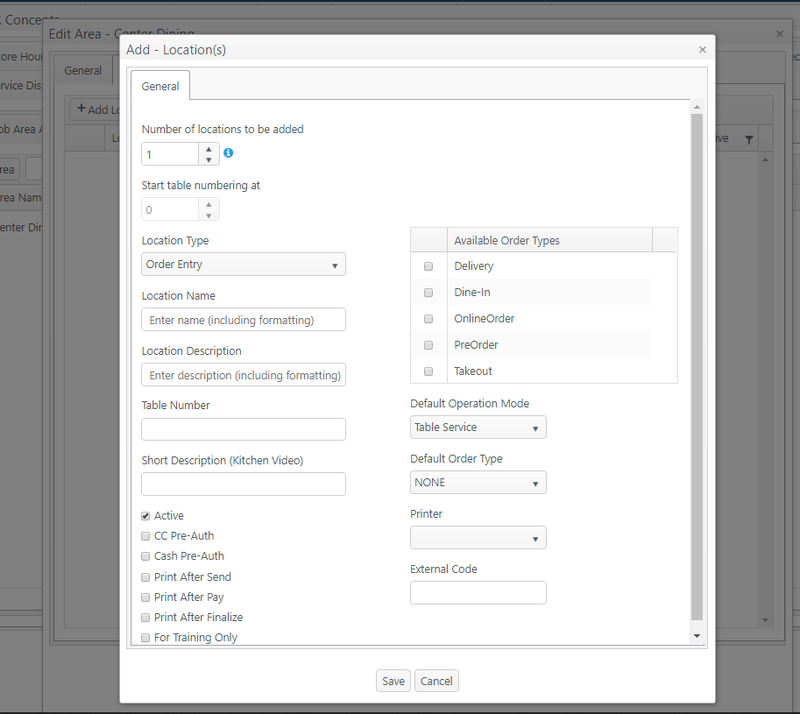
- Click Add Location
- On the Add - Locations page, enter:
- Location name
- Location description
- Table number
- Select the default operation mode and click Save
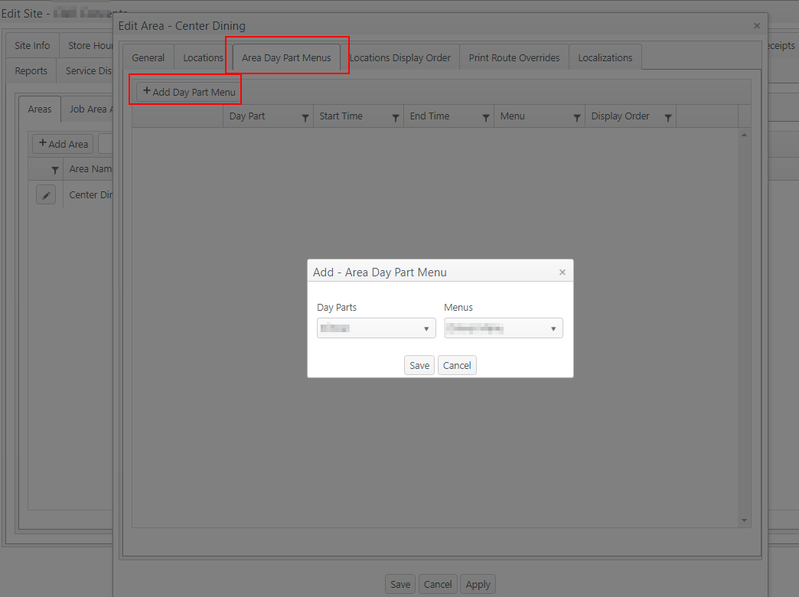
Attach a Day Part Menu to an Area
- From the Edit Site page, click the tab Areas
- From the Areas page, click the edit icon (pencil) next to the area that was created

- Click the tab Area Day Part Menus
- Click Add Day Part Menu
- Day Parts - Choose the day part created earlier
- Menus - Choose the menu created earlier
- Click Save
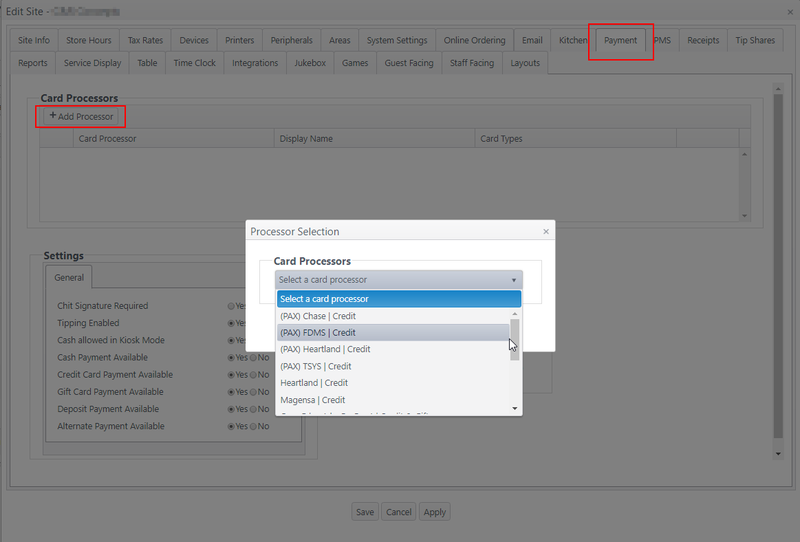
Add a Payment Processor
- From the Edit Site page, click the tab Payment
- Click Add Processor
- Click the drop-down list and select (PAX) FDMS | Credit (for lab purposes only)
- Click Continue on the Processor Selection pop-up window
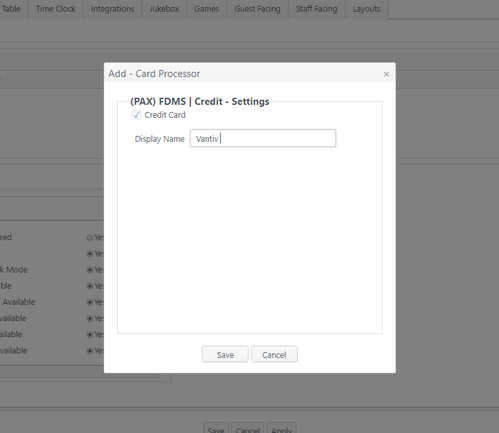
- On the Add - Card Processor page, select Credit Card and enter a display name; click Save
Publish your site
Deploy Changes
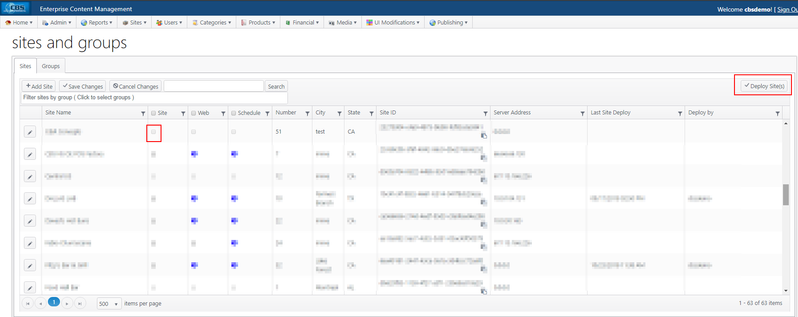
- From Sites, click Sites and Groups
- On the Sites and Groups page, select the Site checkbox then click Deploy Site(s)
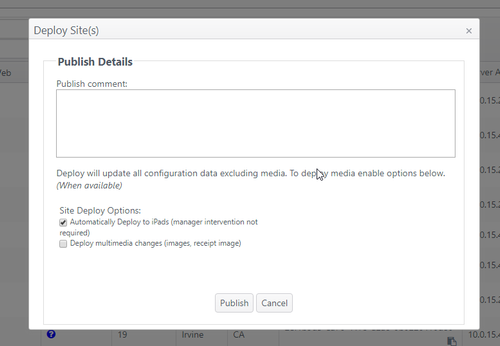
- On the Deploy Site(s) pop-up, enter a comment and select Automatically Deploy to iPads( manager intervention not required)
- Click Publish
Congratulations! Your new site has been created in ECM with a sellable menu item. Connect to the site on your tablet device, register the device and log on to Order Entry to view your creation.
Related articles
Add a new iOS Device & Register