BackUp Augmentation after install doc
BackUp Augmentation
POSisched
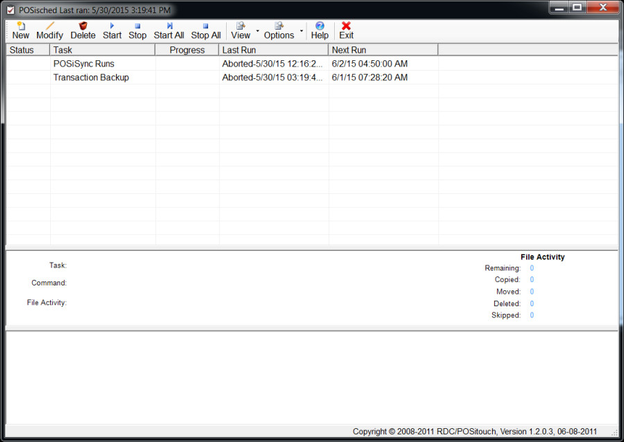
When the installer completes it should display this screen:
You can test to see if BackUp augmentation is working by checking a few items.
1) Click on "POSisync Runs" which should highlight it. Then Click Start on the menu bar in POSiSched.
The progress indicator should reach 100% and it should state under last run finished successfully.
2) Click on "Transaction Backup" which should highlight it. Then Click Start on the menu bar in POSiSched. The progress indicator should reach 100% and it should state under last run finished successfully.
i) If not Click on "Transaction Backup" which should highlight it.
ii) Then Click modify on the menu bar in POSiSched.
iii) Check to make sure the Source drive Letter is correct.
(This should match the location of the POSidrivers SC Folder.)
(The default is L:)
vi) If the drive letter is incorrect Highlight the Command where it is wrong
v) Change the Source to the correct location.
iv) Click the Replace Command Button,
iiv) Repeat till all commands are correct.
iiiv) Click OK
3) Check to make sure "Configure Drive Mapping" is set up correctly.
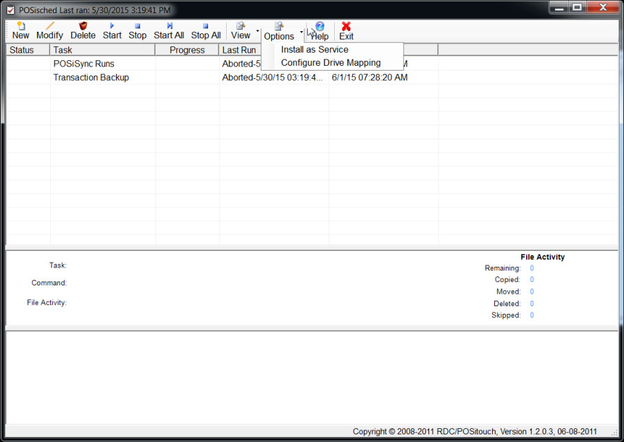
i) Configure Drive Mapping is located on the Options tab of the menu bar.
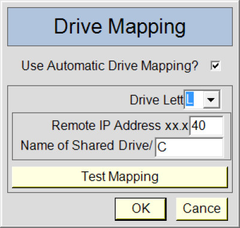
ii) Click on "Configure Drive Mappings" and a Dialog box will appear.
iii) Make Sure Use Automatic Drive Mapping is Cheked
vi) The CBS Standard is to use L as the POSidiver Drive letter
If another Drive Letter is used "Transaction Backup" will need to be modified.
v) Set the last octet of the IP Address.
(if the Back Office computer is on a different sub-net
i.e. if any of the first three octets are different then uncheck
"Use Automatic Drive Mapping"and close the dialog box.
Automatic Drive Mapping is unavailable in that scenario")
iv) Set the Name of the shared drive. Normally this will be C or C$
You can check this on the POSidriver.
iiv) Test the mapping via the button if it works click on OK and you are done.
4) Do not hit the X button but use the flat bar button to minimize POSiSched.


