How to migrate existing Landing Pad configuration to a new Landing Pad installation on a new server.
Step-by-step guide
- Copy the following configuration files from the old installation to a temp directory on the new server.
- C:\Program Files\NorthStar\Landing Pad\settings.cfg
- C:\Program Files\NorthStar\Landing Pad\Database\LPad.mdb
- C:\InetPub\wwwroot\NSPortal\ASPNETPortal.css
- C:\InetPub\wwwroot\NSPortal\PortalCfg.xml
- C:\InetPub\wwwroot\NSPortal\web.config
- C:\InetPub\wwwroot\NSPortal\Images\ - All files and folders
- Copy the entire website from the old server to the same location on the new server.
- C:\InetPub\wwwroot\NSPortal\ - All files and folders
- C:\InetPub\wwwroot\NSPortal\ - All files and folders
- The newest version of Landing Pad uses a LPAD database attached to SQL server and the older version uses a LPAD.MDB (access database file)
If you using an older version of Landing Pad follow the instructions for importing landing pad configuration data into sql. How to import legacy landing pad configuration data into sql - Uninstall the old version of Landing pad as follows:
a)Backup the Program Files\NorthStar\Landing Pad folder
b)Open a command prompt (run as administrator)
c)Change to the Landing Pad folder (cd\program files\northstar\landing pad)
d) typ e the following command to uninstall the landing pad service (installutil /u landingpadservice.exe) and press enter
e)Run the new Landing Pad Installation
f) Enter the Server Name, and the Database Name (LPAD) - Run the Landing Pad Installation. Downloads (Northstar Enterprise)
- Copy the old settings.cfg file to C:\Program Files (x86)\Custom Business Solutions\NorthStar Enterprise Landing Pad\ (Overwrite the existing file)
- Restart the Landing Pad Service.
- Run the Northstar Portal Installation. Downloads (Northstar Enterprise)
- Copy the old ASPNETPortal.css file to C:\InetPub\wwwroot\NSPortal\ (Overwrite the existing file)
- Copy the old PortalCfg.xml file to C:\InetPub\wwwroot\NSPortal\ (Overwrite the existing file)
- Copy the old web.config file to C:\InetPub\wwwroot\NSPortal\ (Overwrite the existing file)
- Copy the old PortalCfg.xml file to C:\InetPub\wwwroot\NSPortal\ (Overwrite the existing file)
- Copy the old Image files to C:\InetPub\wwwroot\NSPortal\Images\ (Do not overwrite the existing files)
- Edit web.config
- Remove all tags between <configSections></configSections>
Example:
Old:
New:
- Prefix the value for the settings below with a ~/
<add key="configFile" value="~/PortalCfg.xml" />
<add key="PortalHome" value="~/" />
<add key="TempImageDir" value="~/images/Temp" />
<add key="ReportingSubDir" value="~/" />Example:
Old: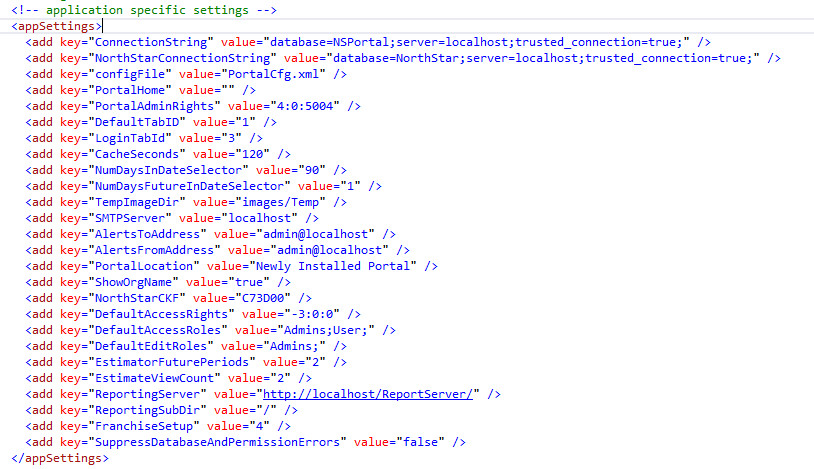
New: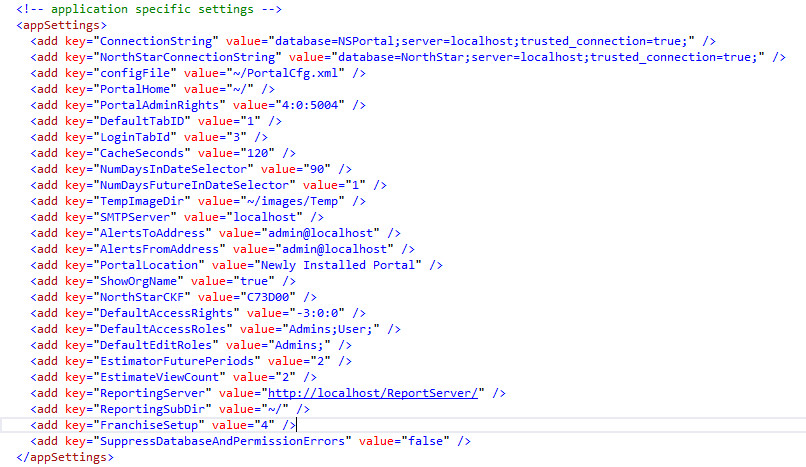
- Remove all tags between <configSections></configSections>
- Edit PortalCfg.xml
- Prefix the value for the settings below with a ~/
<Global PortalId="0" PortalName="NorthStar Hosted Portal" PortalImage="images/nslogo.jpg" AlwaysShowEditButton="false" />
- Prefix the value for the settings below with a ~/